C1629M-F (3/08) 21
Hard Drive Array Installation
All DVR5300 Series recorders use RAID 5 to maximize fault tolerance and enhance disk-access performance. The unit incorporates two RAID 5
controllers; each manages an independent storage array of six drives. If one drive fails, the unit continues operating and signals the operator that
the drive failed and should be replaced.
INSTALLING HARD DRIVE CARRIERS
After you have securely mounted the DVR5300, you will install 12 hard drive carriers into the front of the chassis. Each hard drive is already
mounted in its own drive carrier so that you can easily insert and remove a hard drive, even while the unit is operating.
NOTE: You must install all hard drive carriers before you apply power to the DVR5300. All six-drive models (1.5 TB/2.4 TB/3.0 TB) include six
empty hard drive carriers that you must also install. The drive status indicator is not included on empty drive carriers.
To install the hard drive carriers into the front of the unit:
1. Make sure you protect the unit and its components, which are susceptible to damage from improper handling and electrostatic discharge
(ESD). Refer to the Safe Handling Instructions of Hard Drives (C2668M) for additional savety instructions when handling a hard drive.Unlock
and open the bezel cover.
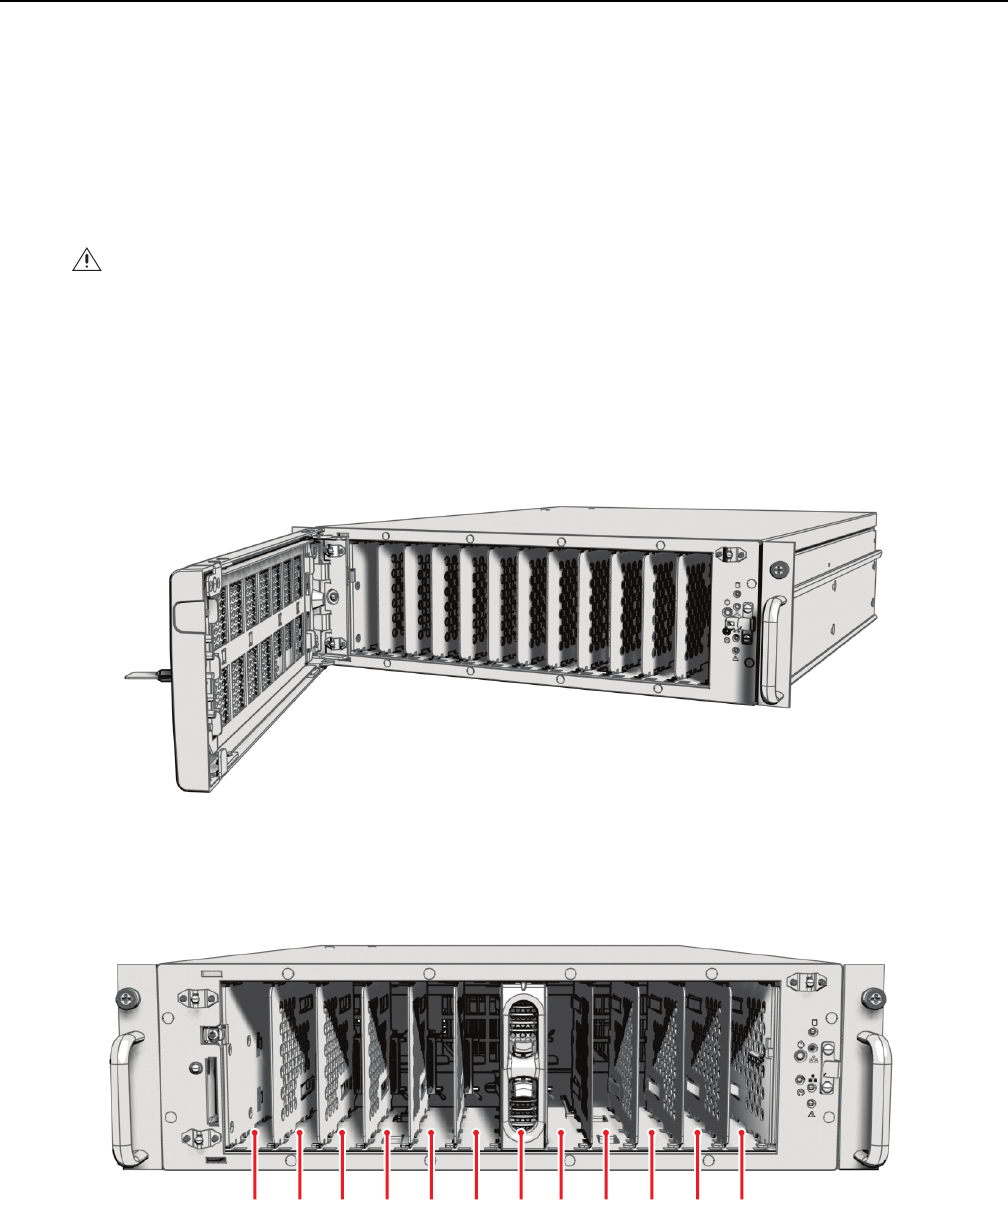
Figure 16. Opening the Front Bezel
2. Identify the drive bay for each hard drive carrier. The drive bays and drive carriers are numbered from 1 to 12 (refer to Figure 17 below and
Figure 18 on page 22).
Figure 17. Drive Bay Assignment
On 12-drive models (6.0 TB/9.0 TB), carriers 1 through 12 contain hard drives.
WARNING Each hard drive has been preconfigured for a specific drive bay in the DVR5300. If you do not install them in their proper
locations, the RAID arrays will be corrupted and the unit will not record.
1
2
3 4 5 6 7 8 9 10 11 12
