34 C1629M-F (3/08)
INSTALLING MULTIPLE SEB5100 UNITS (SWITCH)
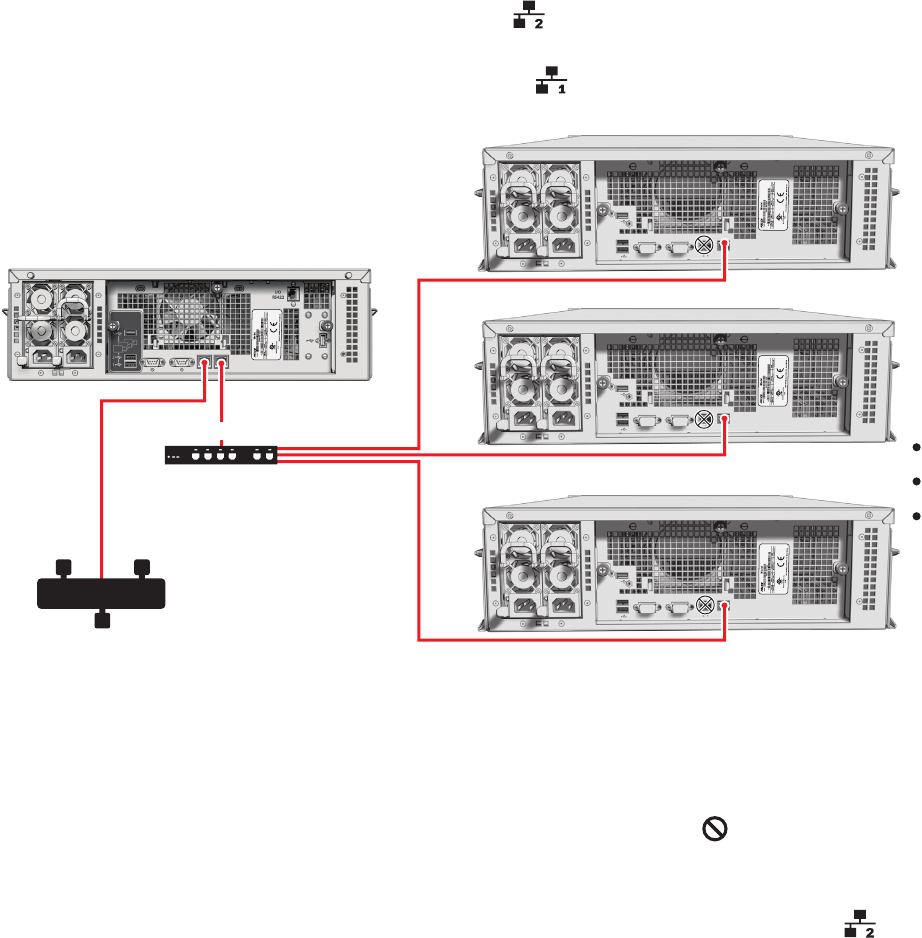
Use a dedicated, Pelco-approved Gigabit Ethernet switch to expand the video storage of the DVR5300 quickly and easily. First, connect the
DVR5300 to the switch. Then connect up to eight SEB5100 units to the switch. Contact Pelco’s Product Support for a list of approved Gigabit
Ethernet switches (refer to Appendix F: Troubleshooting on page 43 for contact information).
To connect one or more SEB5100 units to a single DVR5300:
1. Connect one end of a UTP cable to the secondary network connector on the DVR5300 rear panel. Use a standard Cat5e or better UTP
cable with RJ-45 connectors.
NOTE: Do not connect the UTP cable to the primary network connector .
Figure 29. Connecting a DVR5300 to Multiple SEB5100 Units
2. Connect the other end of the UTP cable to a free port on the dedicated network switch.
NOTES:
• You do not have to power down the DVR5300 to add an SEB5100 with a network switch.
• Do not connect the network switch for the SEB5100 units to the primary network connector .
• To change from a single UTP cable to a Gigabit Ethernet switch, you must shut down the DVR5300 and the SEB5100 (refer to
Unit Shutdown on page 32).
3. Connect a standard Cat5e or better UTP cable from a free RJ-45 port on the switch to the secondary network connector on the rear
panel of each SEB5100.
4. Power up the Gigabit Ethernet switch if necessary.
5. Power up each SEB5100 if necessary (refer to the SEB5100 Series Installation manual for more information).
6. Power up the DVR5300 if necessary (refer to Unit Startup on page 31).
The DVR5300 automatically recognizes the new SEB5100 units within two minutes and puts them into service.
UTP CABLE
ENDURA NETWORK
1
2
8
SEB5100
GIGABIT SWITCH
SEB5100
SEB5100
DVR5300
UTP CABLE
UTP CABLE
