


21
English
EN
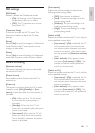
Step 2 Search and store new TV
channels
1 Press MENU > [PBS Settings] >
[Consumer Setup] > [Yes].
» The consumer menu appears.
2 Press to select [Installation] >
[Channel installation] > [Analog: manual
install].
» The [Analog: manual install] menu
appears.
3 Press to select [Search], then press
to enter.
4 Press Numeric buttons to manually enter
the three-digit frequency.
5 Press OK to begin search.
» If a channel is unavailable at the
selected frequency, the system searches
for the next available channel.
6 When the new channel appears, press
to return to the [Analog: manual install]
menu.
7 Press to select [Store as new
channel], , then press to enter.
8 Select [Yes], then press OK to store the
new channel.
9 Press MENU to exit.
Step 3 Fine-tune analog channels
1 Press MENU > [PBS Settings] >
[Consumer Setup] > [Yes].
» The consumer menu appears.
2 Press to select [Installation] >
[Channel installation] > [Analog: manual
install].
» The [Analog: manual install] menu
appears.
3 Press to select [Fine tune], then press
to enter.
4 Press to adjust frequency.
5 Press OK to conrm.
6 Press to select [Store current
channel] to store channel number.
7 Press to enter [Store current channel].
8 Select [Yes], then press OK to store
current channel.
9 Press MENU to exit.
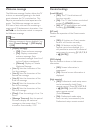
Skip channels
1 When watching TV, switch to the channel
that you want to skip.
2 Press MENU > [PBS Settings] >
[Consumer Setup] > [Yes].
» The consumer menu appears.
3 Press to select [Installation] >
[Channel installation] > [Analog: manual
install].
» The [Analog: manual install] menu
appears.
4 Press to select [Skip channel], then
press to enter.
5 Press to select [Yes], then press OK
to skip current channel.
» The selected channel is skipped when
you press CH +/- on your remote
control or view from the channel grid.
6 To skip more channels, repeat the
procedure.
Tip
• To access the skipped channels, press Numeric
buttons.
• To restore a skipped channel, repeat steps 1
to 4, and then select [No] in step 5.