


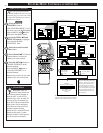
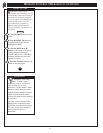
USING THE AUDIO/VIDEO INPUT JACKS
L
R
S-VIDEO-1 S-VIDEO-2
ANT A / CABLE
75⍀ UHF/VHF
R
L
PIP
ANT B / CABLE
75V UHF/VHF
REAR SURROUND
EXT. SPEAKERS
AUDIO
OUT
VIDEO
OUT
AUDIO INPUT
AUX 1 AUX 2
AUX 1 AUX 2
VIDEO INPUT
AUDIO OUT
VAR PIP
RR
LL
– 8⍀ +
STOP ■
REW
ᮤᮤ
FF
ᮣᮣ
PLAY
ᮣ
REC ●
STATUS
VOL
CH
1
2
3
4
5
6
7
8
9
0
ON/OFF
TV/VCR
VCR
CBL
TV
SWAP
FREEZE
POS
SIZE
ENTER
M
E
N
U
M
CLEAR
SURF
MUTE
PAUSE II
SLEEP
SMART
POWER
M
ODE
LIGHT
2 TUNER PIP
B
ᮤ
ᮤ
A
ANTENNA
OUT
IN
OUT
IN
AUDIO
R
L
VIDEO
IN
OUT
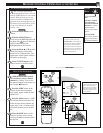
EXIT
1 OF 3
PICTURE
SOURCE
MORE...
CLOSED
CAPTIONS
FEATURE MENU
CHANNEL
MEMORY
CABLE
TUNING
5
1
2
4
3
3
4
PICTURE SOURCE SELECT
HELP
EXIT
ANT A
AUX1
AUX3
ANT B
AUX2
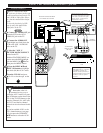
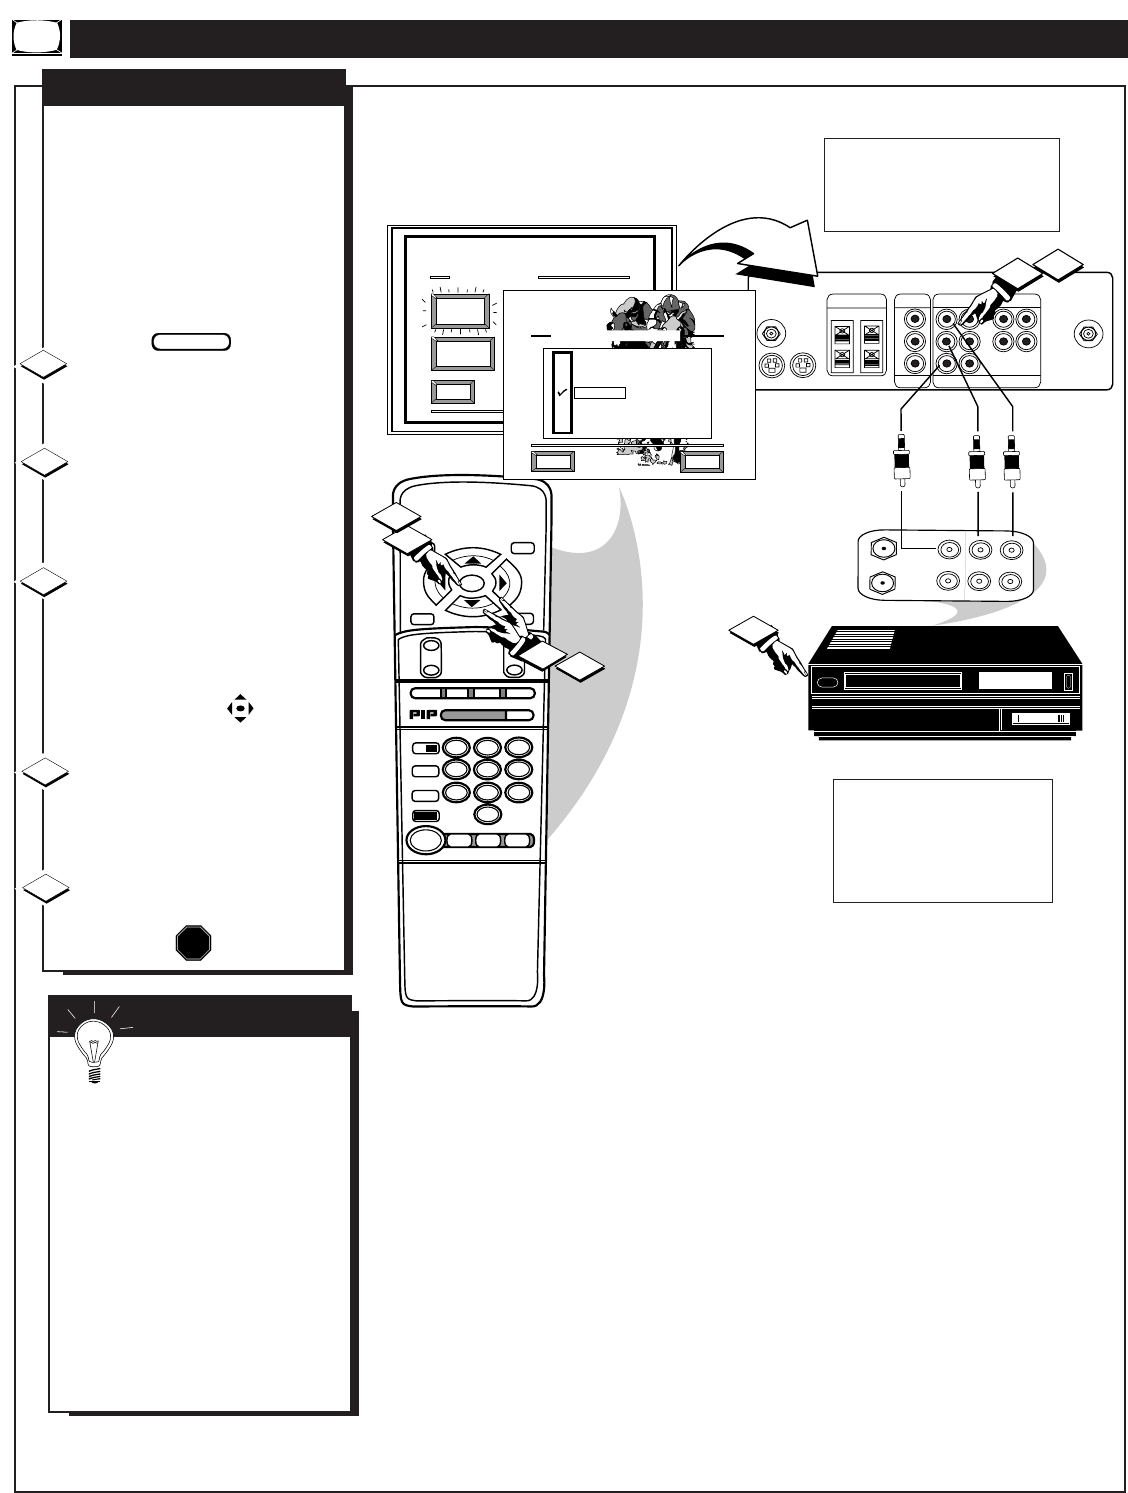
T
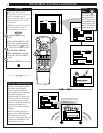
he TV's Audio/Video Input
jacks are for direct picture and
sound connections between the TV
and a VCR (or Video Disc Player,
etc.) that has Audio/Video Output
jacks.
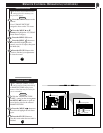
To view the playback of a VCR
tape by using the Audio/Video
Input jacks on the TV:
Connect the VIDEO OUT jack
from the VCR to the AUX 1
VIDEO IN jack on the TV.
Connect the AUDIO OUT
jacks R(ight) and L(eft) from the
VCR to the AUX 1 AUDIO IN
jacks on the TV.
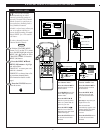
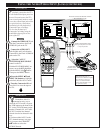
Select the "AUX 1"
PICTURE SOURCE SELECT
control on the TV.
With the FEATURES MENU on
screen, move the RED highlight
with the MENU (M) buttons.
Then press the MENU button.
Press the MENU ▲▼ and
MENU (M) buttons to highlight
and select (ߜ) the AUX 1 mode.
Turn the VCR ON and press
PLAY to view the tape on the
TV.
VCR/AUX INPUTS
1
2
3
4
STOP
BACK OF TV
VIDEO IN
(YELLOW)
AUDIO IN
(RED/WHITE)
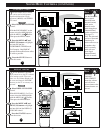
If you have a single (monaural)
Audio Output VCR, "Y" connectors
are available to complete your
connection. Contact your dealer, or
our Parts Information Center (1-800-
292-6066) to order any optional
accessories.
VCR
PICTURE AND SOUND FROM
PLAYBACK OF VCR TAPE
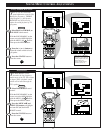
BEGIN
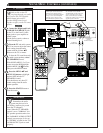
SMART HELP
Remember, after it is
connected an easy way to
select the AUX 1 mode is to press
the VCR button on the front of the
TV (or the TV/VCR button on the
remote.) Channels 3/4, ANT A/B,
AUX 2/3, and the last channel
viewed can also be selected in this
way.
If you have added AUX 1 to the
TV's channel memory (see page
14), just press the CHANNEL
▲▼ buttons to select the AUX 1
mode.
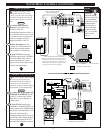
5
AUDIO/VIDEO
OUTPUT JACKS
ON VCR
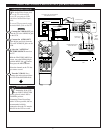
NOTE: Connections and use of the
TV's AUX 2 Audio/Video Input jacks
are the same as for the AUX 1 jacks
(except "AUX 2" is selected as the
Picture Source in step 3).
28