18
English
Installation
IMPORTANT!
– The type plate is located at the rear of
the system.
– Before connecting the AC power cord
to the wall outlet, ensure that all other
connections have been made.
–Never make or change any
connections with the power switched on.
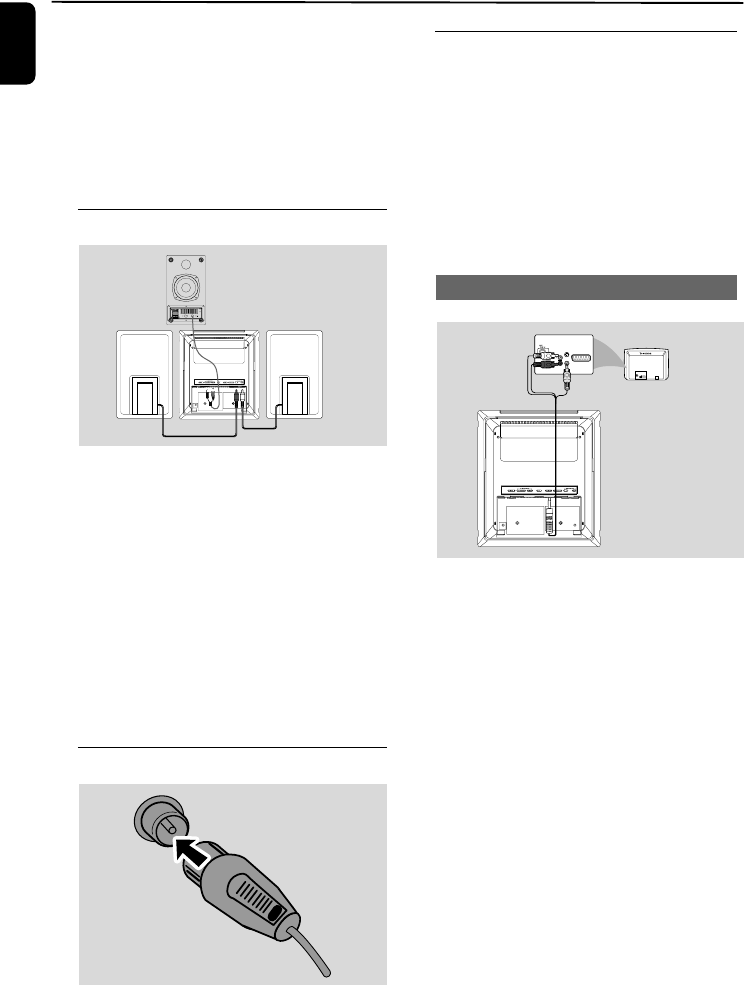
Step 1: Connecting speakers
1 Place the main set with the front side facing
down on a flat and firm surface. Then remove
the detachable cover on the back of the set to
expose the terminals available for connection.
2 Connect the two front speaker cables to the
SPEAKERS terminals: right speaker to "RIGHT"
and left speaker to "LEFT".
3 Connect the DIN cable from the TO MAIN
SET jack on the back of the subwoofer to the
TO SUBWOOFER jacks on the back of the
main set: audio connector to the
SUBWOOFER OUT jack while the power
supply connector to the DC 24V jack.
Step 2: FM antenna connection
Connect the supplied FM antenna to the FM
AERIAL terminal.
Step 3: Connecting TV
IMPORTANT!
–You only need to make one video
connection from the following options,
depending on the capabilities of your TV.
– Connect the DVD system directly to
the TV.
–A SCART connection allows you to
use both Audio and Video features on
the system.
Using A/V OUT jack
AUDIO
IN
S-VIDEO
IN
VIDEO IN
TV IN
AUDIO
IN
S-VIDEO
IN
VIDEO IN
TV IN
1 Connect the end of the supplied AV cord with
only one connector to the A/V OUT jack of
the DVD system.
2 For the other end, connect the video output
connector (yellow) to the video input jack (or
labeled as A/ V In, CVBS, Composite or
Baseband) on the TV. To hear the sound of this
DVD system through your TV, connect the
audio connectors (white/ red) to the audio
input jacks on the TV.
pg001-pg024_MCD288E-12-Eng-A 2007.12.21, 17:2218


