


Recording
06
77
En
English
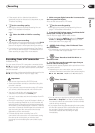
Using the built-in TV tuner
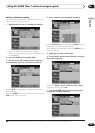
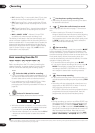
There are three different ways to select TV channels. Note
that you can’t change the TV channel during playback,
recording or during recording standby.
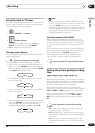
• CHANNEL +/– buttons
• Number buttons
For example, to select channel 4, press 4 then
ENTER; for channel 34, press 3, 4, ENTER.
1
• CH +/– buttons on the front panel
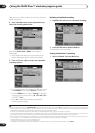
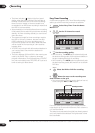
Changing audio channels
You can change the audio channel of the broadcast or
external input signal.
• Press to change the audio type.
The current audio channel is displayed on-screen.
• If the NICAM audio setting (see NICAM Select on
page 130) is set to NICAM and you are watching a
NICAM broadcast, you can switch between NICAM
and Regular (non-NICAM) audio.
• If the NICAM broadcast is bilingual, you can also
select the language.
• You can also select the language for a non-NICAM
bilingual broadcast.
• When watching a recording made from an external
input with Bilingual recording selected (see External
Audio on page 130), you can switch the audio
channel between left (L), right (R) or both (L+R).
Note
• When recording to the HDD with HDD Recording
Format set to Video Mode On, to DVD in Video mode,
or on the LPCM setting, only one channel of a
bilingual broadcast is recorded. In this case, decide
which language you want to record before recording
by setting the Bilingual Recording setting (see
Bilingual Recording on page 130).
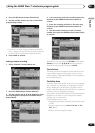
Switching between TV and DVD
When the recorder is stopped or recording you can
choose whether to have the audio/video from the built-in
TV tuner (or external input) play on your TV (‘DVD mode’),
or watch the channel that the TV is currently set to (‘TV
mode’).
During playback or when a menu is being displayed on-
screen, the sound and video is always routed to your TV
and is unaffected by the TV/DVD mode setting.
Note that the recorder must be connected to your TV
using a SCART cable to be able to use this feature.
• Switch between TV mode and DVD mode.
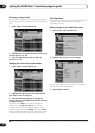
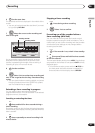
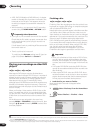
Setting the picture quality/recording
time
Before starting a recording, you will usually want to set
the picture quality/recording time. There are six standard
settings available, which allow you to choose a balance
between picture quality and recording time.
When Manual Recording is set to On (see Manual
Recording on page 132), a further option will be available
(MN1 to MN32 or LPCM, depending on what you set).
When recording to DVD+R/+RW, SLP is the longest
recording time available. If you select SEP or MN1 to
MN3, the recording mode will automatically revert to
SLP.
• Press repeatedly to select the recording
quality.
• XP – High quality setting, gives about one hour of
recording time on a DVD disc.
• SP (Standard Play) – Default quality, used for most
applications, gives about two hours of recording time
on a DVD.
• LP (Long Play) – Lower video quality than SP, but
doubles the recording time on a DVD to about four
hours.
Note
1. Channel presets are numbered 1 to 99.
ENTER
CHANNEL
+
CHANNEL
–
SET UP
MCACC
ADVANCED
TEST TONE
SR
+
/TUNE
+
ENTER
/TUNE
–
/ST
–
/ST
+
123
456
78
0
9
+
AUDIO
MAIN SUB
NICAM
Regular
NICAM A NICAM B
Regular
NICAM A+B
A (L) B (R)
A + B (L+R)
LR
L+R
TV/DVD
DVD (VR) DVD (Video) DVD+R DVD+RW DVD-RAM HDD
REC MODE