


Recording
06
83
En
English
• If the aspect ratio is distorted (squashed or
stretched), adjust on the source component or your
TV before recording.
3 Set the recording quality.
• See Setting the picture quality/recording time on
page 77 for detailed information.
4 Select the HDD or DVD for recording.
5 Press to start recording.
• The recorder will only start recording from the DV IN
jack if there is a valid signal. Recording will also
pause if the signal is interrupted during recording.
• If your source is copy-protected using Copy Guard,
you will not be able to record it. See Restrictions on
video recording on page 76 for more details.
Recording from a DV camcorder
DVR-640H-AV only
You can record from a DV camcorder connected to the
DV IN jack on the front panel of this recorder. Using the
recorder’s remote, you can control both the camcorder
and this recorder.
Before recording, make sure that the audio input for the
DV IN jack is setup (see DV Input on page 130).
Important
• The source signal must be DVC-SD format
• Some camcorders cannot be controlled using this
recorder’s remote.
• If you connect a second recorder using a DV cable,
you cannot control the second unit from this one.
• You can’t control this unit remotely from a
component connected to the DV IN jack.
• You can’t record date and time information from DV
cassette.
• During DV recording, if a part of the tape is blank, or
has copy-protected material on it, this recorder will
pause recording. Recording will restart automatically
when there is a recordable signal. However, if there is
more than 10 seconds of blank tape, this recorder will
stop recording and the camcorder should stop
(depending on the camcorder).
• For best results when recording from a DV
camcorder to this recorder, we recommend cueing
the camcorder to the place you want to start
recording from and setting the camcorder to play-
pause.
1 Make sure your digital camcorder is connected to
the front panel DV IN jack.
Also, set the camcorder to VTR mode.
2 Set the recording quality.
• See Setting the picture quality/recording time on
page 77 for detailed information.
3 From the Initial Settings menu, check that the DV
audio input is setup as you require.
See DV Input on page 130 for more on this.
• Check also that the Audio In settings for External
Audio and Bilingual Recording are as you want
them (see Audio In on page 130).
4 Select ‘Copy’, then ‘DV Record’ from
the Home Menu.
• DV recording only works when the digital camcorder
is in VTR mode with a tape loaded.
5 Select ‘Record to Hard Disk Drive’ or
‘Record to DVD’.
6 Find the place on the camcorder tape that you
want to start recording from.
For best results, pause playback at the point from which
you want to record.
• Depending on your camcorder, you can use this
recorder’s remote to control the camcorder using the
, , , , , / and / buttons.
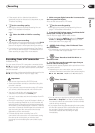
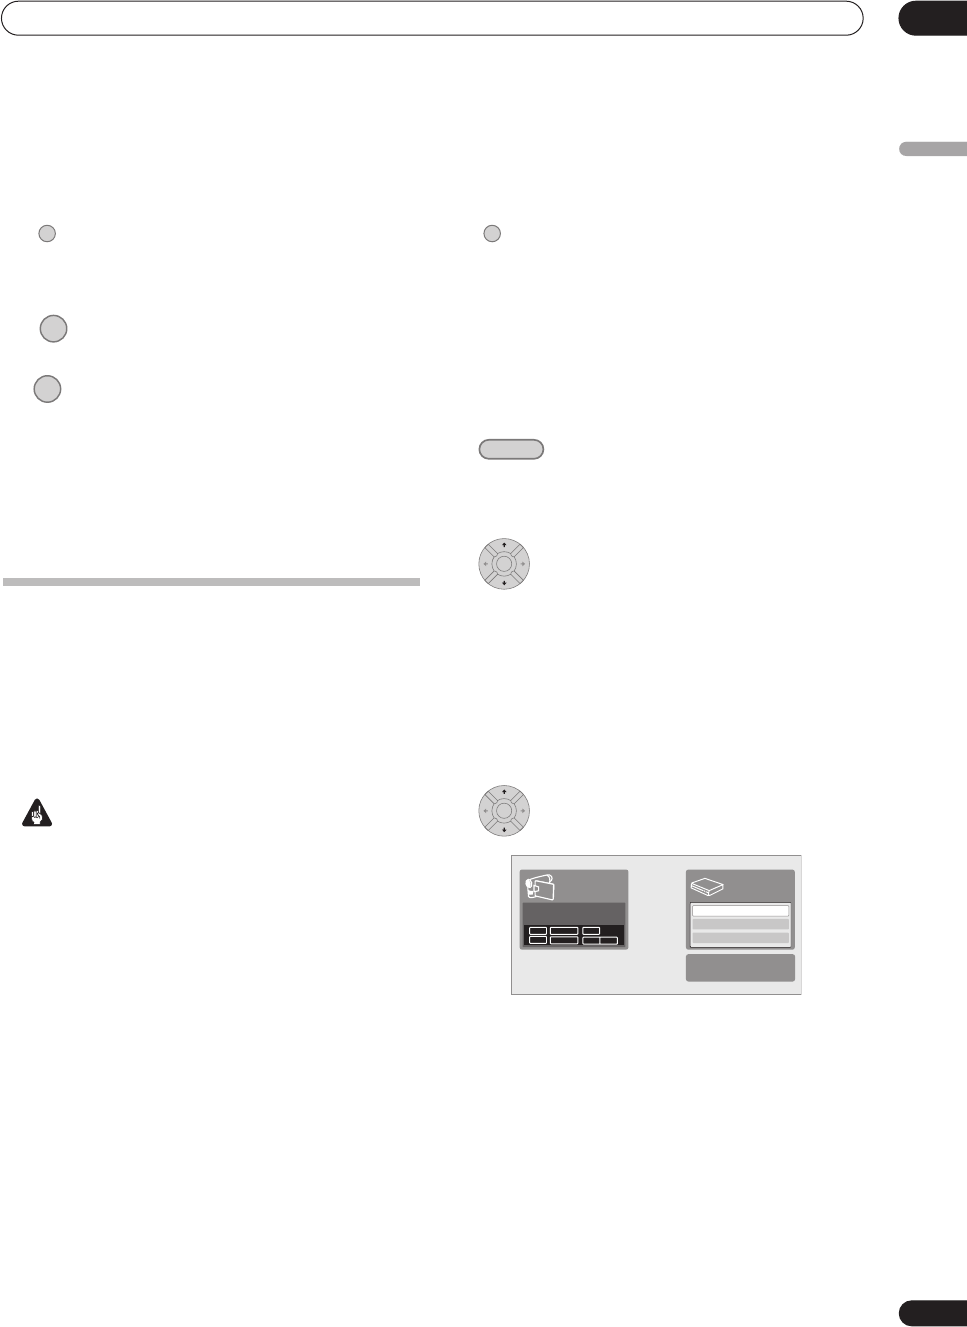
7 Select ‘Start Rec’.
• You can pause or stop the recording by selecting
Pause Rec or Stop Rec from the on-screen display.
You cannot control the camcorder from this remote
control during recording.
• If you restart recording after stopping the camcorder,
the first few seconds of the camcorder tape will not
be recorded. Use the pause button on your
camcorder instead and recording will start
immediately.
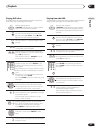
REC MODE
HDD/DVD
REC
ì
REC MODE
HOME MENU
ENTER
ENTER
Start Rec
Pause Rec
Stop Rec
SP (2h00m/DVD)
32h45m
Stop Stop
1.02.22
Control with these
buttons
Rem.
HDD