


Recording
06
47
En
Setting the picture quality/recording
time
Before starting a recording, you will usually want to set
the picture quality/recording time. There are four
standard settings available, which allow you to choose a
balance between picture quality and recording time.
It’s also possible to create a fifth, ‘manual’ setting for
picture quality/recording time. Before you can select this,
however, you will need to set the
Manual Recording
option in the Initial Settings menu (see
Manual Recording
on page 107).
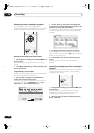
• Press REC MODE repeatedly to select a recording
setting.
•
FINE
– Fine picture quality
•
SP
– Standard play
•
LP
– Long play
•
EP
– Extended play
•
MN
– Manual (available only when manual recording
is on)
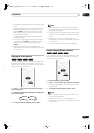
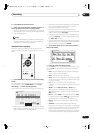
The setting is indicated in the front panel display, and
shown on-screen together with the recording time for a
blank recordable disc. If a recordable disc is loaded, the
approximate remaining recording time for that disc is
also shown. (Note that if the On Screen Display setting
(see
On Screen Display
on page 98) is
Off
then this
information is not displayed.)
Basic recording from the TV
Follow the instructions below to record a TV program.
Recording starts immediately and continues until the
disc is full or you stop the recording.
1 Press HDD or DVD to record to the hard disk drive
or a recordable DVD respectively.
• If you’re recording to DVD, load a recordable disc (if
you load a new blank DVD-RW disc, the recorder
takes a short while to initialize the disc).
2 Use the CHANNEL +/– buttons to select the TV
channel to record.
The front panel display shows the channel number:
• While the recorder is stopped, you can also use the
number buttons on the remote to select the channel.
(For channel 6, press
6
then
ENTER
; for channel 24,
press
2, 4
then
ENTER
)
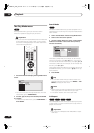
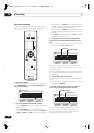
VR mode Video mode HDD
REC MODE
VR mode Video mode HDD
DVD RECORDER
AUDIO
HDD DVD
ENTER
CHANNEL
REC
PAUSE
STOP REC
REC MODE
ì
23 30 7
Channel preset
PR
DVR-04_HDD_UK.book 47 ページ 2004年4月11日 日曜日 午後6時11分