


10
<ARB1527>
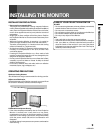
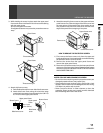
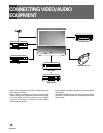
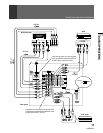
INSTALLING THE MONITOR
To improve the image reproduction characteristics of the
monitor and to protect the screen from damage or dust, attach
the provided protective screen to the screen frame of the
monitor following the given procedure.
If you decide not to install the protective screen, attach the
upper and lower panel frames as indicated and attach the
corresponding trim. If the protective screen is not being used,
store it on a flat surface. Do not lean it against a wall, as it will
become warped. Keep the microform cushion and cardboard
container for screen storage. Please note that the monitor does
not use the side frame covers when the protective screen is
not attached to the monitor.
PARTS INCLUDED FOR PROTECTIVE SCREEN INSTALLATION:
1 PROTECTIVE SCREEN WITH EDGE GUARDS
2 PANEL FRAMES (MOUNTS)
2 SIDE FRAME COVERS (TRIMS)
2 FRAME COVERS (TRIMS)
10 or 6
PANEL FRAME ATTACHING SCREWS
(FASTENERS)
(Screw quantity depend on model)
When the protective screen
is attached.
When the protective screen
is not attached.
Panel frame Panel frame
Protective screen
<SIDE VIEW> <SIDE VIEW>
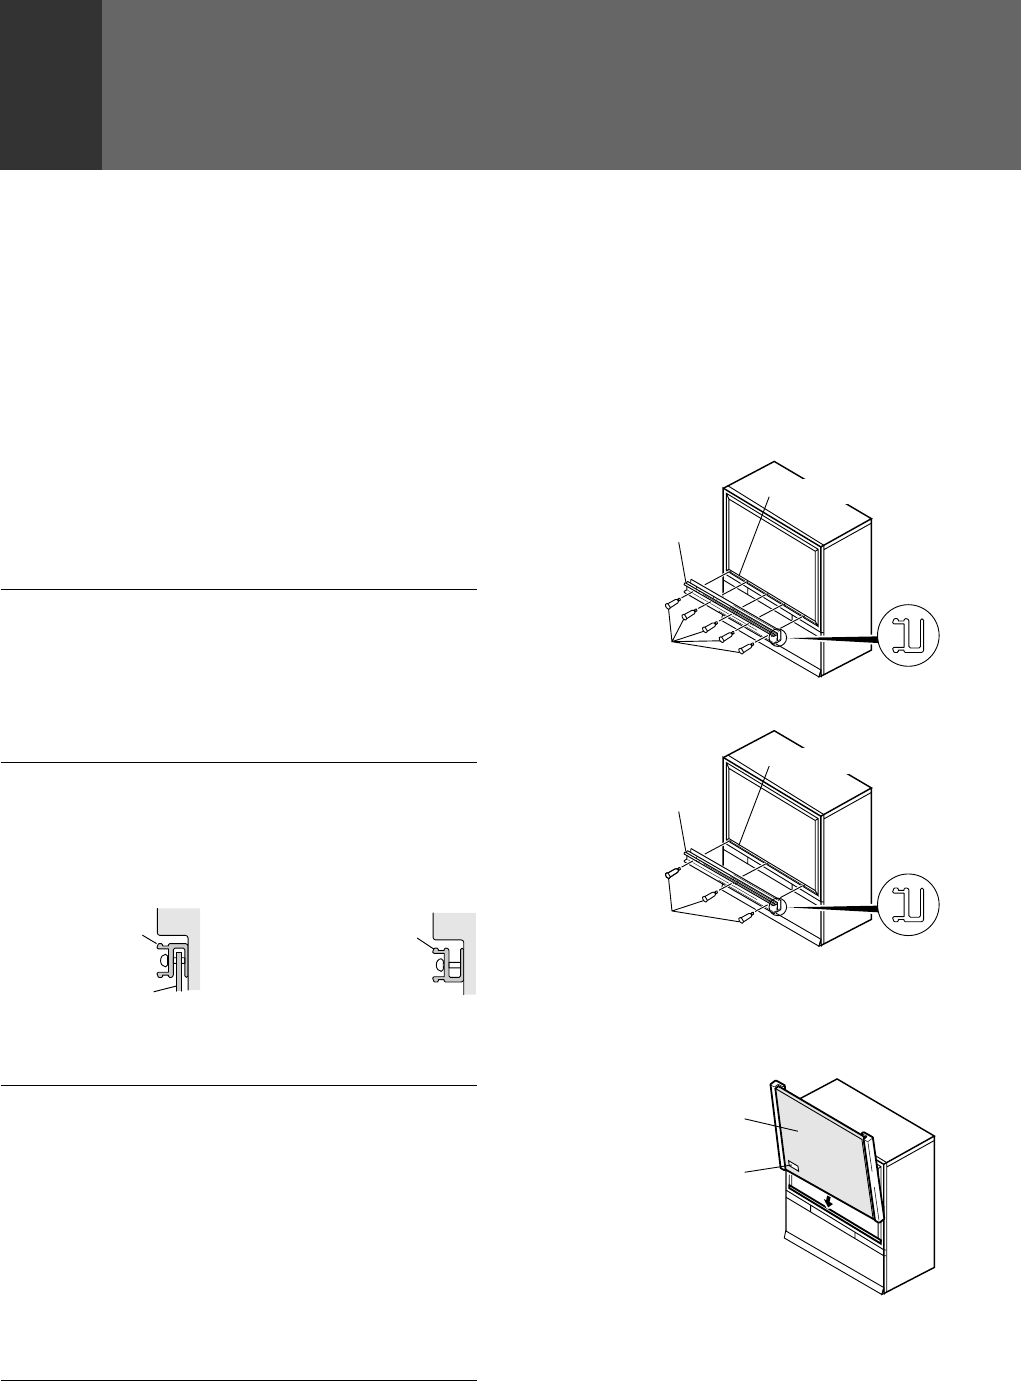
HOW TO ATTACH UPPER AND LOWER TRIM ONLY
Attach upper and lower panel frames as indicated then follow
step 5 on HOW TO ATTACH THE PROTECTIVE SCREEN.
HOW TO ATTACH THE PROVIDED PROTECTIVE SCREEN
WE RECOMMEND ATTACHING THE PROTECTIVE SCREEN BEFORE USING THE MONITOR.
CAUTION: BEFORE ATTACHING THE PROTECTIVE SCREEN
• Do not handle the screen by yourself. Have someone assist
you when attaching or carrying the screen to prevent any
accidents.
• Use a large-sized Phillips-head screwdriver for screwing and
unscrewing fasteners.
• Handle the screen with care to avoid injury and to avoid
leaving fingerprints on the screen surface.
• Carefully peel the vinyl covering from the front and back of
the protective screen. Inspect the screen and brush off any
plastic shavings or particles from the screen surface.
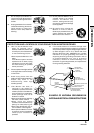
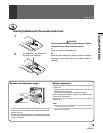
HOW TO ATTACH THE PROTECTIVE SCREEN
1. Attach the lower panel frame to the monitor using five or
three screws starting with the center screw. (Screw quantity
depend on model.)
Do not overtighten the screws.
Overtightened screws may cause the protective screen to
warp.
Panel frame
Screen frame
Side view
Screws
2. Insert the protective screen into the lower panel frame
making sure the labeled side is to be front and the label is
to be at the bottom left-hand corner.
Protective screen
Label
Five screws type
Panel frame
Screen frame
Side view
Screws
Three screws type