


RR1 • 8
This project will not work as well as you may wish if you just slap it together
without following good assembly techniques and all of the instructions. No
matter how clear we may think our manual is, if you have any questions give us
a call at the factory instead of jumping to conclusions. We will be happy to help
you with any problems may run into.
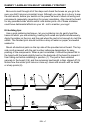
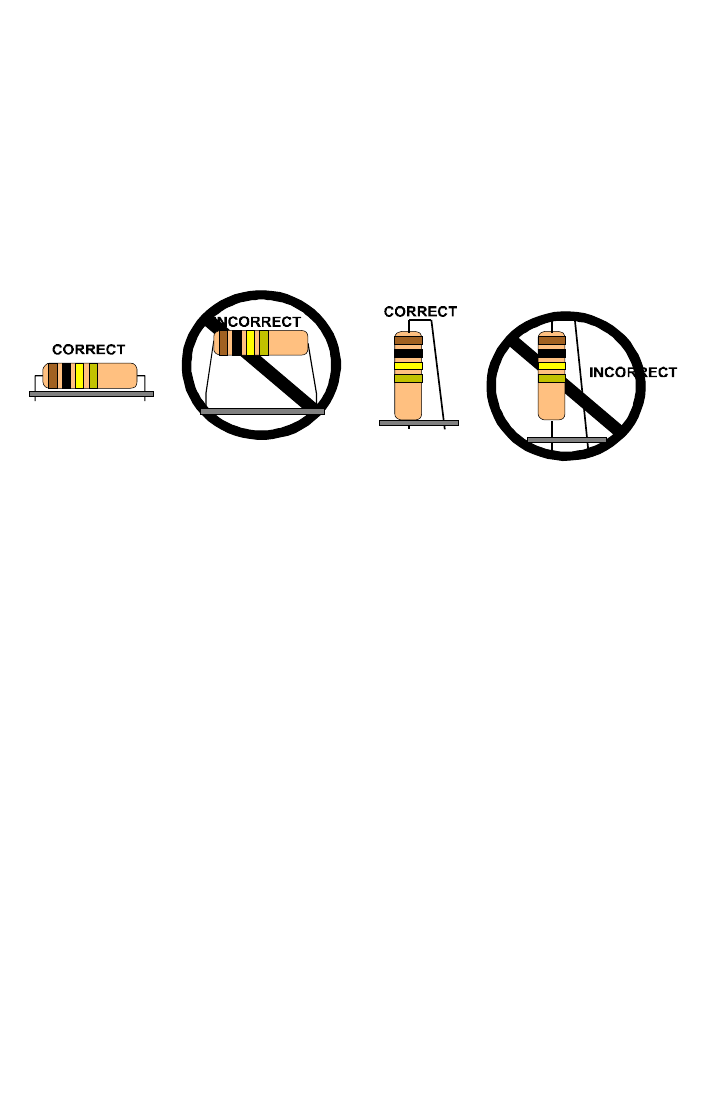
It is always good practice to mount the parts AS LOW AS POSSIBLE to the
board. A 1/4” lead length on a resistor not mounted close to the board can act
as an inductor or an antenna, causing all sorts of problems in your circuit. Be
aware though that there are stand up components in your circuit. They don’t
need to be squished to the board, but keep the portion of the resistor closest to
the board mounted right on the board.
For each part, our word "Install" always means these steps:
1. Pick the correct part value to start with.
2. Insert it into the correct PC board location, making sure the part is
mounted flush to the PC board unless otherwise noted.
3. Orient it correctly, follow the PC board drawing and the written directions
for all parts - especially when there's a right way and a wrong way to solder
it in. (Diode bands, electrolytic capacitor polarity, transistor shapes, dotted
or notched ends of IC's, and so forth.)
4. Solder all connections unless directed otherwise. Use enough heat and
solder flow for clean, shiny, completed connections.
Keeping this in mind, let’s begin by sorting out our components and cross-
checking them against the parts list to make sure we have received everything.
NOTE TO NEWCOMERS: If you are a first time kit builder you may find this
manual easier to understand than you may have expected. Each part in the kit
is checked off as you go, while a detailed description of each part is given. If
you follow each step in the manual in order and practice good soldering / kit
building skills, the kit is next to fail-safe. If a problem does occur, the manual
will lead you through step by step in the troubleshooting guide until you find the
problem and are able to correct it.