


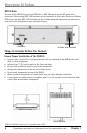

Overview & Setup
8 Chapter 1
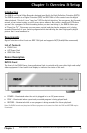
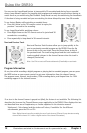
Illustrations contained in this document are for representation only.
Overview & Setup
Chapter 1 9
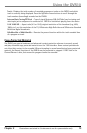
Illustrations contained in this document are for representation only.
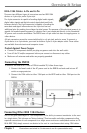
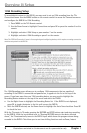
1394 Recording Setup
To record digital content to the DVR10, you may need to set up 1394 recording from the TV’s
Connections menu. Use the MENU button on the remote control to access the Connections menu
and congure the DVR10 for 1394 Recording.
1. Press MENU on the TV’s Remote control.
2. Use the Down Arrow to highlight Connections and press OK or press the number 6 on the
remote.
3. Highlight and select 1394 Setup or press number 7 on the remote.
4. Highlight and select 1394 Recording or press 2 on the remote.
Note: The “DTVLink Connection” menu is for recognizing and conguring devices, which require an analog connection,
and does not pertain to the DVR10.
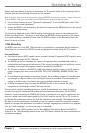
The 1394 Recording screen allows you to congure 1394 components that are capable of
recording. If the DVR10 is connected and powered on, it appears in the list at the top of the
screen. If you have more than one 1394 recording device, you may need to highlight the
Recording Device window at the top of the screen and select the DVR10.
• Use the Right Arrow to highlight the Recording Device list. If the DVR10 is not displayed,
press OK to toggle the device in the list until you see the DVR10.
• With the DVR10 selected, use the Down Arrow to highlight the Auto Tune check box. Press OK
to check the box.
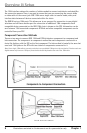
With the TV remote in TV mode, pressing the RECORD and STOP buttons start and stop recording
to the DVR10. With the box checked next to “Pressing RECORD tunes to the device selected
above,” the TV automatically tunes to the DVR10 input which shows the program stream being
recorded to the DVR10. This allows you to use time shifting functions such as Pause, Instant