


23
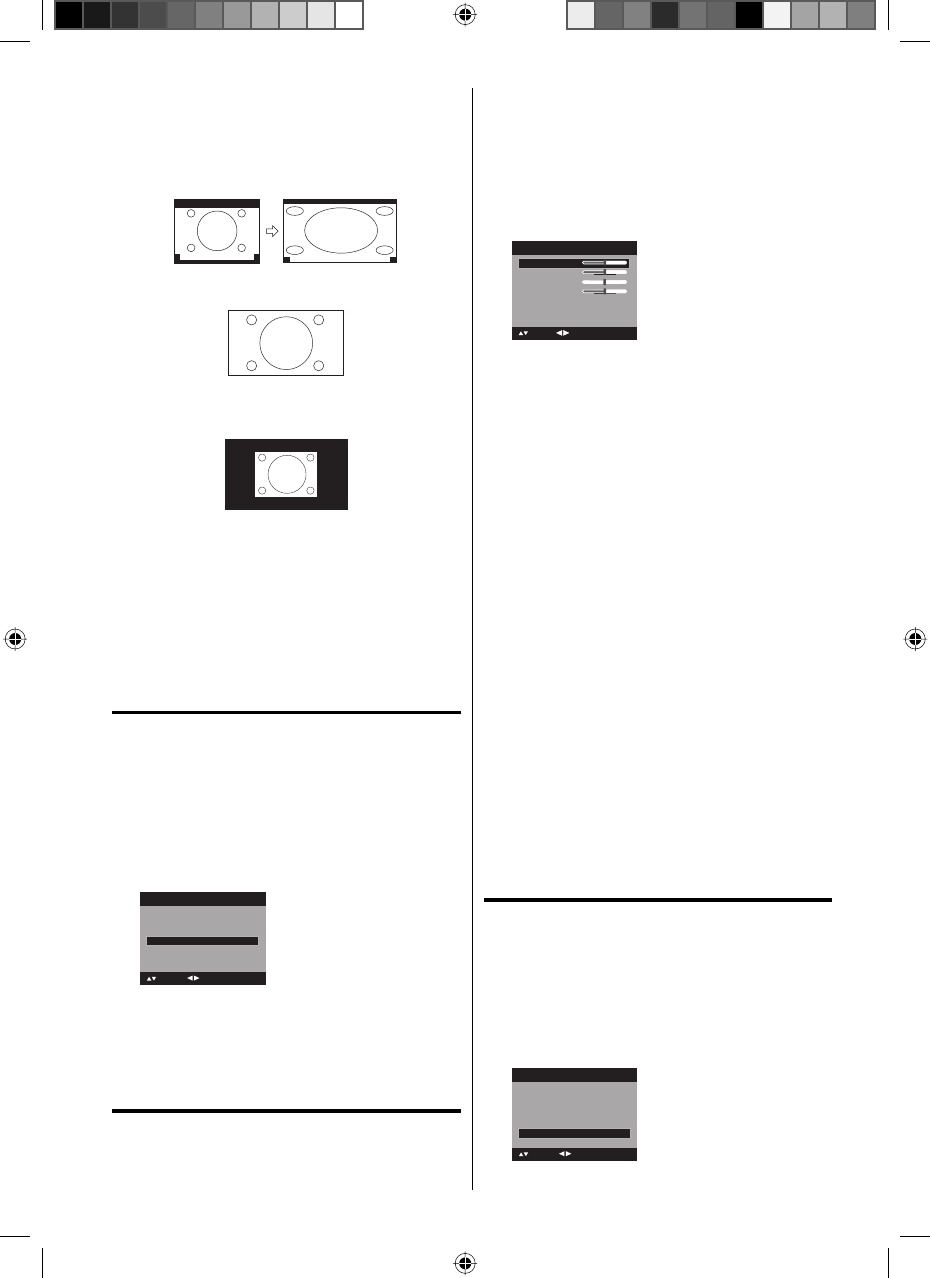
Cinema Wide3 (for letter box programs with
subtitles)
To fill the width of the screen, it is extended
horizontally. However; it is only slightly extended at the
top and the bottom.
The top and bottom edges of the picture may be hidden.
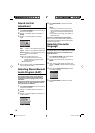
A B C D E F G - - - - - - - - - - - - - - - -
A B C D E F G - - - - - - - - - - - - - - - - - - - - - - - - - -
Full (for 16:9 source programs)
Full will display the picture at the maximum size.
Native (for PC mode only)
Detects the resolution of the signal of the image and it
will be shown on the screen with same amount of pixels.
NOTE:
Some High Definition and/or Digital broadcasts may
not allow you to change the picture size.
In HDMI or COMPONENT mode with a scanning
rate of 720p, 1080i or 1080p only the Cinema
Wide2 and Full picture size feature is available.
In PC Mode, only the Natural, Full and Native
picture size features are available. In PC Mode
(WXGA), only the Full and Native picture size
features are available.
Film mode
A smoother motion may be obtained by setting
the Film Mode to “On” when you view a DVD.
1
Press SETUP/TV MENU in the TV mode. The TV
menu screen will appear.
2
Press ▲ or ▼ to select “Picture”, then press ▶ or
ENTER.
3
Press ▲ or ▼ to select “Film Mode”.
Press ◀ or ▶ to select “On” or “Off”.
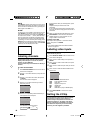
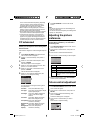
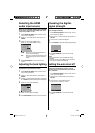
PC Setting >>
DNR On
Picture
Picture Setting >>
Picture Preference Sports
Picture Size >>
Film Mode On
: Adjust
: Select
4
Press EXIT/CANCEL to return to the normal screen.
Picture control
adjustment in the PC mode
You can adjust to optimize the performance of
the TV in the PC mode.
1
Press INPUT SELECT, then press ▲/▼ or
Number button (4) to select the PC mode.
•
•
•
2
Press SETUP/TV MENU. The TV menu screen
will appear.
3
Press ▲ or ▼ to select “Picture”, then press ▶ or
ENTER.
4
Press ▲ or ▼ to select “PC Setting”, then press ▶
or ENTER.
The PC Setting menu will appear.
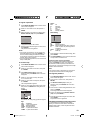
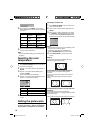
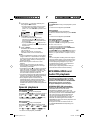
Ver Position
Clock
Phase
: Adjust
25
0
25
PC Setting
Hor Position
25
: Select ENTER:Set
Auto Adjust >>
5
Press ▲ or ▼ to select the desired item you want
to adjust.
6
Press ◀ or ▶ to adjust the setting.
Hor
Position:
To adjust the horizontal position of
the image on the PC mode.
Ver
Position:
To adjust the vertical position of the
image on the PC mode.
Clock: To minimize any vertical bars
or stripes visible on the screen
background.
Phase: This must be adjusted after the
frequency of the PC mode has
been set to 60Hz to optimize
picture quality (page 39).
Auto Adjust:To adjust the all PC settings
automatically
7
After adjusting, press ENTER to return to the PC
Setting menu. Then continue to adjust the other items.
8
Press EXIT/CANCEL to return to the normal screen.
NOTE:
Auto Adjust feature is available only for 16:9 or 4:3
format.
If no buttons are pressed for more than approx. 60
seconds, the Menu-screen will return to normal
Monitor-screen automatically.
The PC settings are not effective for other input modes.
DNR
DNR (Digital Noise Reduction) can reduce the
roughness of the picture.
1
Press SETUP/TV MENU in the TV mode. The TV
menu screen will appear.
2
Press ▲ or ▼ to select “Picture”, then press ▶ or
ENTER.
3
Press ▲ or ▼ to select “DNR”. Press ◀ or ▶ to
select “On” or “Off”.
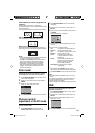
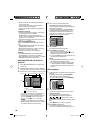
Picture Preference Sports
Picture Size >>
Film Mode On
Picture
Picture Setting >>
PC Setting >>
DNR On
: Adjust
: Select
4
Press EXIT/CANCEL to return to the normal screen.
•
•
•
52D0201A_EN.indd 2352D0201A_EN.indd 23 6/12/09 1:44:34 PM6/12/09 1:44:34 PM