


31
Recording a Program
RECORDING AUDIO
To Record Audio Only
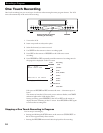
1. Press the INPUT button or 0,0 on the remote to hear the
source attached to the AUDIO jacks. VIDEO appears on
the TV screen.
The VCR records audio from the audio equipment
connected to the AUDIO1 (L and R) IN jacks.
2. Use SPEED on the remote to select the recording speed.
The tape speed indicator appears on the TV screen.
3. Start playing the audio source. Then, press RECORD on
the VCR or REC on the remote to begin recording.
4. Press STOP•EJECT on the VCR or STOP on the remote
when you are finished.
To Play Back Audio Only
Connect the AUDIO OUT of the VCR to the appropriate input
on your amplifier or receiver. Do not use the phono input.
Refer to your amplifier or receiver userÕs guide for
information.
Using the Recording Features
Recording Pause
To prevent recording short passages of unwanted material, use PAUSE or PLAY•PAUSE
during recording to stop and start recording. The VCR automatically switches from
pause to stop after a few minutes.
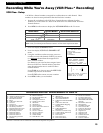
Pro-Tect Plus™ (Child Lock) Feature
This feature is useful to tamper proof your timer recordings from unwanted changes
and/or protect the VCR from misoperation by other users in the household.
To Lock the VCR
Press and hold POWER or VCR button on the remote for
approximately six seconds to turn on the Pro-Tect Plusª
feature.
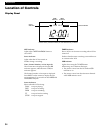
SAFE appears in the VCR front panel to let you know the
feature is activated.
To Unlock the VCR
Press and hold VCR button on the remote for approximately
six seconds to unlock the VCR.
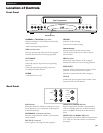
You can record audio only from another audio source connected to the AUDIO1 IN (L and R) jacks on the
back of the VCR. Any video on the tape will be erased when you record audio only.