


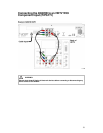
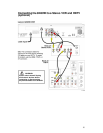
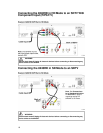

Complete the following steps to install a SATA drive.
1. Make sure that both the 8240HD and the external SATA drive are unplugged from power.
2. Connect the data cable for the SATA drive to the 8240HD.
3. Plug in power to the external SATA drive.
4. Plug in the 8240HD power cord, and then turn on the 8240HD.
5. Follow the on-screen instructions. One of the following occurs:
• If it is a new drive or one used on another device, you will be asked to format it.
• If the drive is formatted and will work with this 8240HD, you will get a confirmation that the
drive is working.
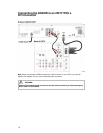
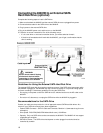
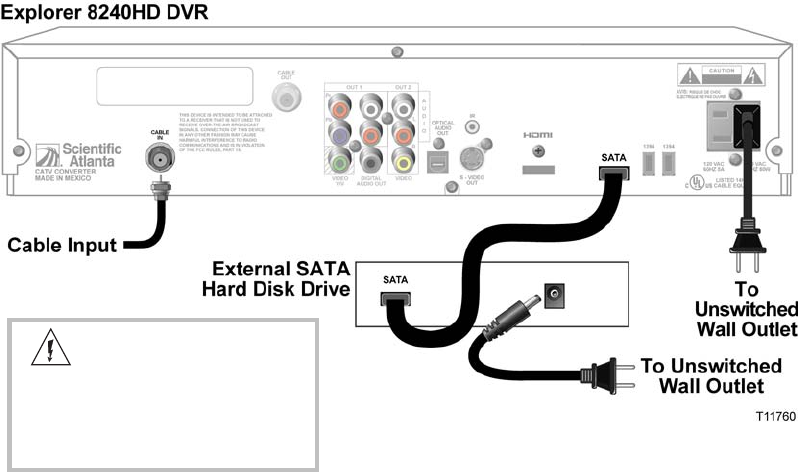
Connecting the 8240HD to an External SATA
Hard Disk Drive (optional)
Guidelines for Using the External SATA Hard Disk Drive
The external SATA hard disk drive requires continuous power. If the SATA drive loses power while
the 8240HD is plugged in, the 8240HD may stop current recordings or not provide enough space
for future recordings. Follow these guidelines for using the SATA drive:
• Do not plug in the power cord for the SATA drive to a switched outlet or to the AC outlet on the
8240HD.
• Do not turn off, disconnect, or unplug the SATA drive while the 8240HD is plugged in.
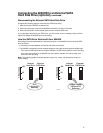
Recommendations for the SATA Drive
Contact your cable service provider for a list of approved external SATA hard disk drives. At a
minimum, your SATA drive should have these capabilities:
• External SATA Connector - SATA II: Cable and Connector, Revision 1.0 (www.sata-io.org for more
information)
• Drive Speed: 7200 RPM (5400 RPM without Multi-room); 133 MB/sec
• Capacity: Only one SATA drive can be connected to the 8240HD. The 8240HD will not support
a separate port multiplier.
• SATA Drive Power: The SATA drive should power on when plugged in and should not be
controlled by a switch.
16
WARNING:
Electric shock hazard! Unplug
all electronic devices before
connecting or disconnecting any
device cables to the 8240HD.