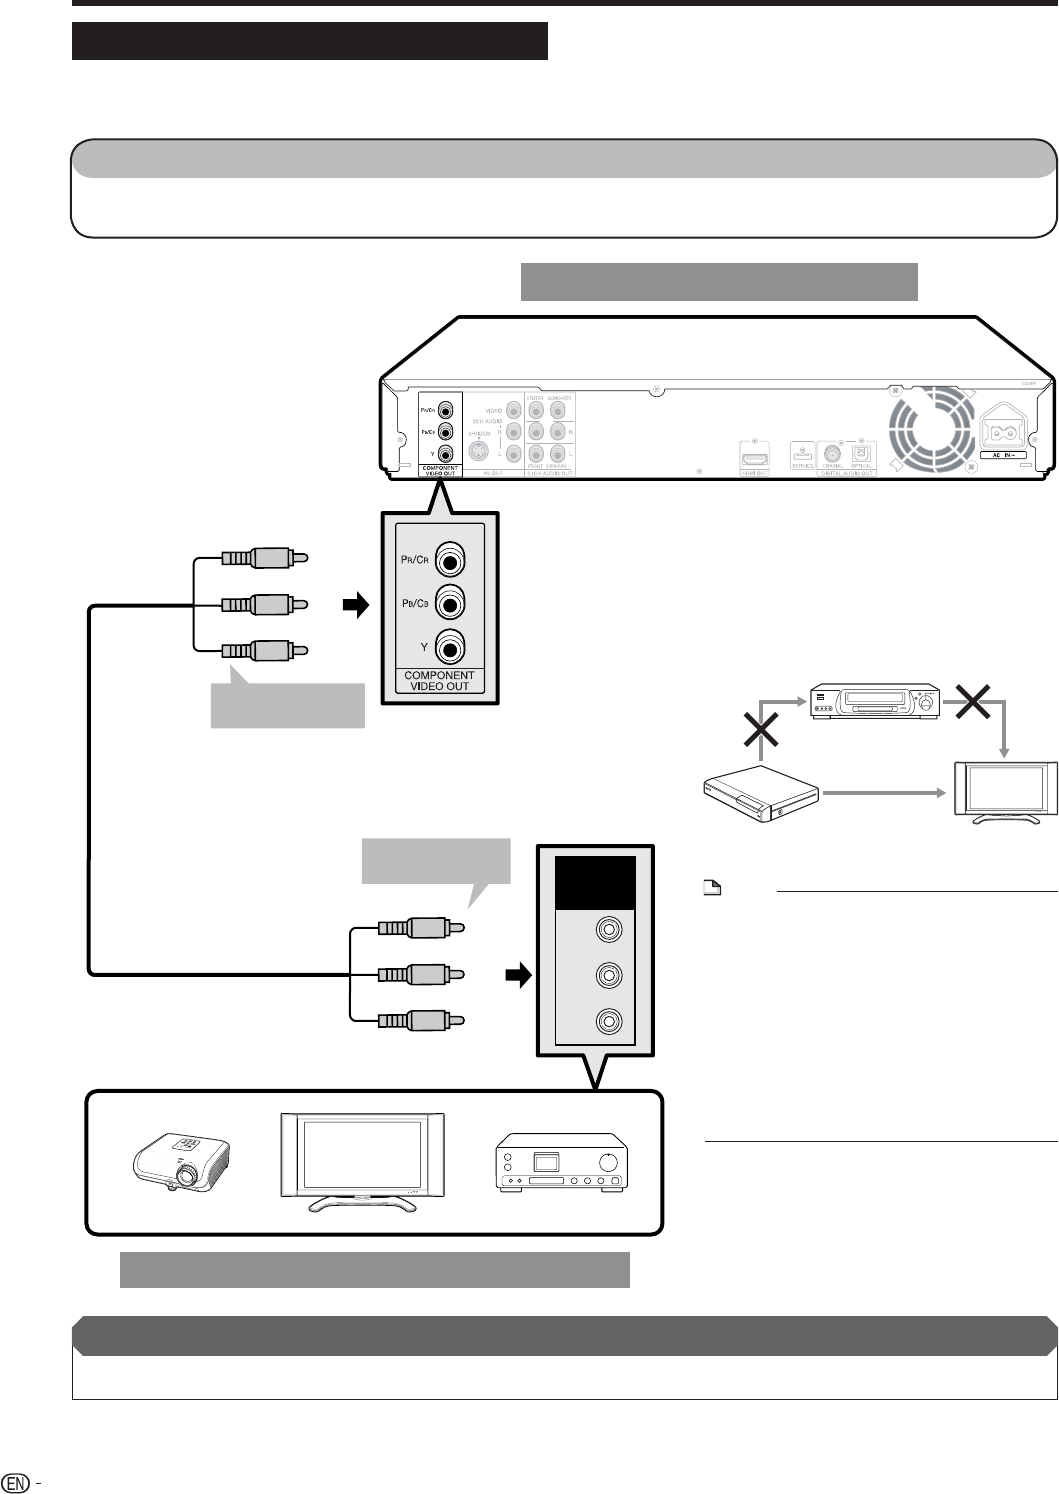
Connecting to the Component Jacks
You will enjoy accurate colour reproduction and high quality images through the component jacks.
Y
P
B
(
CB)
PR
(
CR)
COMPO-
NENT IN
(Red)
STEPS
1: Be sure to turn off this Player and the equipment before making any connections.
2: Firmly connect a component video cable (commercially available) to the component jacks (1 and 2).
This Player
(Blue)
(Green)
To COMPONENT
VIDEO OUT jacks
To component
video input jacks
(Red)
(Blue)
(Green)
Component video cable
(commercially available)
TV
Projector
AV receiver
Video equipment with component jacks
1
2
After connecting
• Connect audio equipment or the audio terminals of the TV. (Pages 18-20)
VCR
Blu-ray Disc
Player
LCD TV
Connect directly
NOTE
• Connect the Blu-ray disc player to LCD TV
directly. If you playback the image via VCR, the
image may deteriorate due to the copy guard
function.
• When you record the programme where
copyright is protected, the copy guard function is
activated automatically; the programme can not
be recorded correctly. Also, the playback image
via VCR may deteriorate due to this function.
However, this is not a malfunction. When you
watch the programme where copyright is
protected, we recommend that the Blu-ray disc
player be connected to LCD TV directly.
Caution:
• HDMI output and Component Video
output can not be used at the same
time.
Caution:
• Press HDMI button for 5 seconds, and the
change of “Component Video Out” and “HDMI
Out” is possible.
• Even when there is no cable connected to the
HDMI video out, switching the output to HO-out
(HDMI video out) is still possible.
When HO-out is selected, there will be no signal
from the Component video out.
16
Video Connections


