Before Starting Playback
Loading the Batteries in the
Remote Control
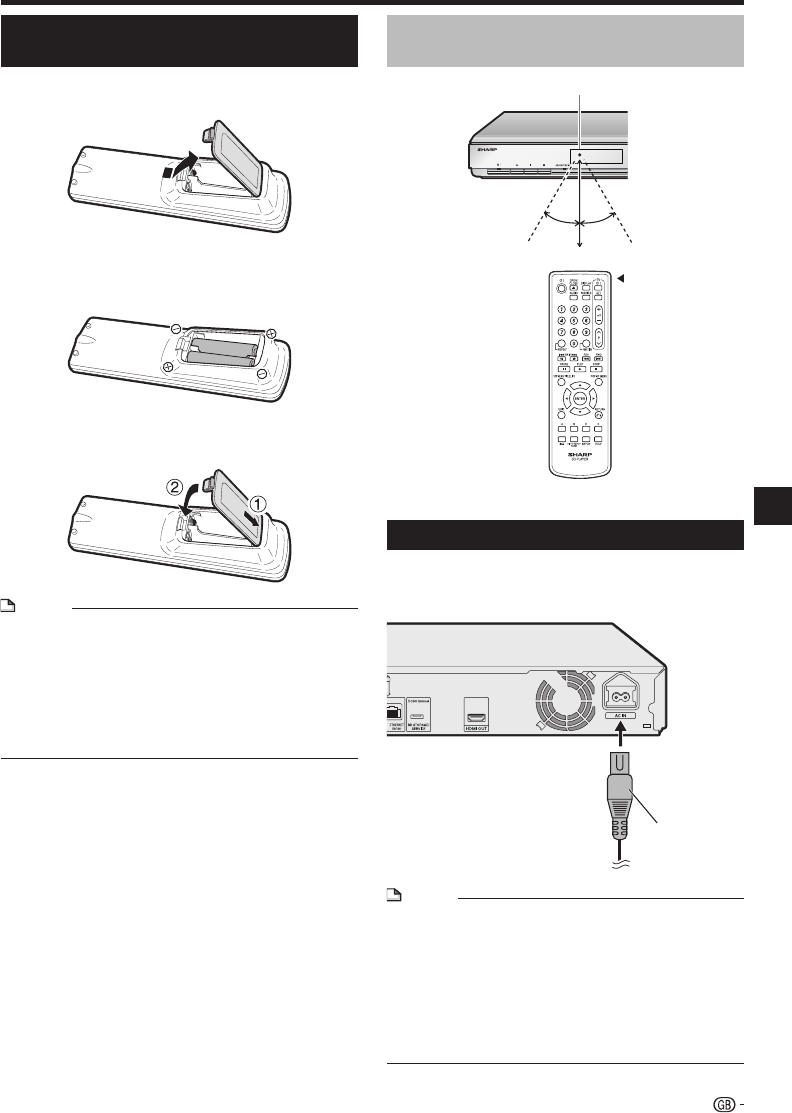
Hold in the tab on the battery cover and pull the
cover towards the direction of the arrow.
Load the two “AA” size batteries (R-06 size,
UM/SUM-3). Place batteries with their terminals
corresponding to the m and n indications in
battery compartment.
Insert the smaller tab of the battery cover into
the opening 1, and press down on the cover
until it clicks in place 2.
NOTE
Do not subject the remote control unit to shock, water or
excessive humidity.
The remote control unit may not function if the Player's
remote sensor is in direct sunlight or any other strong light.
Incorrect use of batteries may cause them to leak or burst.
Read the battery warnings and use the batteries properly.
Do not mix old and new batteries, or mix different brands.
Remove the batteries if you will not use the remote control
unit for an extended period of time.
•
•
•
•
•
1
2
3
Connecting the Power Cord
Plug the supplied AC cord into the AC IN terminal on
the rear of the Player. Then plug into AC outlet.
NOTE
Place the Player close to the AC outlet, and keep the
power plug within reach.
TO PREVENT RISK OF ELECTRIC SHOCK, DO NOT
TOUCH THE UN-INSULATED PARTS OF ANY CABLES
WHILE THE AC CORD IS CONNECTED.
The B (Standby/On) indicator blinks while the Player is
preparing for starting up. You cannot turn the Player on
until the B (Standby/On) indicator stops blinking.
If you are not going to use this Player for a long period of
time, be sure to remove the AC cord from the AC outlet.
•
•
•
•
Approximate operating range of
remote control
Disc Playback
21
Disc Playback
Remote control sensor
Remote control unit
30º 30º
7 m
To AC IN terminal
To AC outlet


