


20
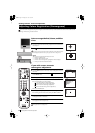
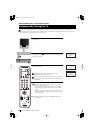
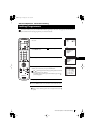
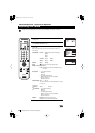
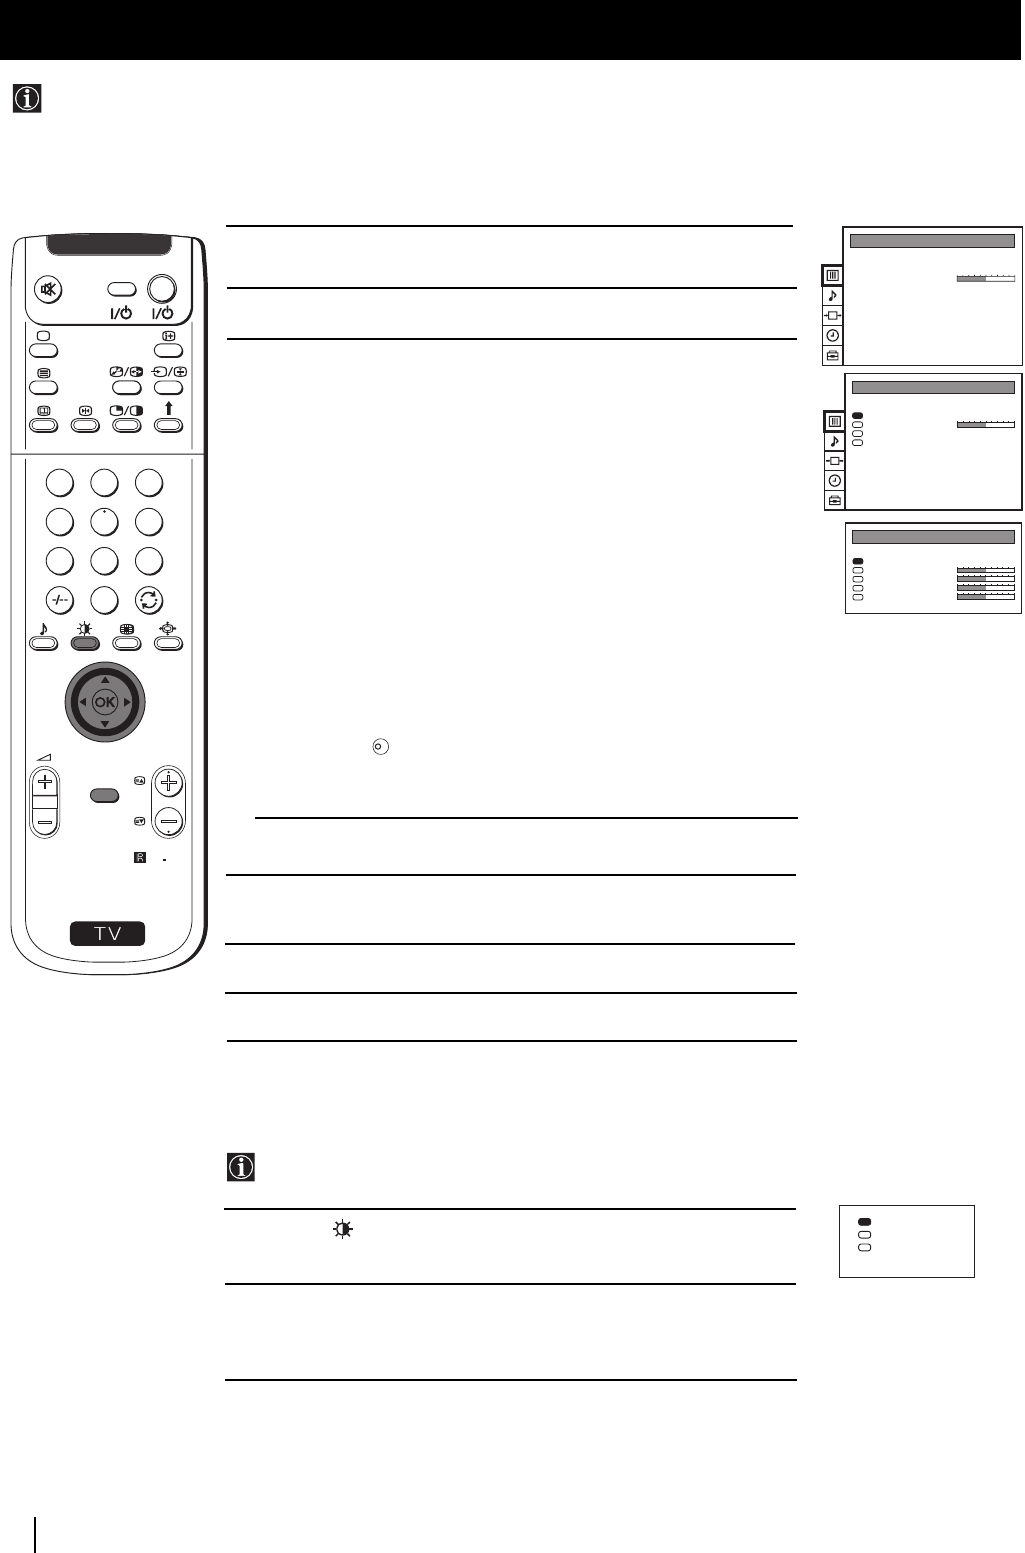
1 Press the MENU button on the remote control to display the menu
on the screen.
2 Push the joystick z to enter the PICTURE CONTROL menu.
3 Push the joystick to $ or 4 to select the item you wish to change,
then push to z.
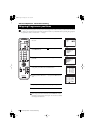
Refer to the table below to chose the item and for the effect of
each control:
Picture Mode z Picture Mode z Personal (for individual settings)
z Movie (for films)
z Live (for live broadcast programmes)
$ Brightness* Z Darker z Brighter
$ Colour* Z Less z More
$ Sharpness* Z Softer z Sharper
$ Hue** Z Greenish z Reddish
Contrast Z Less z More
Reset Resets picture to the factory preset levels.
Format (for detalis refer to the section "Changing the Screen
Mode")
* Can only be altered if Personal Picture Mode is selected.
** Only avalaible for NTSC colour signal (e.g: USA video tapes).
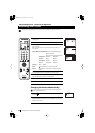
4 Push the joystick to Z or z to alter the selected item, then
press the OK button to store the new adjustment.
5 Repeat steps 3 and 4 to alter the other items.
6 Press the MENU button to exit and return to the normal TV screen.
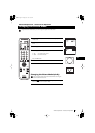
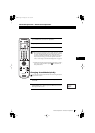
Changing the Picture Mode Quickly
You can quickly change the Picture Mode without entering the
Picture Control menu screen.
1 Press the button on the remote control to directly access the
Picture Mode.
2 Push the joystick to $ or 4 to select your desired picture mode
(Personal, Movie or Live), then press the OK button to remove the
display from the screen.
K
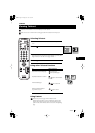
Advanced Operation - Advanced TV Operation
Although the picture is adjusted at the factory, you can modify it to suit your own taste.
Adjusting the Picture
Advanced Operation - Advanced TV Operation
S
RM
892
PROGR
MENU
1
4
7
2
5
8
0
3
6
9
VIDEO TV
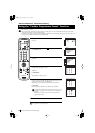
PICTURE CONTROL
Personal
4:3
Picture Mode
Contrast
Reset
Format
PICTURE CONTROL
Personal
4:3
Picture Mode
Contrast
Reset
Format
PICTURE MODE
Personal
Picture Mode
Brightness
Colour
Sharpness
Hue
Personal
Movie
Live
01GB.fm Page 20 Monday, June 4, 2001 3:47 PM