


37 (GB)
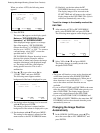
2 Press
v
/
V
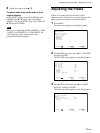
to move the cursor (B) to “CONFIG”
and press ENTER.
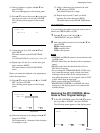
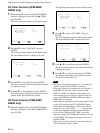
The CONFIG (1/2) menu appears on the display
panel.
ENTER
MENU
CONF I G( 1/2)
DISPLAY : ON
W-VGA : OFF
CLOSED CAPTION: OFF
COLOR SYSTEM : AUTO
SCREEN F I LL :CENTER
POWER CONTROL
SCREEN SAVER
SELECT SET END
YUV LEVEL : SMPTE
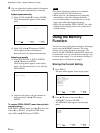
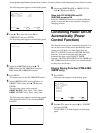
3 Press
v
/
V
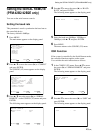
to move the cursor (B) to “SCREEN
SAVER” and press ENTER.
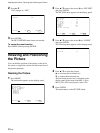
The following menu appears on the display panel.
ENTER
MENU
SCREEN SAVER
PIC INVERSION : OFF
PIC ORBITING
SELECT SET END
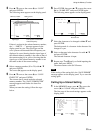
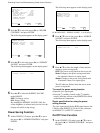
4 Press
v
/
V
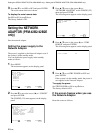
to move the cursor (B) to “PIC
INVERSION” and press ENTER.
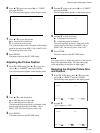
The following menu appears on the display panel.
PIC INVERSION : OFF
5 Select the PIC INVERSION mode with
v
/
V
.
OFF: to set the PIC INVERSION to OFF
ON: to set the PIC INVERSION to ON
AUTO: Carry out the PIC INVERSION process
once a day.
Reducing Afterimage/Ghosting (Screen Saver Function)
Reducing Afterimage/
Ghosting (Screen Saver
Function)
If an image like a computer screen or a still picture,
the brightness of which does not change, is displayed
for a long time, this image may be burnt into the panel
or may leave a ghosting image behind. To avoid this,
or to attempt to fix it, a screen saver function has been
provided with this unit. The screen saver function has
two screen savers. One screen saver reverses the
image (PIC INVERSION) while the other
automatically changes the position of the image
displayed (PIC ORBITING).
Situations which can result in burn-in and
picture retention
1 Black bars at the top and bottom that appear with
wide video source (Letter box picture), 2 Black bars
to the left and right that appear with 4:3 video source
(conventional TV broadcast), 3 Video game sources,
4 DVD on-screen menu displays, 5 On-screen
menus, channel numbers, etc., of connected
equipment such as DSS, Cable box, video decks, etc.
Note
The followings are alternative procedures for reducing
burn-in and afterimage.
•Avoid displaying channel numbers, on-screen menus
etc., of connected equipment such as DSS, Cable
box, video decks, etc. To erase channel numbers, on-
screen menus, refer to the user manual of connected
equipment.
•Reduce brightness of the picture and/or display video
source in Wide Zoom or Full Mode.
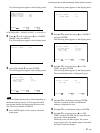
Reversing the Image
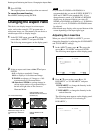
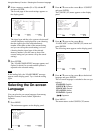
1 Press MENU.
The main menu appears on the display panel.
ENTER
MENU
MA I N MENU
INPUT SELECT
PIC CONTROL
PIC SIZE
CONF I G
MEMORY
REMOTE
STATUS
SELECT SET END