


Chapter 4: Operation 37 of 60
Chapter 4: Operation
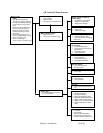
4-1 GH-M Operation Procedures
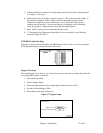
The system will begin monitoring the process rate once an RPM reading from the Extruder is
detected. Again, this RPM must be communicated to the PLC through the supplied inductive
proximity switch, or through the optional Ethernet module. The extruder icon on the recipe
page will become animated, indicating the extruder is running and the measured Extruder
RPM will be displayed. If the system does not automatically start loading upon starting of
the extruders then check this value for trouble shooting.
At this point, the controller will refill the weigh hopper to its set weight capacity.
The GH-M rate monitor will start tracking the extruder as soon as it is started.
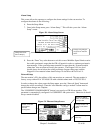
The displayed value may be far from the actual value the first time the system is ran. The
GH-M goes through a learning process with each material. This is indicated by a “Steady
Process” indicator on the main recipe page. Upon starting the line you should always give
the hopper time to analyze the flow and give you a “Steady Process” before making
adjustments based on the displayed throughput.
The initial learning process will be complete when the “Steady Process” indicator is
displayed on the recipe screen. You are now ready to run the unit as normal. The “Steady”
flag indicates that the measured throughput in reliable and can be used for control.
The system will automatically stop loading the hopper upon stopping the extruder. There is
no need to manually start/stop a GH-M unit.
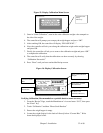
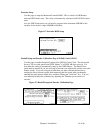
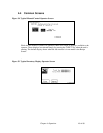
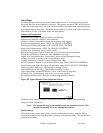
Operator Displays
Figure 33a: Typical Operator Screen for GH-M system
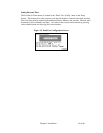
It is not necessary to perform any special routine in order to start-up a GH-M Rate Monitor
System. Use these easy steps:
1. Start up your extruder
2. Wait until you see the “Steady Process” indication on the screen (or through
communications)
3. Observe the “Lbs/hr” or “Kgs/hr” to adjust your extruder to the desired throughput.