


English - 6 -
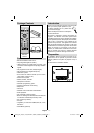
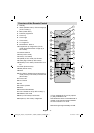
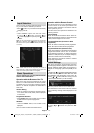
LCD TV and Operating Buttons
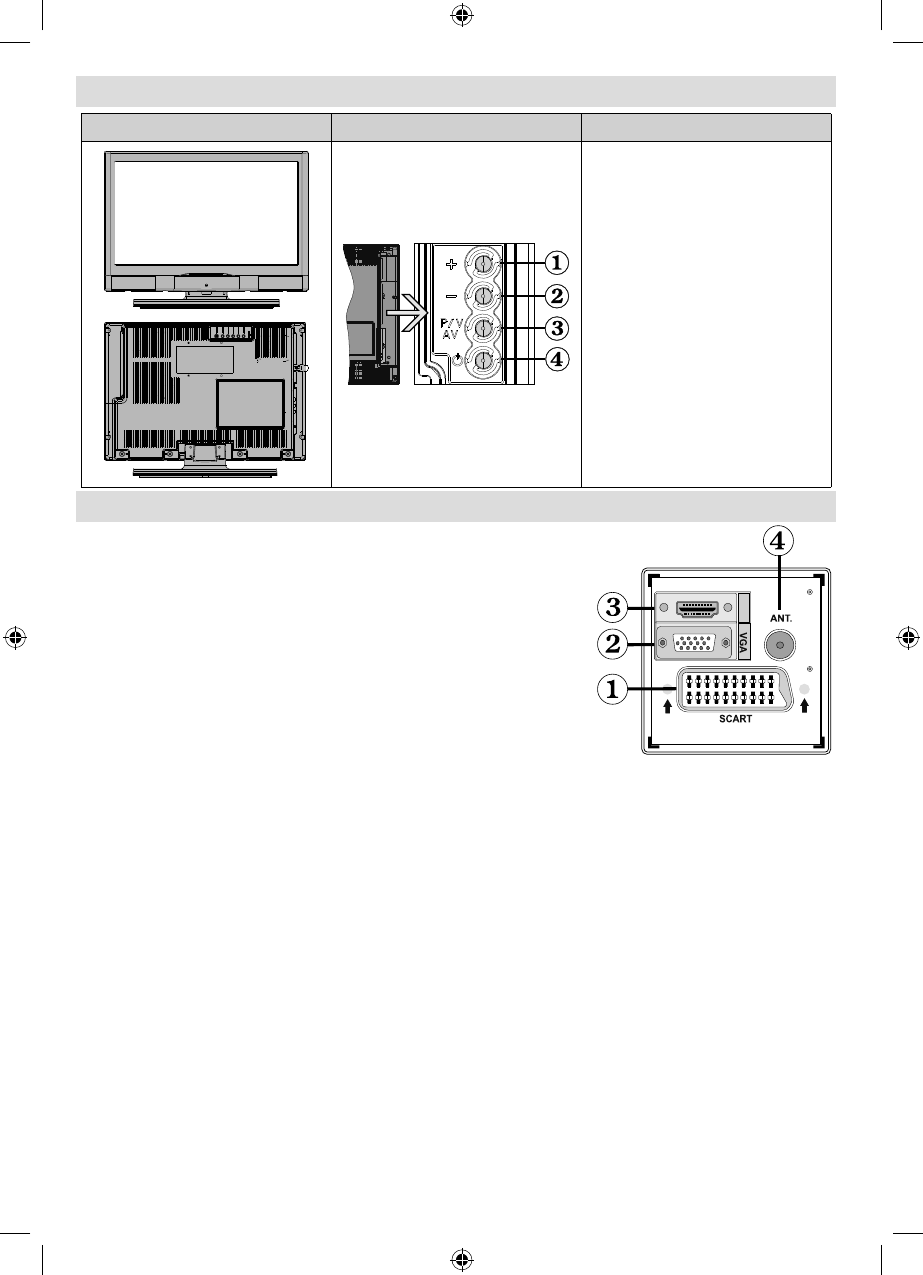
FRONT and REAR VIEW SIDE VIEW Control Buttons
Up button1.
Down button2.
Programme/Volume / AV 3.
selection button
Standby/On button4.
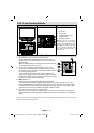
Note:You can use “+/-” buttons to
change volume. If you want to change
channels, press P/V/AV button once
and then use “+/-” buttons. If you hold
the P/V/AV button about a few seconds,
source OSD will be displayed. Main
menu OSD cannot be displayed via
control buttons.
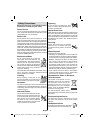
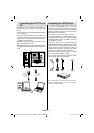
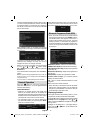
Viewing the Connections- Back Connectors
SCART socket inputs or outputs for external devices.1.
HDMI
Connect the SCART cable between SCART socket on TV and
SCART socket on your external device (such as a decoder, a VCR
or a DVD player).
Note: If an external device is connected via the SCART socket, the
TV will automatically switch to AV mode.
PC Input is for connecting a personal computer to the TV set. 2.
Connect the PC cable between the PC INPUT on the TV and the
PC output on your PC. Component Video Inputs (YPbPr) are used
for connecting component video.
You can use PC input to enable YPbPr signal connection with a
device that has component output. Connect the YPbPr to PC cable
between the PC INPUT on the TV and the component video outputs
of your device. (YPbPr cable is not supplied)
HDMI3. : HDMI input
HDMI Input is for connecting a device that has an HDMI socket.
Your LCD Television is capable of displaying High Defi nition pictures from devices such as a High
Defi nition Satellite Receiver or DVD Player. These devices must be connected via the HDMI sockets
or Component Socket. These sockets can accept either 480i, 480p, 576p, 576i, 720p, 1080i, 1080p
signals. No sound connection is needed for an HDMI to HDMI connection.
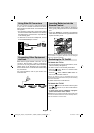
RF Input connects to an antenna or a cable system.4.
Note that if you use a decoder or a media recorder, you should connect the aerial cable through the
device to the television with an appropriate antenna cable, as shown in the illustration in the following
pages.
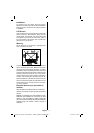
When you use the wall mount kit (optional) with the LCD TV, we would defi nitely recommend to plug all your cables into the
back of the LCD before mounting to the wall.
MB45_[GB]_1205UK_IDTV_BRONZE11_19882W_10066964_50164988.indd 6MB45_[GB]_1205UK_IDTV_BRONZE11_19882W_10066964_50164988.indd 6 15.02.2010 14:40:1015.02.2010 14:40:10