


(E) 46/52/62HM94
Copyright © 2004 TOSHIBA CORPORATION. All rights reserved.
49
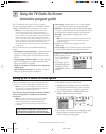
Chapter 6: Setting up your TV
Setting the AVHD device skip time
When you connect an external AVHD (audio/video hard drive)
device, such as the Toshiba Symbio
™
AVHD recorder (model
160HD4), to one of the TV’s IEEE-1394 ports, you can use the
AVHD device skip time feature to set the number of minutes
the device will skip forward or backward when you press the
SKIP buttons.
Note:
•This TV will work best with the Toshiba
Symbio
™
AVHD recorder
(model 160HD4), for recording high definition and standard
definition material from either tuner and for controlling live TV
(pause/rewind/etc.). When the AVHD recorder is connected to the
TV, the remote control keys (LIVE, STOP, REW, PAUSE, PLAY, etc.)
are automatically activated to allow pausing of live TV.
If you connect a Toshiba Symbio
™
AVHD recorder, you must set up
the TV Guide On Screen system in order to use the Symbio’s full
functionality. See Chapter 5 for details on setting up the TV Guide
On Screen system. See pages 23 and 49 for further details about
AVHD digital recorders.
•When you connect an AVHD (or a D-VHS) device, the TV Guide
On Screen system is automatically configured to allow recording.
See page 23 for device connection information. See Chapters 5
and 7 for details about setting up and using the TV Guide On Screen
system.
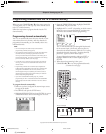
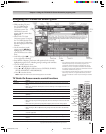
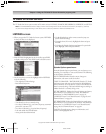
To set the AVHD device skip time:
1. Press MENU and open the
SETUP menu.
2. Highlight AVHD SKIP
TIME and press ENTER.
3. Press z or y to select the
AVHD skip time and press
ENTER.
Setting the HDMI
™
audio mode
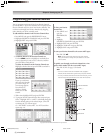
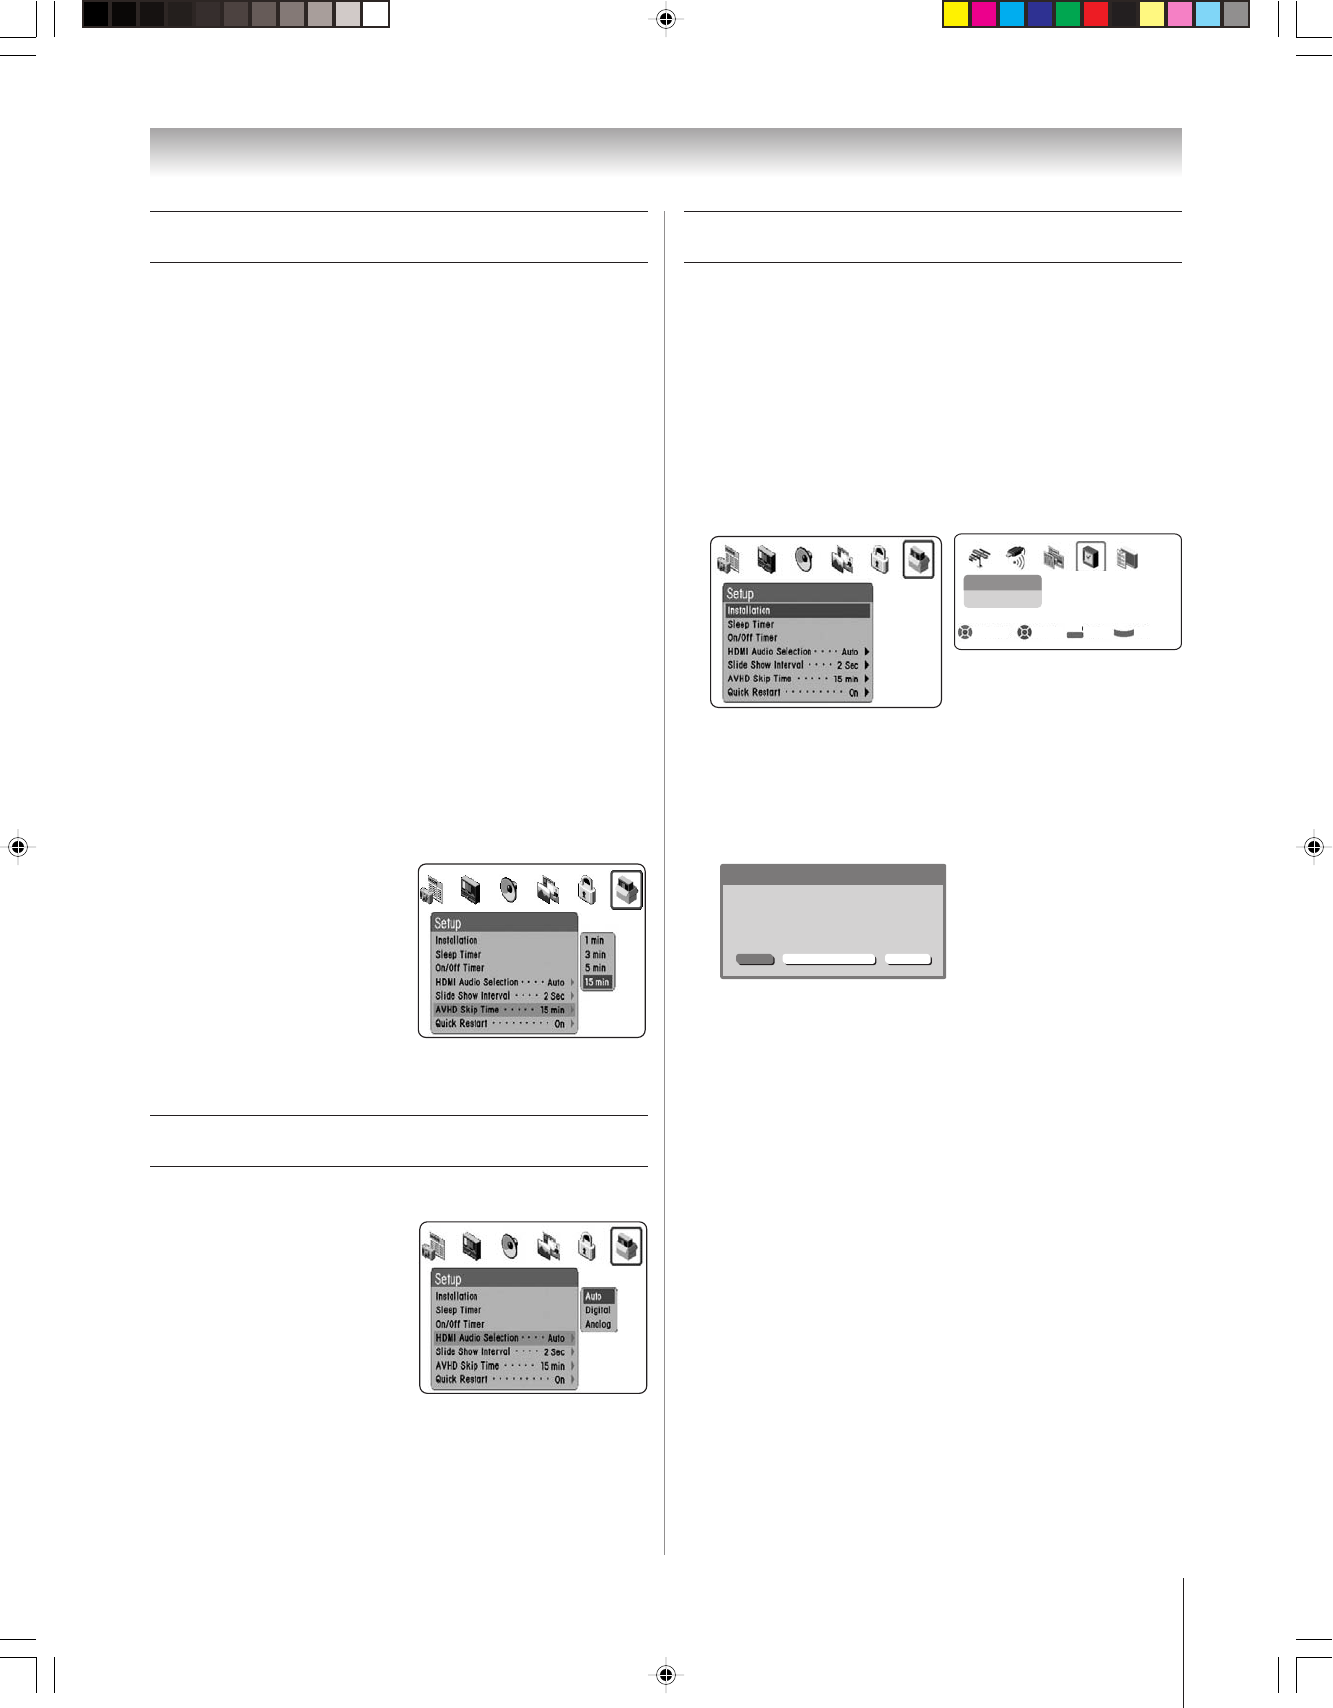
To select the HDMI audio mode:
1. Press MENU and open the
SET UP menu.
2. Highlight HDMI AUDIO
SELECTION and press
ENTER.
3. Press z or y to select the
HDMI audio mode (Auto,
Digital, or Analog) and
press ENTER. (Auto is the recommended mode).
See “Connecting an HDMI or a DVI device to the HDMI
input” on page 19.
Setting the time and date
Note: If you already set up the TV Guide On Screen system, the
time and date were set automatically and you can skip this step.
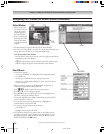
To set the time and date:
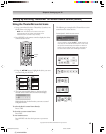
1. Press MENU and open the SETUP menu.
2. Highlight INSTALLATION and press ENTER. (A new set
of INSTALLATION menu icons will appear on-screen, as
shown in step 3 below.)
3. Open the TIME AND DATE menu, highlight
START SETUP, and press ENTER.
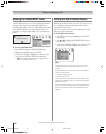
Time And Date
Start Setup
Navigate Select Back Exit
DVD RTN
CH RTN
EXIT
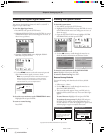
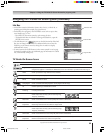
If you have not set up the TV Guide On Screen system, the
following screen will appear. To set the time, highlight
TV GUIDE ON SCREEN and press ENTER. The TV
Guide On Screen setup sequence will start, and the time
and date will be set automatically.
Manual CancelTV Guide On Screen
Time And Date
Your TV Guide On Screen System can provide
accurate time and date information.
It is recommended you set up TV Guide On Screen
first and use it to obtain the time and date.
Note:
• If you highlight TV GUIDE ON SCREEN (above) to set the
time and date through the TV Guide On Screen system and a
power outage occurs, the time and date will be updated
automatically when the power is restored.
• If you highlight MANUAL (above) to set the time and date
manually and a power outage occurs, you will lose the time
and date settings when the power is restored.
• If you manually set the time and date and then perform TV
Guide On Screen setup, the manual time and date settings
will be overridden by the TV Guide On Screen settings.
HM94(E)044-51(6b-Setup) 8/31/04, 2:09 PM49