


Operation
54 Vidikron Vision 70 Series Owner’s Operating Manual
PRE
L
IMINAR
Y
Video Filter: The Video Filter setting controls the behavior of the Sharpness control. The
available settings depend on the vertical resolution of the input signal, as follows:
• With a 480i signal, you can apply the sharpness control to either the input signal (1), the
output signal (2), both (3) or neither (0).
• With a 480p or higher-resolution signal, the sharpness control is applied only to the
output signal and only when you set the
Video Filter to “on” (1).
HD/RGB Adjust: Use the settings in the HD/RGB Adjust menu to fine-tune 480p and
higher-resolution signals for optimum picture quality.
•Auto: Adjusts the phase, frequency and position automatically.
•Freq. Adjusts the frequency of the signal.
•Phase: Adjust the phase if the image (usually from an RGB source) shows shimmer or
“noise.” Pixel phase adjusts the phase of the pixel sampling clock relative to the incoming
signal. The effect of this control is similar to that of a tracking control on a VCR.
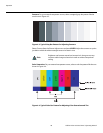
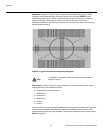
For best results, use a good test pattern such as a smooth gray consisting of a clear pattern
of black and white pixels, or a similar “half on, half off” graphic image. (You may find that
you can stabilize the image at more than one point. Use either setting in this case.)
• H. Pos.: Adjusts the horizontal position of the image.
•V. Pos.: Adjusts the vertical position of the image.
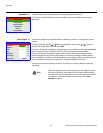
Blue Enable: Press the or button to turn the Blue Enable Off or On. This feature
removes all red and green color information from the image (simulating a blue filter), and is
useful for color-calibrating the projector or other video components.
Save Settings: When you have finished making your adjustments, select Save Settings to
store the settings for the current input in the “Custom 1” memory location.
Load Saved Settings: To recall stored custom image quality settings, select Load Saved
Settings and choose “Custom 1,” “ISF Night” or “ISF Day.”
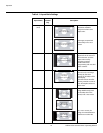
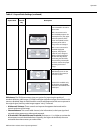
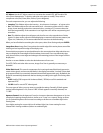
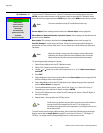
Projector Status To load default settings, configure the sleep timer or adjust the lamp, select Projector Status
from the Main Menu and press ENTER.
Default: To restore the default image settings for the current input source ONLY, press the
or button to highlight “Load,” then press ENTER.
Sleep Timer: The Sleep Timer automatically puts the projector into standby mode after the
amount of time you specify here. (A warning appears on-screen one minute before this is to
occur.)
Use the or button to set the timer for anywhere from 10 to 180 minutes (three hours), in
10-minute increments. To disable the Sleep Timer, set it to 0.
Lamp Power: Select Lamp Power from the Projector Status Menu to adjust the lamp output
level. You can choose to run the lamp as bright as possible (250W; this is the default setting)
or you can choose the lower (200W) setting. Generally, lower lamp output can prolong the
life of the lamp, but decreases brightness.
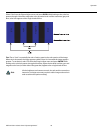
To adjust the image position with a 480i source, use the Image Shift
controls in the Service menu (see page 58).
Note
Projector Status
Default Load
Sleep Timer 30 Minutes
Lamp Power 200 W
Lamp Hours +8 Hours
0 Minutes
➤