12
Audio Controls
Graphic EQ Settings
After choosing the program source you want; adjust the GRAPHIC EQUALIZER controls as follows:
1. Adjust the VOLUME control for the desired listening level.
2. Set the GRAPHIC EQUALIZER controls to match the sound characteristics of your listening room. With each of the five controls of the GRAPHIC
EQUALIZER, it is possible to control a narrow, distinct section of the audio band by up to +/-10dB. The frequency bands controlled by the slide
controls have been chosen to give you the best possible control action within the audio spectrum.
100 Hz -Is very useful for enhancing low bass notes (as in organ music, kick drum, etc.) or making corrections when a deficiency in bass exists. Or
you can use this to reduce rumble, acoustic feed back, and other low frequency aberrations.
300 Hz -Will allow you to vary the upper bass frequencies. An over-accentuated, upper bass will give a muddy, boom quality to music while the
system shy of upper bass will sound hollow and thin.
1 kHz - Lies in range of frequencies where the ear is most sensitive to tonal balance. This is often called “presence”, since adjusting this control brings
the vocalist out to the front or back into ensemble.
3. 3 kHz-Speaker designers often boost output in this range to effect a quality of presence to the music. Too much energy on the other hand, sounds
overbearingly harsh and stringent.
10 kHz -Adjustment affects the brilliance of music with too much boosts in high frequencies (can be an unpleasant and piercing quality). You may use
this to add a little more dimension to the high-shelf sound or use it as a very high frequency noise filter.
Using Your Radio
AM or FM - Press the POWER button ON. Slide the FUNCTION SELECTOR to AM or FM. Rotate the tuning knob to the desired listening station.
Cassette Handling
Operating Tips
1. High quality tapes will give you better recordings. Tapes of the following types are suggested: Low noise, high density, high output or extended
range with a play or record time up to 90 minutes.
NOTE: Cassette with a time of 120 minutes (C120) are not recommended because they contain thinner and longer tapes which are more likely
to jam or tangle in the player/recorder.
2. For best results in playing or recording, it is necessary for the head to be clean. Refer to cleaning instructions. Keep cassettes away from
excessive heat or cold.
3. If the tape is loose in the cassette, tighten it before putting it in.
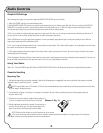
To do so, put a pencil into the hub and turn it to the right (Shown in Fig. 1)
4. A leader tape begins each side of a cassette. You cannot play or
record on this part of the tape. You have to let the tape run for
about five seconds so this leader tape is past the heads.
NOTE: When you start the tape, be sure the tape take–up reel is moving.
If the reel is not moving stop the machine at once; if you don’t the tape could become tangled in the player/recorder. If this does hap
pen, carefully remove the cassette and correct it as shown above.
(Fig. 1)
(Fig. 1)


