4 Chapter 2
Step 3: Use Wyse Simple Imager to Convert Each Cloud Client
Use the following guidelines on each cloud client you want to convert:
1. Connect the cloud client (to be imaged) to the router with DHCP running that is
attached to the machine on which Wyse Simple Imager is installed. Be sure the cloud
client is shut down.
Ensure all software firewalls and antivirus services are stopped.
2. Launch the Wyse Simple Imager console (double-click the Wyse Simple Imager icon).
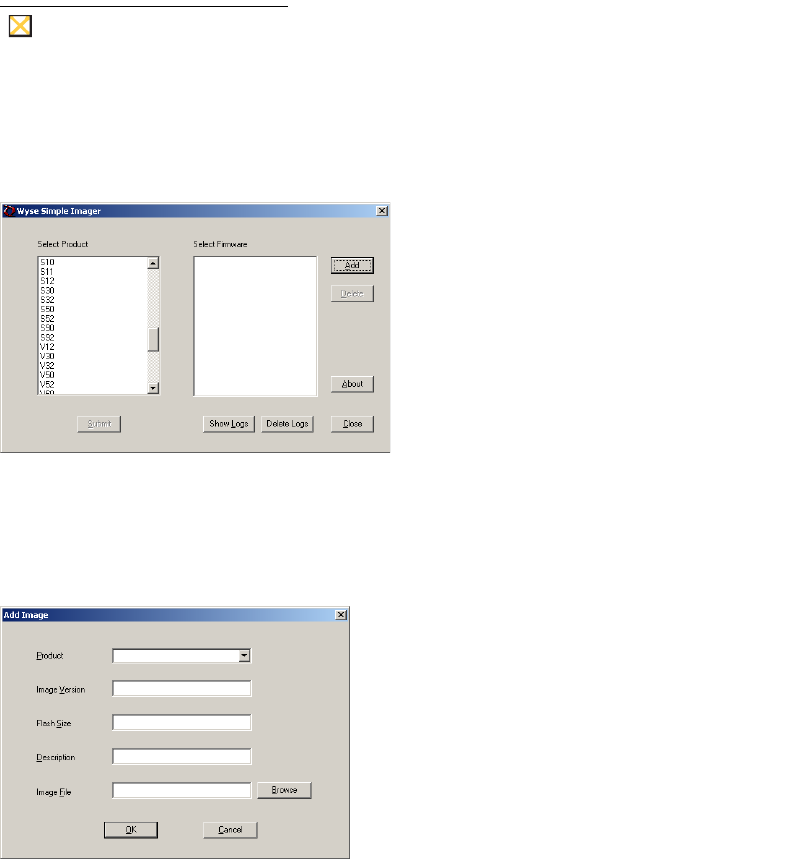
Figure 2 Wyse Simple Imager console
3. Select S10 in the Select Product list, and then click Add to open the Add Image dialog
box.
Figure 3 Add Image dialog box
4. Use the following guidelines:
• Product - S10 is automatically entered (leave this value).
• Image Version - Enter 7.x.0_113 for Image Version. This refers to the new
Firmware version.
• Flash Size - This is the amount of flash memory installed in your cloud client. Flash
Size can be 64, 128, or 512.
NOTE: To determine the flash size of your cloud client (location of the flash size is
as follows - see your cloud client documentation for help on viewing the flash size):
·S30: Start > Settings > Control Panel > System > System Info tab
·S50: Start > Control Panel > System > System Information > Identity tab
·S90: Start > Control Panel > System > Client Information > General tab
