6
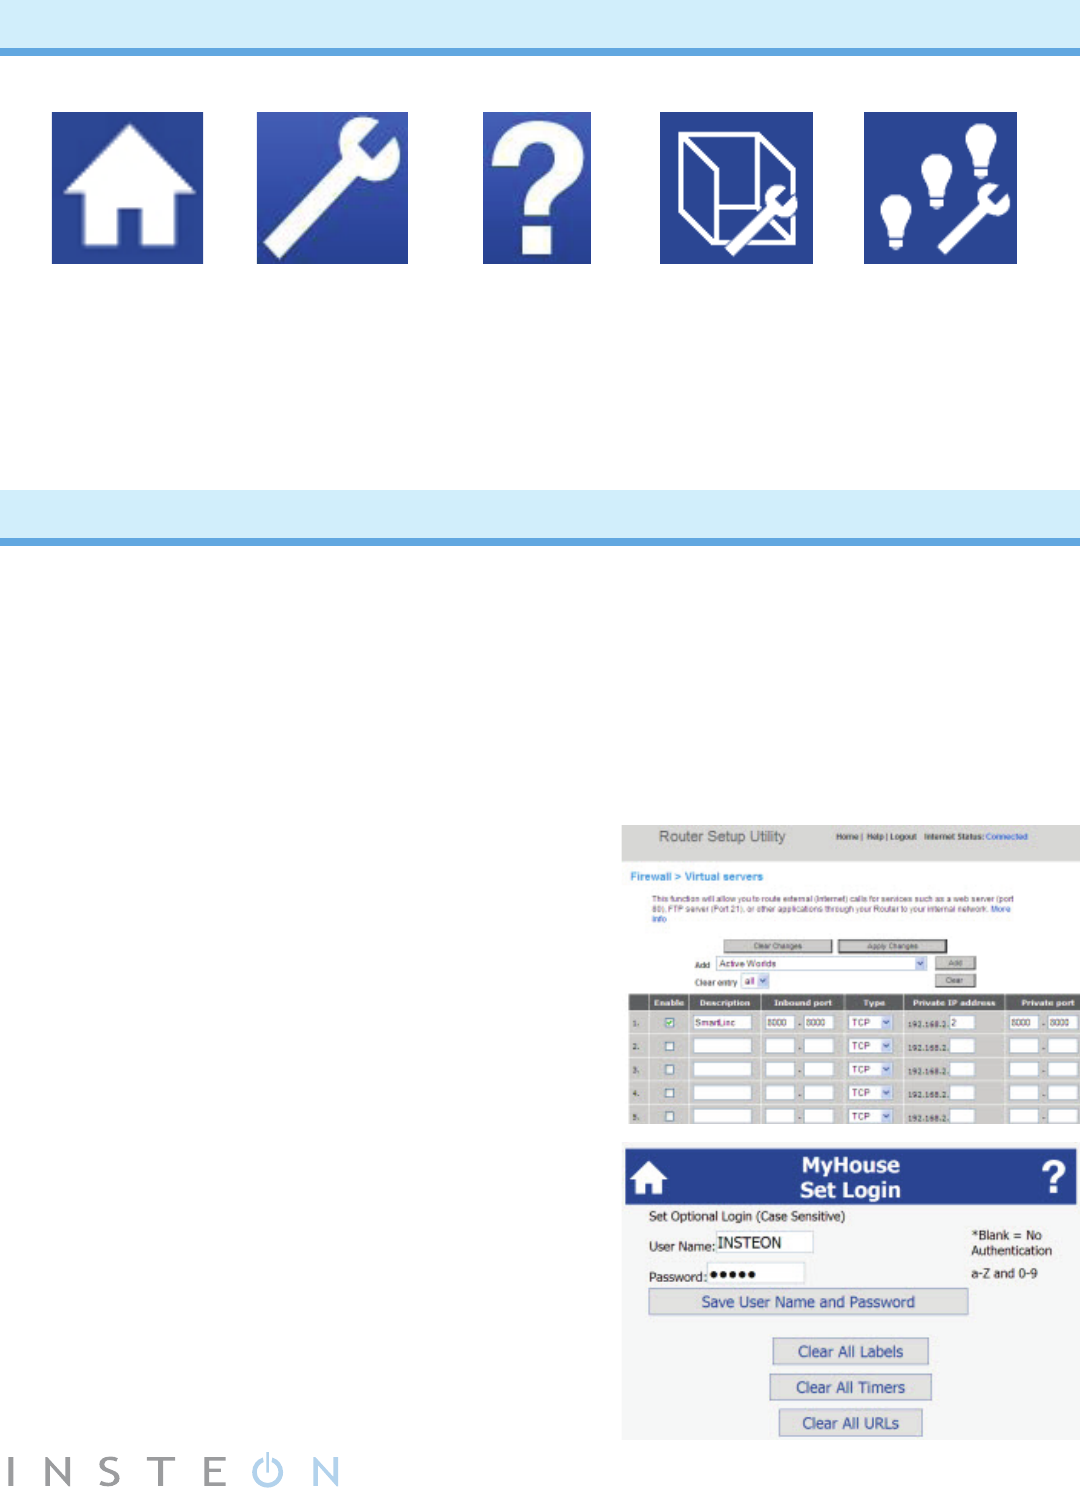
Web Interface Icons
Homepage Settings Help
Room Settings
Scene Settings
Returns you to
the SmartLinc
homepage
Takes you
to SmartLinc
general settings
Takes you
to SmartLinc
help page on
Smarthome
Wiki
Add, remove
and rename
scenes
Add, remove
and rename
rooms and add
camera URLs
•Theseinstructionsassumetheuserisfamiliarwithnetworkingsetupandrewall
management (you will need to refer to your router’s instruction manual to determine how to
performthefollowingstepsonyourspecicrouter)
•Userneedstobeawarethattherearealwaysrisksassociatedwithconguringdevicesto
make them accessible to the Internet. User takes full responsibility for network management
and security.
•Youmustbeonyourlocalnetwork(sameasyourSmartLinc)whenregisteringat
http://smartlinc.smarthome.com(nalstepsbelow).
1. Set up port forwarding on your router.
•Logontoyourrouter.
•Determineyourrouter’srangeofIPaddresses.You
may need to contact your ISP.
•ChooseanIPaddressoutsidethatrange.
•Opentheportforwarding/virtualserversfeatureon
your router.
•ForwardyourchosenIPaddressplusarandomport
of your choice (to move off the default 80 server).
2. Set up SmartLinc authentication.
•Whileathome,visithttp://smartlinc.smarthome.com
and click “I’m at home.”
•ClicktheSettings(wrench)icon.
•ClickAuthentication.
•Enteryourusernameandpassword(maximum10
characters of letters, numbers and “@” only).
•ClickSaveUserNameandPassword.
Setting Up Web Interface


