21
Creating a Playlist
Chapter 3 Basic Operations
2
Click the button on the “Edit Playlist” window
toolbar.
If the currently displayed playlist has not been saved,
the VSPA-D7 software displays a message asking
whether you want to discard it.
Save the displayed playlist, if necessary.
3
Check the resolution displayed on the “Edit Playlist”
window title bar.
Change the target resolution, if necessary, by clicking
the button.
4
Select a piece of material in the “Content
Management” window, then add it to the playlist by a
drag & drop operation.
The layer (column) in which you drop the material is
decided depending on the material and its purpose.
When a material tab is selected in the “Content
Management” window, the titles of the columns
corresponding to the material appear white on dark
gray, showing that the material on the tab can be
dropped on those columns.
The added material is displayed on the playlist.
Although not shown on the playlist, the position and
size data based on the standard layout template are
added to the dropped material. You can view the
specified layout in the “View Layout” window by
clicking a line or cell of the playlist. To modify the
layout, click [Change Layout] in the “View Layout”
window.
See “Modifying Screen Layout” on page 22 for
detailed information on modifying the layout.
5
Repeat step 4 to create the playlist.
If necessary, edit the newly added event, for example,
by modifying the duration of the event.
See “Menus in the Edit Playlist Window” on page 43
for detailed information on playlist editing functions.
To finish creating/editing of a playlist, save the
playlist. You can either simply save it, or save it and
simultaneously create a schedule using the playlist.
Saving a newly created playlist
Simply save the playlist when you intend to use an extra
audio list and/or control commands in combination with
the playlist. In this case, create a schedule, later, using the
playlist.
See “Creating a Schedule” on page 25 for details on
creating a schedule.
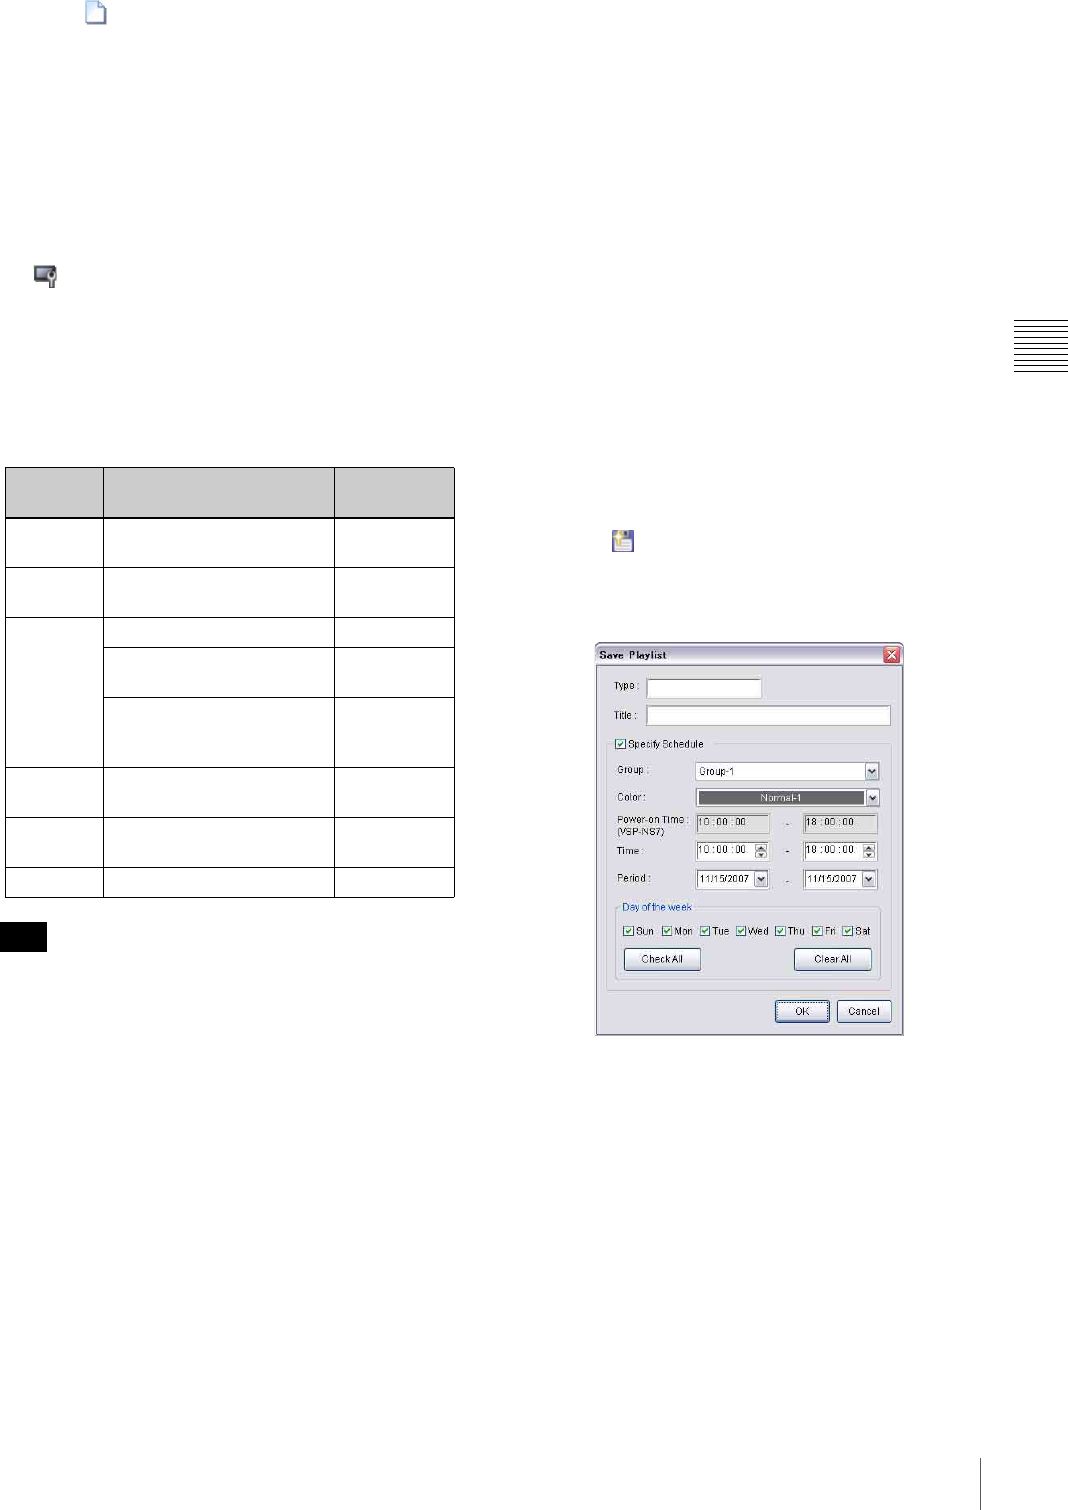
1
Click the button on the toolbar of the “Edit
Playlist” window.
The “Save Playlist” window appears.
2
Specify the type (up to 20 characters) and title (up to
40 characters) of the playlist to be saved.
Select each text box, and enter the desired text.
3
Clear the “Specify Schedule” check box, then click
[OK].
The playlist is saved. A message appears asking
whether you want to clear the playlist currently
displayed in the “Edit Playlist” window.
4
Click [Yes] to finish working with this playlist, or
click [No] to continue working with this playlist.
Material Purpose Layer
(Column)
Video Video (with accompanying
audio)
Video
Streaming MPEG4 streaming video
from IP cameras
Video
Graphics Background, Wallpaper Background
Graphics to be displayed
behind video
Graphics 1
Logo marks, Down-stream
keying, Graphics to be
displayed in front of video
Graphics 2
URL Web pages Graphics 1 or
Graphics 2
Flash Flash movies Graphics 1 or
Graphics 2
Text Captions Text
Hint


