25
Creating a Schedule
Chapter 3 Basic Operations
Creating a Schedule
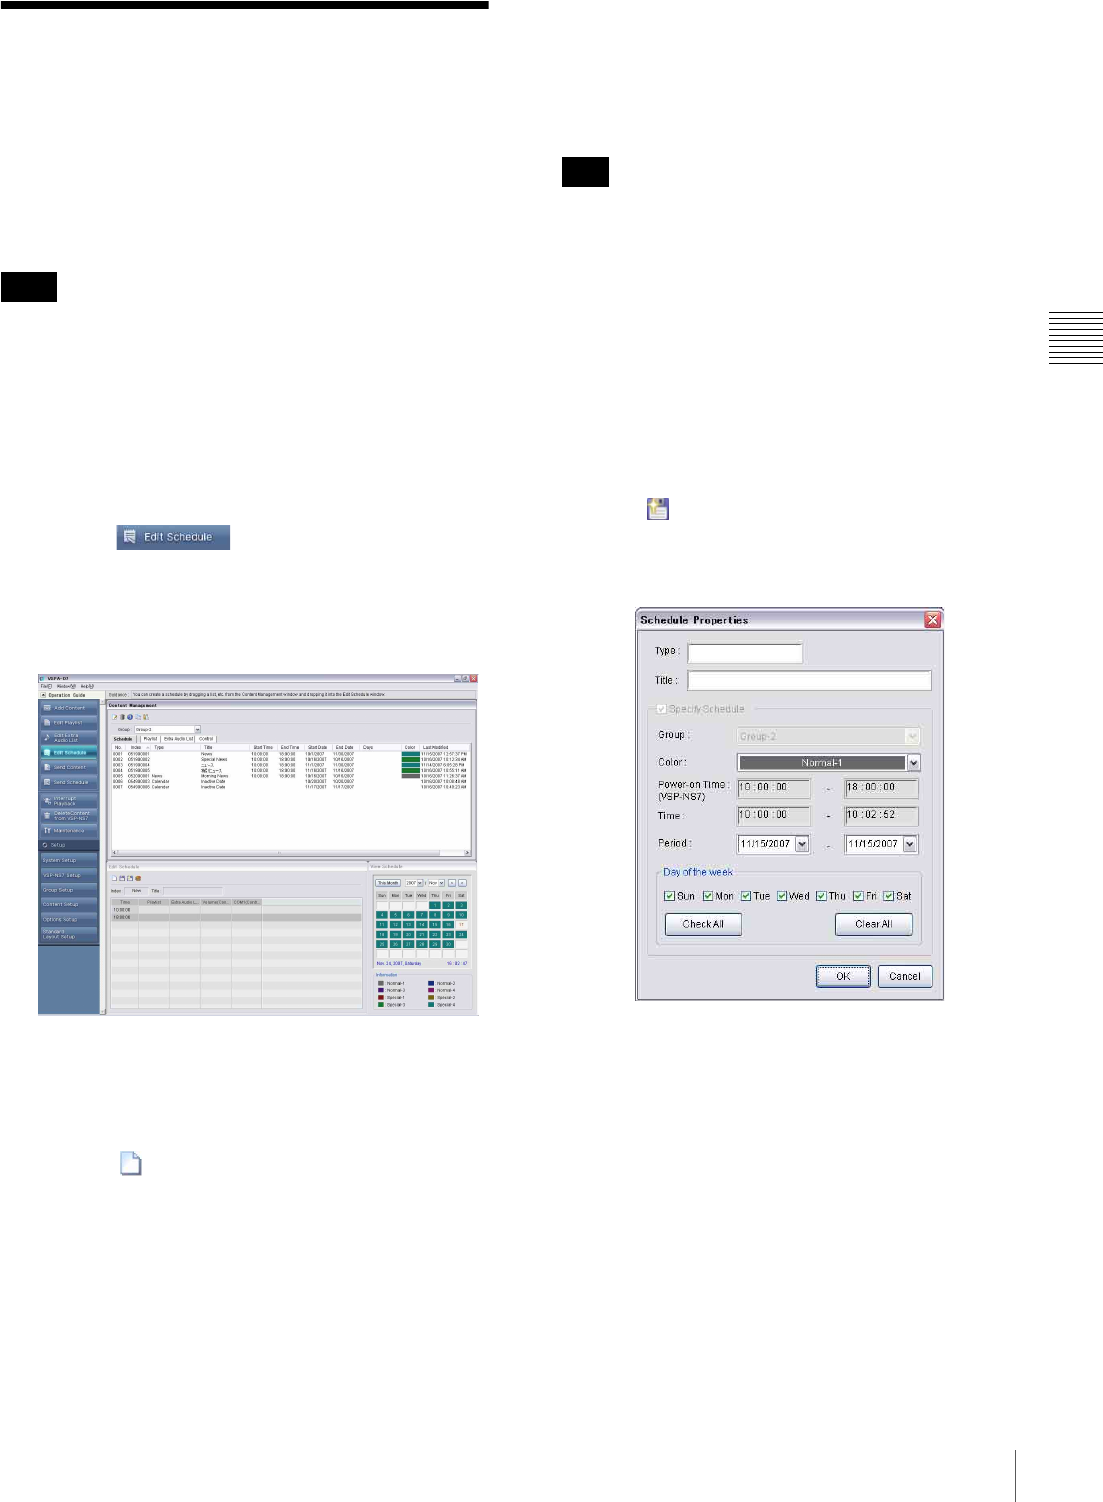
You can create a playback schedule in the “Edit Schedule”
window, using playlists, extra audio lists, and control
commands displayed in the “Content Management”
window.
A new playback schedule is created using the following
procedure:
When both a playlist and extra audio list are specified to be
played, sound accompanying video will not be output
while separate audio material is played. However, sound
accompanying Flash files and web pages will be mixed
with audio material and output. When the microphone of
the IP camera used is set to on, too, its sound will be mixed
and output.
1
Click the button of the operation guide.
The “Edit Schedule” window set appears. It consists of
the “Content Management,” “Edit Schedule,” and
“View Schedule” windows.
2
Select the player group for which you are going to
create a schedule, using the “Group” drop-down list
box in the “Content Management” window.
3
Click the button on the “Edit Schedule” window
toolbar.
If the displayed schedule has not been saved, the
VSPA-D7 software displays a message asking
whether you want to discard it.
Save the displayed schedule, if necessary.
4
Select a playlist, extra audio list, or control command
in the “Content Management” window, then add it to
the schedule by a drag & drop operation.
The added list or command is displayed on the
schedule.
Lines displayed in red in the “Edit Schedule” window
indicate a time slot where the players are powered off.
You cannot add playlists, extra audio lists, or control
commands on these lines.
5
Repeat step 4 to create the schedule.
If necessary, edit the newly added event, for example,
by modifying the duration of the event.
See “Menus in the Edit Schedule Window” on page 53
for detailed information on schedule editing functions.
6
Click the button on the toolbar of the “Edit
Schedule” window.
The “Schedule Properties” window appears.
7
Specify the type (up to 20 characters) and title (up to
40 characters) of the schedule to be saved.
Select each text box, and enter the desired text.
8
Select the color to be used to display the created
schedule, using the “Color” drop-down list box.
9
Specify the first and last days of the playback period of
the schedule.
Clicking the button of the drop-down list box displays
a calendar. The date you click on the calendar will be
specified in the drop-down list box.
Note
Hint


