


9
3M 1996
3M Multimedia Projector MP8030
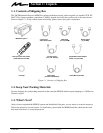
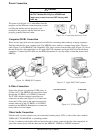
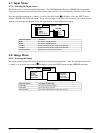
Adjusting the Projector Elevation
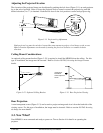
The elevation of the projected image can be adjusted by pushing the lock lever (Figure 3-11) on each projector
leg to the unlock position. Raise or lower the projector body to extend or retract the projector leg until the
desired elevation (1 to 7°) is obtained. Push the lock lever to the lock position to secure each projector leg.
Lock
Lever
UNLOCK
LOCK
Foot
Figure 3-11. Projector Leg Adjustment
Note
Both projector legs must be raised or lowered the same amount to project a level image on the screen.
Minor elevation adjustments can be made by turning the foot in a clockwise or counterclockwise
direction.
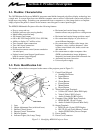
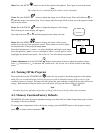
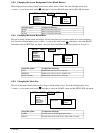
Ceiling Mount Considerations
An optional ceiling mount bracket (Figure 3-12) is required to install the MP8030 from the ceiling. For this
type of installation, the image must be inverted. Refer to Section NO TAG, Inverting the Image for more
details.
90°
Figure 3-12. Optional Ceiling Bracket
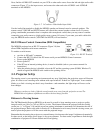
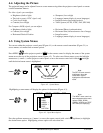
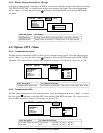
Viewing from
backside of
semi-transparent
screen
90°
Figure 3-13. Rear Projection Viewing
Rear Projection
A semi-transparent screen (Figure 3-13) can be used to project an image and view it from the backside of the
viewing screen. For this type of installation, the image must be inverted. Refer to section NO TAG Inverting
the Image for more details.
3-3. Now What?
Your MP8030 is now connected and ready to power on. Turn to Section 4 for details on operating the
projector.