


Programming The Mio R-3
11
Mio Modero R-3 Remote
Programming The Mio R-3
Most functionality of the Mio R-3 is handled using the KeypadBuilder application. Go to www.amx.com
for the KeypadBuilder Instruction Manual.
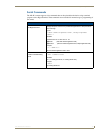
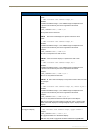
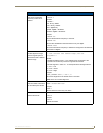
The Mio R-3 recognizes a select number of Serial Commands. For a full list and descriptions, consult the
Serial Commands section on page 15.
Using the Programming Jack on The Mio R-3
The programming jack is used for communication between the device and KeypadBuilder. The
programming jack uses a three-wire, 2.5mm stereo jack, and you may order the programming cable
(FG10-817) from AMX if you do not currently possess one. The Mio R-3 communicates at a 115200
baud rate.
To download KeypadBuilder Configuration Files:
1. Set the Mio R-3 Download mode to ON. See the Setup Mode section on page 7 for details.
2. Flip and turn the device so that the buttons are facing away from you and the device is upside down.
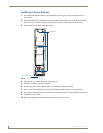
3. Holding the device in both hands, place your thumbs on the battery door and slide the battery door
free. The battery door will slide in the direction of the bottom end of the device.
4. Connect the 2.5mm stereo plug (male) end of the programming cable (FG10-817) into the
programming jack on the bottom side of the remote device.
5. If necessary, connect the DB-9 end of the programming cable to the female DB-9 connector on the
DB-9 extension cable (FG10-727).
6. Connect the female DB-9 terminal end of the extension cable to the port on the back of your
computer.
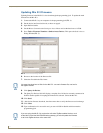
7. Configure the communication parameters in KeypadBuilder.
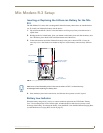
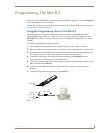
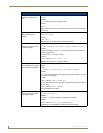
FIG. 4 Connecting The Keypad Device to Your PC
Stereo plug male
DB-9 connector
Cable FG10-817 to cable FG10-727
to PC
programming
cable
Keypad device
Programming
jack
Mio R-3