53
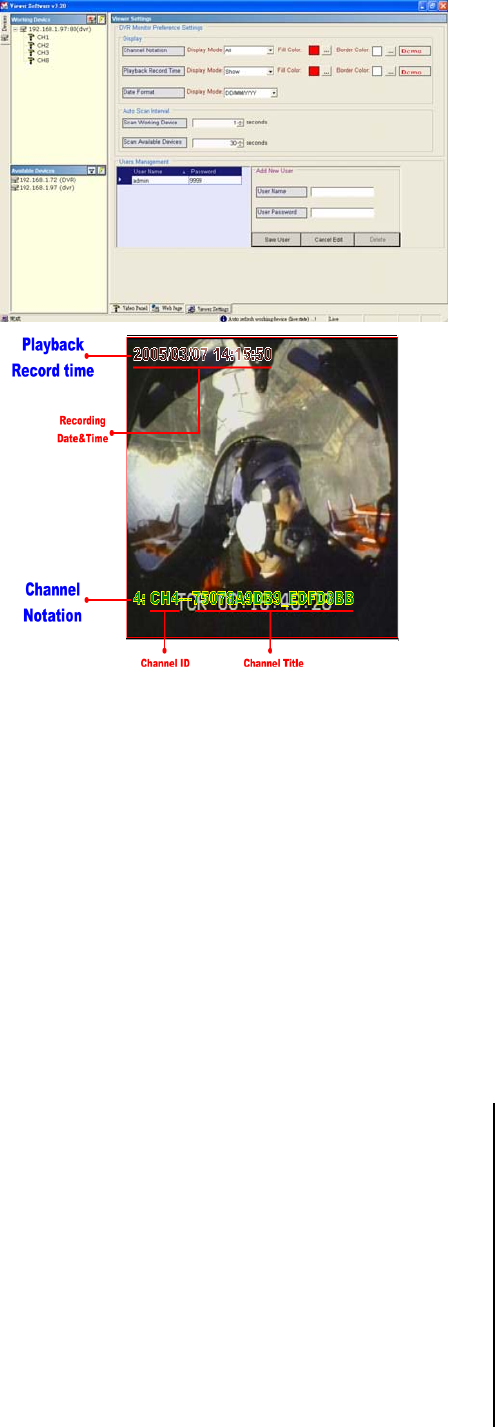
5.2.3.5 Viewer setting
1. "Channel Notation".
If you wish to change the "Display Mode", open
its drop - down list and select any of the four
items there. Your choice will automatically
appear in the relevant blank space. Similarly you
can enter the "Fill Color" and "Border Color"
entries to open their respective color tables.
Click "OK" in each case to set your choice.
2. "Playback Record Time".
Click the "Display Mode" to select from a drop -
down list of two choices, "Hide" and "Show".
Your choice will decide whether the images will
display their date and time or not.
3. "Auto Scan Interval".
Here you have two entries, "Scan Working
Devices" and "Scan Available Devices". Set
the time in seconds for both entries as per your
requirements. The "Scan Working Devices"
entry has a time span of 1 to 5 seconds only.
The "Scan Available Devices " time range
covers 30 to 1000 seconds.
4."Users Management".
Click the "Save User" button to add the new
user’s name and password under "Add New
User": Enter the "User Name" and
"Password" and click "Save User " again. Your
new user and his password will appear on the
"User Name & Password " list to the left. If you
proceed to enter a new user and then click
"Cancel Edit", no new name will be added to
your list. If you wish to delete any user, click his
name and click "Delete" to effect the change.
5.3 Microsoft Internet Explorer
This section provides instructions for using the
Microsoft Internet Explorer.
5.3.1 Connecting the DVR
Start up the Microsoft Internet Explorer, and then
follow the steps given below to connect the
DVR:
1. Type in the URL address of the DVR into the
URL block and press the “Enter” button to enter
the login page. The default user name and
password are admin and 9999 respectively.
2. Enter the User name and Password.
3. Click the “Login” button and enter the home
page of the DVR: both the user name and
password must be provided correctly.


