


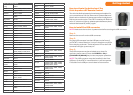

BLU-RAY/DVD CONT’D
Craig 20831
Curtis 22235, 23403, 23052, 21493
Curtis Mathes 22331, 23925
Daewoo 20833, 20869
Denon 22258, 21634, 22748, 23851,
20490
DigitalMax 21738
Digix 22464, 23850
Directed Video 20717
Disney 20675, 21270, 23246
Durabrand 23464
Dynex 22596
Emerson 20675, 22213
Fisher 20670
Funai 20675
Gateway 21158
GE 20717, 20522
General Electric 20717, 20522
GFM 20675
Go Video 20869, 21044, 20741, 21075,
20744, 20833, 21158, 20717
GoldStar 20741, 20869
GPX 22235
Greenhill 20717
Grundig 20539
Harman/
Kardon
20702, 22927, 23228, 20582,
21229
Hello Kitty 20831
Hitachi 20664, 20573
Hiteker 20672
Initial 20717
Insignia 22596, 22095, 22428, 20675,
21013, 20741
Integra 22147, 21769, 21634
Irradio 20646
JBL 20702
JVC 20623, 21164, 20867, 21602,
22855
Kawasaki 20790
Kenwood 20534, 20490
KLH 20717, 20790
Lexicon 22545
LG 20741, 21602, 22135, 20869
LiteOn 21738, 21158, 21416
Logitech 22639
Magnavox 20675, 21354, 20503, 20646,
23488, 21506, 20539
Marantz 22481, 22414, 20539, 23444
McIntosh 21273
Memorex 22213, 23153, 20831, 21270,
22331
Microsoft 22083, 22627, 20522
Mintek 20717
NAD 20741
Naxa 22235
Nesa 20717
New Acoustic
Dimension
20741
Nyko 22340
Ölevia 22331
Onkyo 22147, 21627, 22562, 20503,
21769
Oppo 22545, 21224
Panasonic 21641, 20490, 23641, 21579,
20703, 20503
Philco 20675, 20790
Philips 22056, 22434, 23488, 22084,
20646, 21354, 20539, 21506,
20503, 20675, 21158
Pioneer 22442, 21571, 20631, 22854,
22847, 20142
Polaroid 21013
Polk Audio 20539
Presidian 20675, 21738
Proceed 20672
Proscan 20522
RCA 20522, 22919, 22213, 22587,
23464, 21013, 20717, 22871,
21769, 20790
RE-BL 22555
Rio 20869
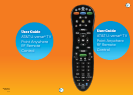
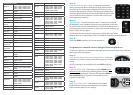
Getting started
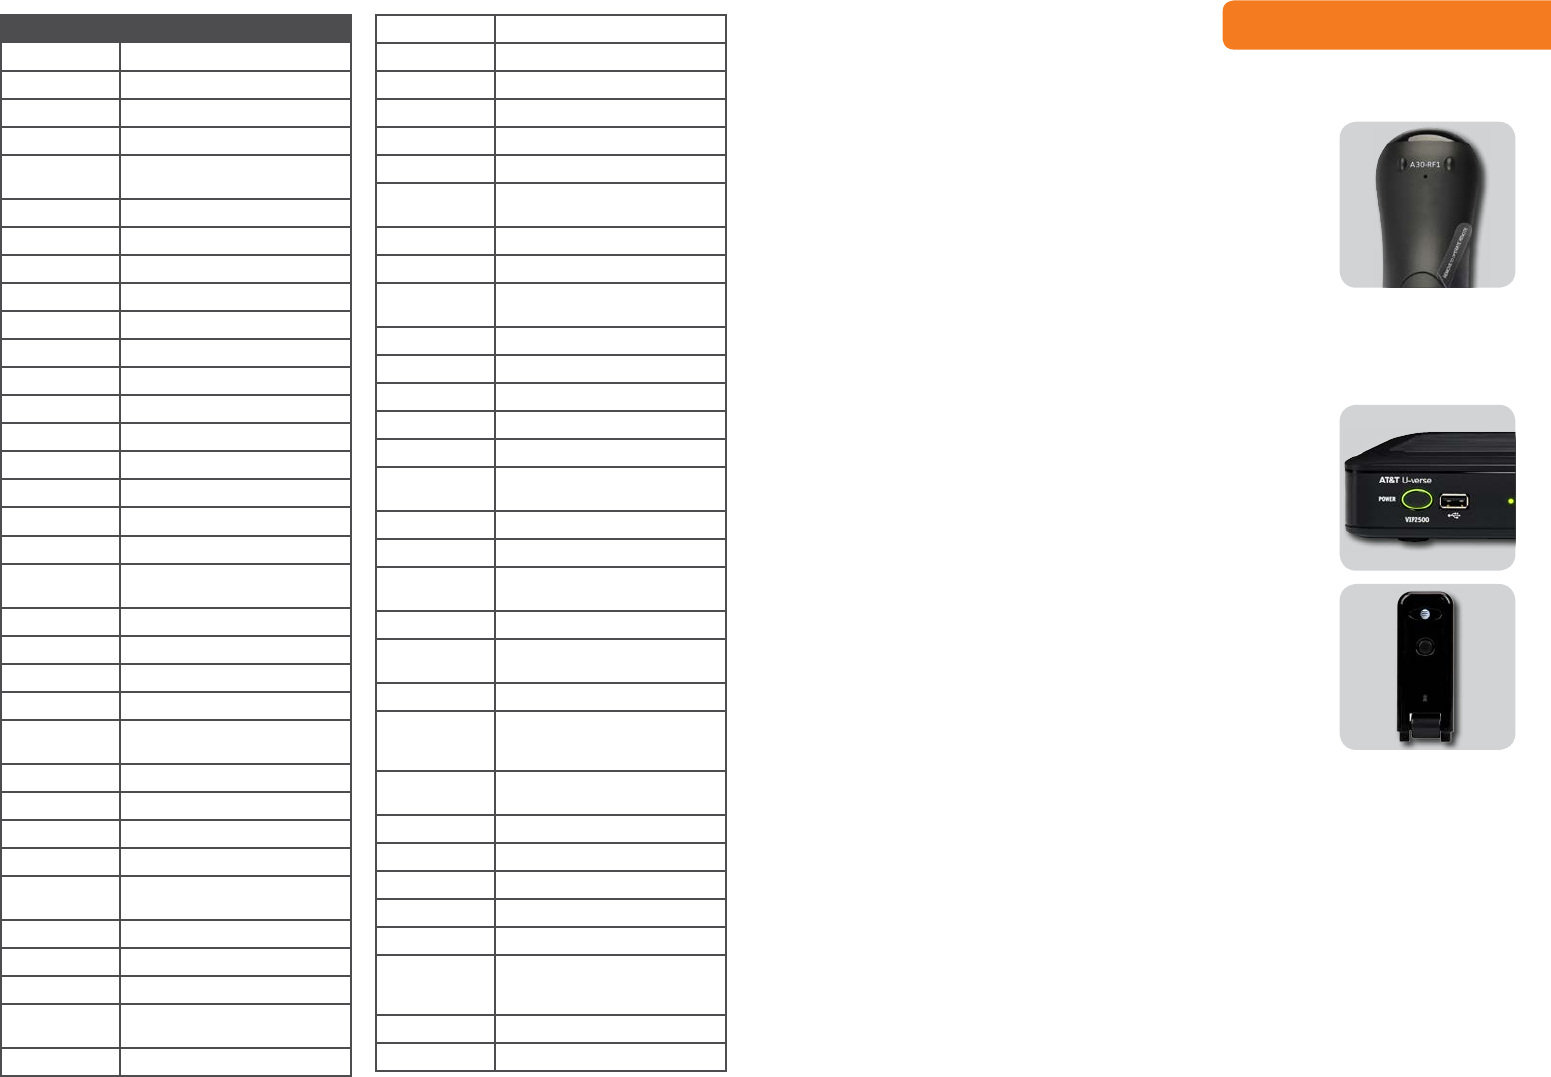
How to activate the batteries of the
Point Anywhere RF Remote Control
Two AA size alkaline batteries have been preinstalled for
your convenience. Pull the “Remove to Operate Remote”
plastic tab on the back of the remote control straight out
with one smooth motion. The AT&T mode key will flash red
twice. If it does not light up, please open the battery door,
reinstall the batteries, and try again.
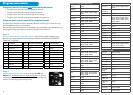
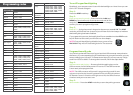
How to install the USB converter
NOTE: Make sure the receiver is powered on before testing the USB converter.
Step 1:
Remove the cover from the USB converter.
Step 2:
Plug the USB converter into the USB port on the front of
your AT&T U-verse Receiver. Your port location may differ
from the picture shown. The blue power LED on the USB
converter will light up and stay on.
Step 3:
The USB converter may be swiveled up or down for
optimum performance. Press the POWER or CH+/-
(CHANNEL UP/DOWN) keys to ensure proper operation.
NOTE: The USB converter must be installed in the front
USB port of the AT&T U-verse Receiver. It will not operate
if installed in the USB port on the back of the receiver.
3