


41
AXIS 241QA/AXIS 241SA - Event configuration
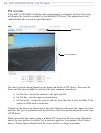
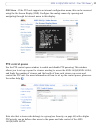
Pre-trigger and post-trigger buffers
This function is useful when checking to see what happened immediately before and after
a trigger, e.g. two minutes before and after a door was opened. Check the Upload images
option under Event Types > Add Triggered... > When triggered... to see available options.
Include pre-trigger buffer
- images stored internally in the server from the time
immediately preceding the trigger. Check the box to enable the pre-trigger buffer, enter the
desired length of time, and specify the required image frequency.
Include post-trigger buffer -
contains images from the time immediately after the trigger.
Configure as for pre-trigger.
Note:
If the pre- or post-buffer is too large for the Axis video server's internal memory, the frame rate is reduced
and individual images may be missing. If this occurs, an entry will be created in the unit's log file.
Continue image upload (unbuffered) - enables the upload of images for a fixed length of
time. Specify the time for the uploaded recording in seconds, minutes or hours, or for as
long as the trigger is active. Finally, set the desired image frequency to the maximum (the
maximum possible) or to a specified frame rate. The frame rate would be the best possible,
but might not be as high as specified, especially if uploading via a slow connection.
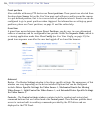
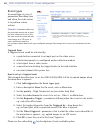
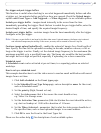
Scheduled event
A Scheduled event can be activated at
pre-set times, in a repeating pattern on selected
weekdays.
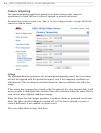
How to set up a scheduled event
This example describes how to set the video server to send an email notification with saved
images from a set
time:
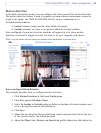
1. Click Ad
d scheduled on the Event types page.
2. In the Scheduled Event Type Setup page, enter a descriptive name for the event,
such as Scheduled email.
3. Set the priority (High, Normal or Low).
4. Select the video source that is the source the event should act on;
e.g. Video 2 in Storage room.
5. Set the Activation Time parameters (24h clock) when the event should be active;
e.g. start on Sundays at 13.00 with a duration of 12 hours.
6. Set the When Activated... parameters that is what the video server should do at
the specified time; such as send uploaded images to an email address.
7. Click OK to save the Event in the Event Types list.
Please see the online help for descriptions of each available option.