


MANAGE PROGRAMS AND RECORDINGS
31
MANAGE PROGRAMS AND RECORDINGS
Keep Others from Watching a Program
You can prevent children or anyone else from watching specific programs by using the Parental Control
feature. Blocking programs using Parental Controls is a 3-step process. First, you must turn Parental
Control on; second, you must enable your PIN; and third, you must select programs to be blocked.
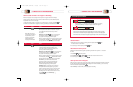
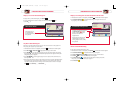
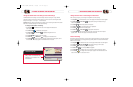
Turn Parental Control On and Off
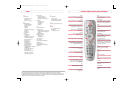
1. Press Menu . The Quick Settings menu appears.
2. Press Move Up or Move Down to highlight the option Turn OFF/ON Parental Control.
3. Press Select to change the Parental Control setting to ON or OFF.The PIN Entry
screen appears.
• When Parental Control is on, only those who know your PIN can view programs that you’ve
selected for blocking.
• When Parental Control is off, anyone can view any program.
4. Press the numeric keys on the remote control and enter your 4-digit PIN. The PIN Entry
screen disappears.
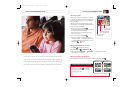
Note: These symbols indicate the status of the Parental Control feature:
A Closed Lock on the channel banner indicates that the Parental Control feature
is on and that this channel or program is blocked.
An Open Lock indicates that the Parental Control feature is off and that this
channel or program is set to be blocked, but is not currently blocked.
Note: The Parental Control feature must be on in order to block programs. However, as a precaution, DVR
automatically activates the Parental Control feature whenever the DVR is powered off and powered on
again. When the Parental Control feature is on, you must enter your 4-digit personal identification
number (PIN) to watch a blocked program.
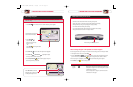
Enable your PIN for Parental Control
1. Press Menu twice on your remote control to access the General Settings menu.
2. Press Move Down to highlight Block: PIN.
3. If PIN shows “Enabled,” just hit exit and proceed to step 6. If PIN shows “Disabled,” then press
to select “Enabled.”
4. When prompted for a PIN, enter a 4-number code.
5. You will be prompted to re-enter your PIN to confirm the code.
6. Press exit or, if you wish to block programs, go to Select Programs to be Blocked.
MenuMenu
MenuMenu
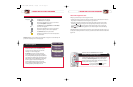
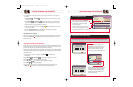
Select Programs to Be Blocked
You can select programs to block by channel, rating, time of day, or any combination of these methods:
1. Press Menu twice on your remote to access the Settings menu.
2. Press Move Up or Move Down to highlight one of the following options:
• Block:Channels blocks all programs on a specific channel.
• Block:Rating blocks all programs according to the rating assigned to the program, such
as G, PG, PG-13, or R.
• Block:Time New blocks all programs broadcast during a specific time of day.
3. Press Select .A Pin Entry screen appears.
4. Press the number keys to enter your 4-digit Personal Identification Number (PIN) or create one.
A block menu (for the option you selected in step 2) appears.
5. To block by channel or rating, select Block:Channels or Block:Rating. Press Move Up or
Move Down to highlight the channel, rating, or date you want to block. Or, if your local Comcast
system allows, you may select a channel by pressing the numeric keys on your remote control.
6. Press Select . DVR indicates the channel or rating is blocked. If you’re blocking a broadcast
time, skip to step 8.
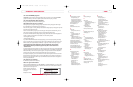
Note: DVR indicates a blocked channel or blocked rating in the following ways:
• Blocked channels: The channel number is listed in the right column on the General Settings menu, and
a Closed Lock symbol appears in the CHANNELS column next to the channel you selected.
• Blocked ratings: A Closed Lock symbol appears in the RATING column next to the rating you selected.
7. Continue this process of highlighting and selecting the channels or ratings you want to block. When all
those channels and ratings have a Closed Lock symbol next to them, press Accept to have
DVR accept your blocks. Go to step 10.
8. To block by time, select Block:Time New. In the START column on the General Settings menu, change
the time shown to the time you want the block to start by following this process:
A. Press Move Left or Move Right to highlight the one you want to change (hours, minutes,
and A.M. or P.M.).
B. Press Move Up or Move Down to change the setting. Or, if your local Comcast system
allows, you may select a setting by pressing the numeric keys on your remote control.
C. Repeat this process to change each setting as necessary.
D. When the correct START time is shown, press Select . The time you want to start blocking
programs appears in the START column and the cursor moves to the STOP column.
MenuMenu
1676-DVR SA USER GUIDE R20 12/8/03 1:47 PM Page 30