


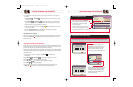

Change the Save Time of a Recording You Have Saved
After recording a program, you can change how long DVR will save the recording:
1. Press My DVR if the Recorded List screen is not displayed. The Recorded List screen appears.
2. Press Move Up or Move Down to highlight the recording with the Save Time you
want to change.
3. Press Select . The Recording Options screen appears.
4. Press Move Up .The option Change Save Time is highlighted.
5. Press Select .The Save Time screen appears.
6. Press Move Up or Move Down to highlight the new Save Time.
7. Press Select . In the Information area of the screen, the message “One moment please”
appears, and the new Save Time displays on the Recorded List screen.
Erase a Recording
Permanently erasing programs that you no longer want to watch creates space to record and store other
programs. If DVR becomes full, some programs may be partially saved or not saved at all. DVR holds at
least 30 hours of programs.
1. Press My DVR if the Recorded List screen is not displayed. The Recorded List screen appears.
2. Press Move Up or Move Down to highlight the recording you want to erase.
3. Press Select . The Recording Options screen appears.
4. Press Move Down twice. The option Erase is highlighted.
5. Press Select . The message “Are you sure you want to erase this recording?” appears.
6. Press Yes, Erase . The message “One moment please” appears in the Information area of the
screen, and the program is removed from the list.
MANAGE PROGRAMS AND RECORDINGS MANAGE PROGRAMS AND RECORDINGS
37
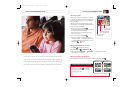
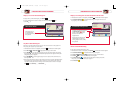
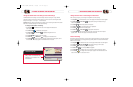
After you select a new default Save Time,
DVR displays your new selection in the
Information area.
Save time is 1 Day
Press to set how long future
recordings will be saved.
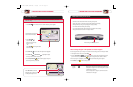
Schedule Recordings Recorded List
Preferences
Sort Recorded List alphabetically
Change Save Time for future recordings
Schedule a new Manual Recording
Options
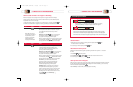
Change the Default Save Time Setting for Future Recordings
The DVR default Save Time setting is set to automatically save each recording for 14 days. DVR then
erases the recording to make space for other programs you want to record. You can change the default
setting from 14 days to 1, 2, or 7 days — or to “Until erased.”
Important: When you change the default Save Time setting, all future recordings recorded with the default
Save Time will be saved according to the new Save Time setting.
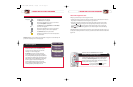
To change the default Save Time setting:
1. Press My DVR if the Recorded List screen is not displayed. The Recorded List
screen appears.
2. Press Preferences . The Preferences screen appears.
3. Press Move Up or Move Down to highlight “Change Save Time for
Future Recordings.”
4. Press Select . The options for Save Time appear.
5. Press Move Up or Move Down to highlight your desired Save Time.
6. Press Select . The Save Time options disappear, the Preferences screen appears, and the
new default Save Time setting appears in the Information area of the screen.
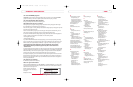
B
Preferences Screen
1676-DVR SA USER GUIDE R20 12/8/03 1:47 PM Page 36