16
Initial Installation
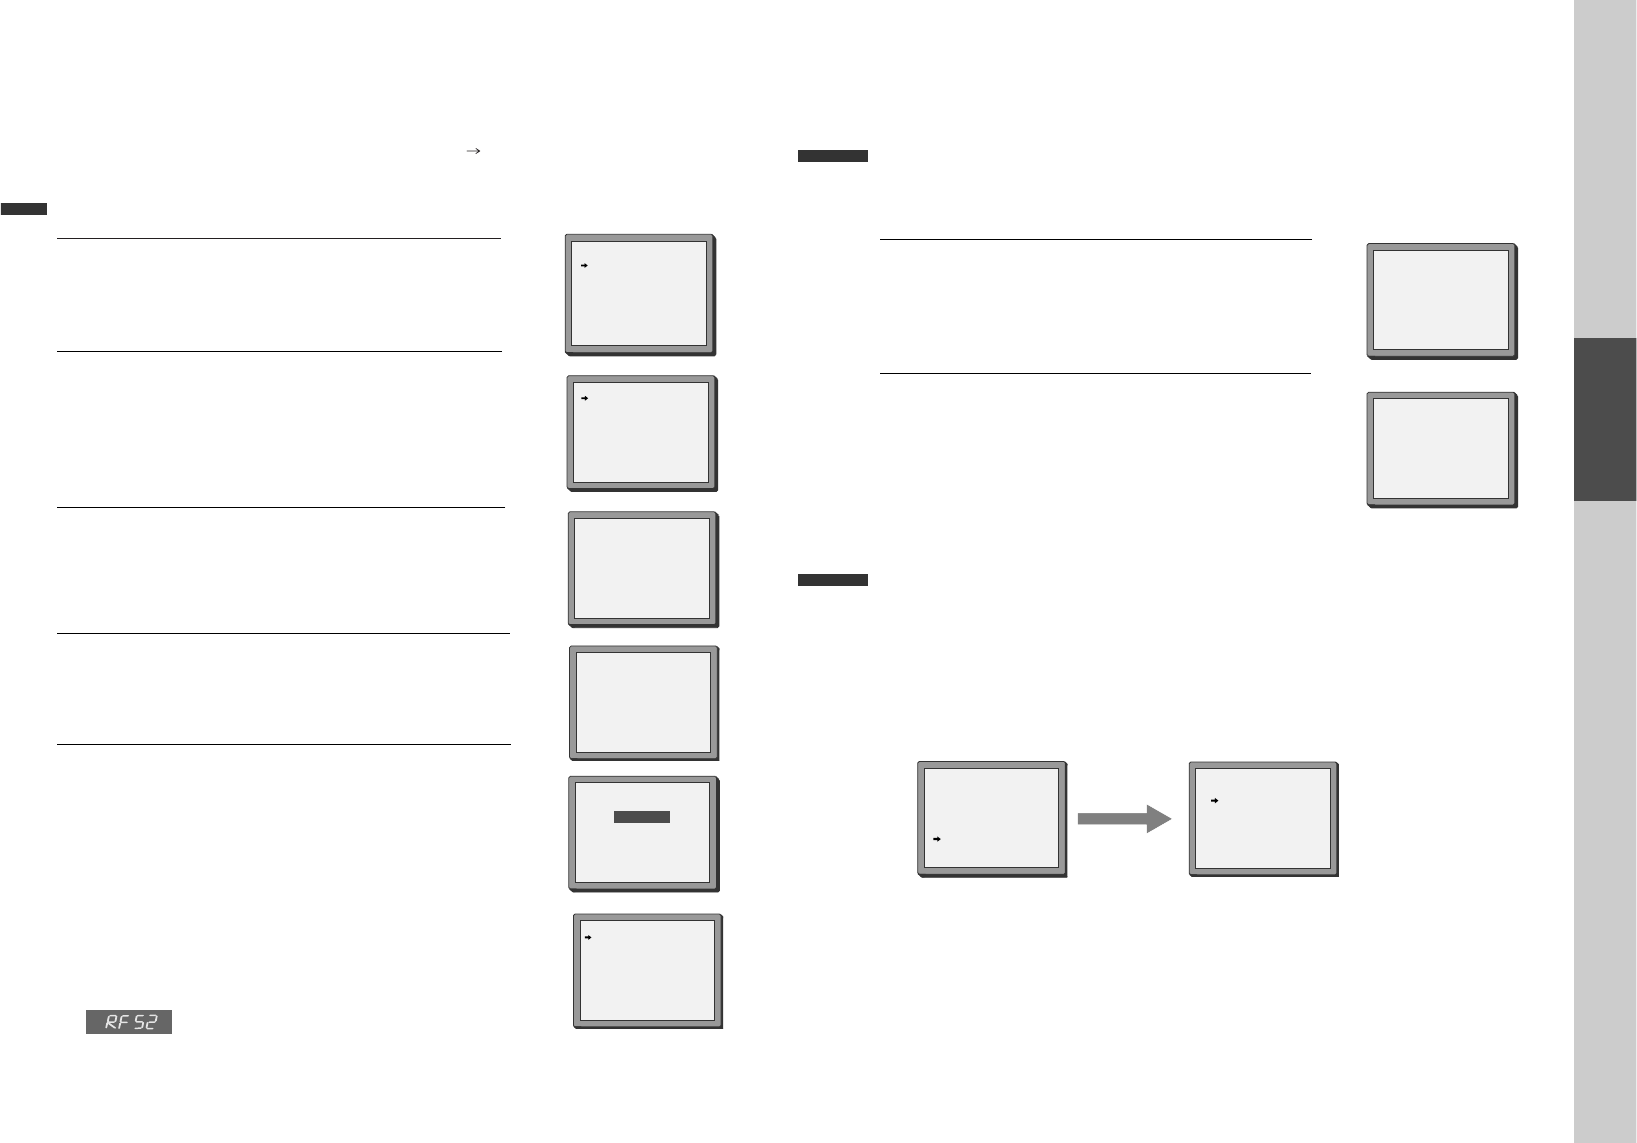
Setting up the player
■ Switch the TV on.
■ You can also start "AUTO SET" in the SETUP "PR PRESET" "AUTO SET".
■ To tune in new stations (manual tuning) and to enter station names see page 23-24.
LANGUAGE SET
ENGLISH
DEUTSCH
ITALIANO
ESPAÑOL
FRANÇAIS
NEDERLANDS
PR+/-:SELECT
OK:CONFIRM SETUP:END
COUNTRY SET
BN
DNL
DK S
ESF
GR CH
ITR
LUX OTHERS
PR+/-:SELECT
OK:CONFIRM SETUP:END
SETUP:END
PLEASE WAIT...
CH 25
RF OUTPUT SET
0-9:SELECT(21-69)
OK:CONFIRM SETUP:END
CURRENT CH 52
RECOMMENDED CH 54
You should see this picture the first time you switch on the TV
and player.
Choose your language.
1
Then choose your country.
For selecting the country, refer to the followings.
2
OK for "AUTO SET!".
"AUTO SET" tunes in all the stations you can receive in your
country and sorts them in an order common for your country.
Clock is automatically set.
3
If other stations are positioned on near the current RF OUTPUT
CH, the guide message appears automatically.
The player recommends the optimal RF OUTPUT CH number
automatically.
4
B: Belgium
D: Germany
DK: Denmark
E: Spain
GR: Greece
I: Italy
LUX: Luxembourg
N: Norway
NL: Netherlands
S: Sweden
SF: Finland
CH: Switzerland
TR: Turkey
Press the [OK] button to confirm the recommended PR.
Should you wish the stations to have the same numbers as those
used on the TV, follow the instructions in "Sorting programme
locations" on page 24.
Else ...
exit the basic installation function and enjoy your player.
5
PLEASE CHANGE THE TV
CH TO 54.
IMPORTANT!
MANUAL SET
PR01 ARD PR08 P-08
PR02 ZDF PR09 P-09
PR03 P-03 PR10 P-10
PR04 P-04 PR11 P-11
PR05 MTV PR12 ----
PR06 P-06 PR13 ----
PR07 P-07 PR14 ----
PR+/-:SELECT
OK:CONFIRM SETUP:END
• If you don´t see this picture, because you don´t use a SCART cable,
search this picture now (CH 52) with the station tuning functions of
your TV set (see its user manual).
• In case of interference problems on CH 52, type in an
other transmission channel between 21 and 69 using
the number buttons.
Basic Operation
17
■ Press [VCR] button on the remote control to change into VCR Mode and follow the procedure
below.
Call the player’s "MAIN SETUP",
choose "VCR SETUP", then "CLOCK SET".
1
Move to the position you want to change and type in the
new values.
Wait a few seconds after typing a one-digit number.
2
Store with [OK] button and exit with [SETUP] button.
CLOCK SET
0-9:SETUP (HOUR)
</>:CORRECT SETUP:END
TIME - - : - -
DATE - - / - - /- - - -
CLOCK SET
0-9:SETUP (HOUR)
</>:CORRECT
OK:CONFIRM SETUP:END
TIME 06:05
DATE 10/03/2002(SUN)
Setting time and date
Setting time and date / Auto clock
■ Auto Clock is only available for models with the VPS/PDC function (see page 25).
Some broadcasting stations may send the time and date along with the VPS/PDC data. The video will
automatically use this time and date during the initial setting up procedure during normal use, and every time
you switch the video off at the mains. If you find that this time and date is incorrect you can remove this feature
by following the steps below changing it to OFF mode, you will then have to manually set the time and date, see
above.
AUTO CLOCK
ON
OFF
PR+/-:SELECT
OK:CONFIRM SETUP:END
Setting Auto clock
VCR SETUP
CLOCK SET
LANGUAGE SET
RF OUTPUT SET
16:9 SET
OSD ON/OFF
AUTO CLOCK
PR+/-:SELECT
OK:CONFIRM SETUP:END


