


QSD2308L/QSD2316L DVR User’s Manual
50
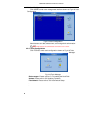
6.1.2 On WAN
There are two ways that the DVR can be connected to the internet.
1. Connect the DVR to internet through a router or virtual server.
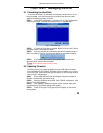
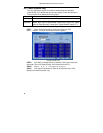
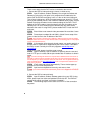
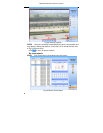
STEP1 Input IP address, Subnet, Gateway. You can get the Subnet and
Gateway by going to the run option on a computer that is attached to the
same router as the DVR and typing “cmd” or in the run box and clicking ok.
This will open a dialog box. At the command prompt type “ipconfig”. This will
show you the Gateway, which is the network IP address of the router, and the
Subnet. Enter these numbers into the network settings of the DVR. The IP
address of the DVR needs to have the same first 3 sets of numbers as the
Gateway, but a 4
th
set of numbers that is different then any other device
attached to the router. If using DHCP, please enable DHCP in both the DVR
and router.
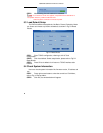
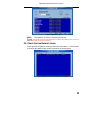
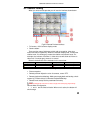
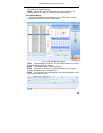
STEP2 Enter Video to set network video parameters like resolution, frame
rate etc.
STEP3 Forward port numbers 80 and 2000 in Virtual Server setup of the
router or virtual server to the IP address of the DVR.
Note: The procedure to forward ports is different in different routers and servers please
check your router manual. You can also find instructions on forwarding ports on most popular
routers at www.portforward.com.
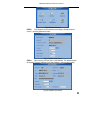
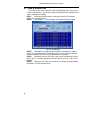
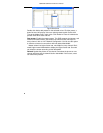
STEP4 If you want to utilize dynamic domain name, you need to apply for a
domain name in a DNS server supported by the DVR or router. Then add to
the DVR or router. Currently this unit only supports www.dns2p.com or
www.88IP.net.
To set up the router, please check the router manual.
STEP5 Open IE browser, input IP address or dynamic domain name and
enter. If HTTP port is not 80, add the port number after IP address or domain
name.
Note: If you are accessing the DVR from a computer that is attached to the same router as
the DVR you need to enter the IP address of the DVR, if you are accessing the DVR from a
remote computer you need to enter the internet IP of the router. You can get this address by
going to a website such as www.myipaddress.com from a computer that is attached to the
same router as the DVR.
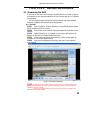
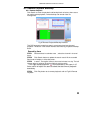
STEP6 IE will download ActiveX automatically. Then a window pops up
and asks for user name and password.
STEP7 Input name and password correctly, and enter to view.
Note: If you cannot download and install ActiveX, please refer to
Appendix A FAQ Q7.
2. Connect the DVR to internet directly.
STEP1 Input IP address, Subnet, Gateway gotten from your ISP. If using
ADSL, please input user name and password, and click OK. The DVR will
connect to the server and show “connection succeeds”.
STEP2 The following steps are the same as STEP4-7 of the connection
way above.