


Digital Video Recorder User Manual
10
2.5 Controlling with Mouse
2.5.1 Connect Mouse
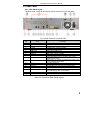
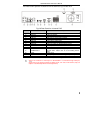
DVR supports PS/2 or USB mouse through the ports on the rear panel, please
refer to Fig 2.10 Remote Control.
Notice: If mouse is not detected or does not work, try the following:
1. Unplug/re-plug several times
2. Power off/on several times
3. Try another mouse
2.5.2 Using a Mouse
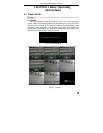
The structure of the main menu is shown in Fig 2.10 Remote Control
In live Mode:
Click left button on one camera to display full screen. Click again to return to
the previous screen display.
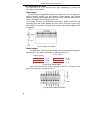
Click right button to show the control bar at the bottom of the screen as Fig
2.10 Remote Control. Here are all the control and setup options. Click right
mouse again to hide the control bar.
In Setup Mode:
Click left button to enter. Click right button to cancel setup, or return to the
previous screen.
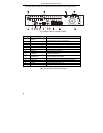
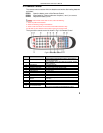
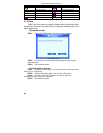
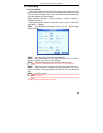
If you want to input a value, move cursor to the blank and click. An input
window will appear as Fig. 2.11. The menu supports number, letter and symbol
input.
Fig 2.11 Digital Numbers and Letters Input Window
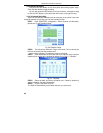
Users can change some values by using the mouse wheel, such as time.
Move cursor onto the value, and roll the wheel when the value changes.
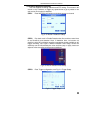
The menu supports mouse drag. i.e. Set motion detection area: click
customized, hold left button and drag to set motion detection area. Set schedule:
hold left button and drag to set schedule time
In playback:
Click left button to choose the options. Click right button to return to searching
mode.
In backup:
Click left button to choose the options. Click right button to return to live.
In PTZ control:
Click left button to choose the buttons to control the PTZ. Click right button to
return to searching mode.