


QSTD2400 Series DVR User’s Manual
43
CHAPTER 6 Remote Surveillance
6.1 Accessing the DVR Remotely
To view remotely the DVR must have the network configuration setup and then
connect with LAN or internet. Please refer to 4.2.7 Network Configuration.
This unit supports IE browser, no client software is installed. In addition, it
supports XP and Vista.
6.1.1 Accessing the DVR on LAN (through a network)
STEP1 Input IP address, Subnet, Gateway. If using DHCP, please enable
DHCP in both the DVR and router. To enter a static IP address in the DVR go to
the run option on a computer attached to the same router as the DVR and type
cmd to get to a command prompt. Then at the cursor type ipconfig to get the
network configuration of the computer which will include the IP address of the
computer, the gateway, which is the IP address of the router, and the subnet
mask. You will assign the DVR the same gateway and subnet mask as the
computer and will assign the DVR an IP address that will have the same first 3
sets of numbers as the gateway, but the fourth set of numbers has to be different
then any other device attached to the router. If the forth set of numbers on the
computer’s IP is a 2 digit number, you probably want to assign the computer a
forth number of 100 or higher, if the computer’s IP address ends in number in the
100s then you probably want to assign the DVR a forth number of 200.
STEP2 Enter Video to set network video parameters like resolution, frame
rate etc.
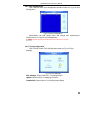
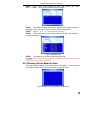
STEP3 Open IE browser on a computer on the same LAN. Input the IP
address of the DVR in IE address blank and enter.
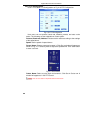
STEP4 IE will download an ActiveX control automatically. Then a window
pops up and asks for user name and password.
Notice: If you cannot download and install ActiveX, please refer to
Appendix A FAQ Q7.
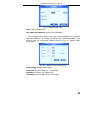
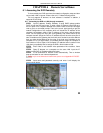
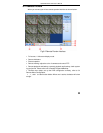
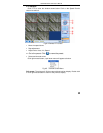
STEP5 Input name and password correctly, and enter. It will display the
screen shown below.
Fig 6.1 View with IE browser