


8
Need help? Call 800-305-2204
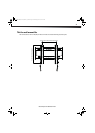
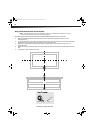
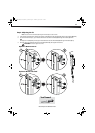
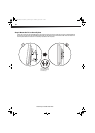
Step 2 - Option 2: Installing on a solid concrete or concrete block wall*
Note: Mount the wall plate directly onto the concrete surface.
1 At the wall height you determined in the previous step, align the wall plate template (R) against the wall, make
sure that it is level, then tape it to the wall. Use a pencil to mark the lag bolt locations (2), then remove the wall
plate template.
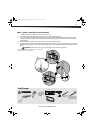
2 Drill pilot holes to a depth of 3" (75 mm) using a 3/8 in. (10 mm) diameter masonry drill bit.
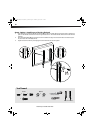
3 Insert concrete wall anchors (F) into the pilot holes and use a hammer to make sure that the anchors are seated
flush with the concrete surface.
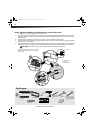
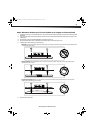
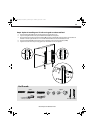
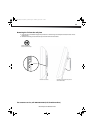
4 Align the wall plate with the anchors. Place washers (E) over the screw holes in the wall plate, insert lag bolts (D)
through the washers, then tighten the lag bolts only until the washers are pulled firmly against the wall plate.
CAUTION: Avoid potential injuries or property damage. DO NOT over-tighten the lag bolts (D).
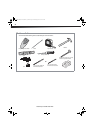
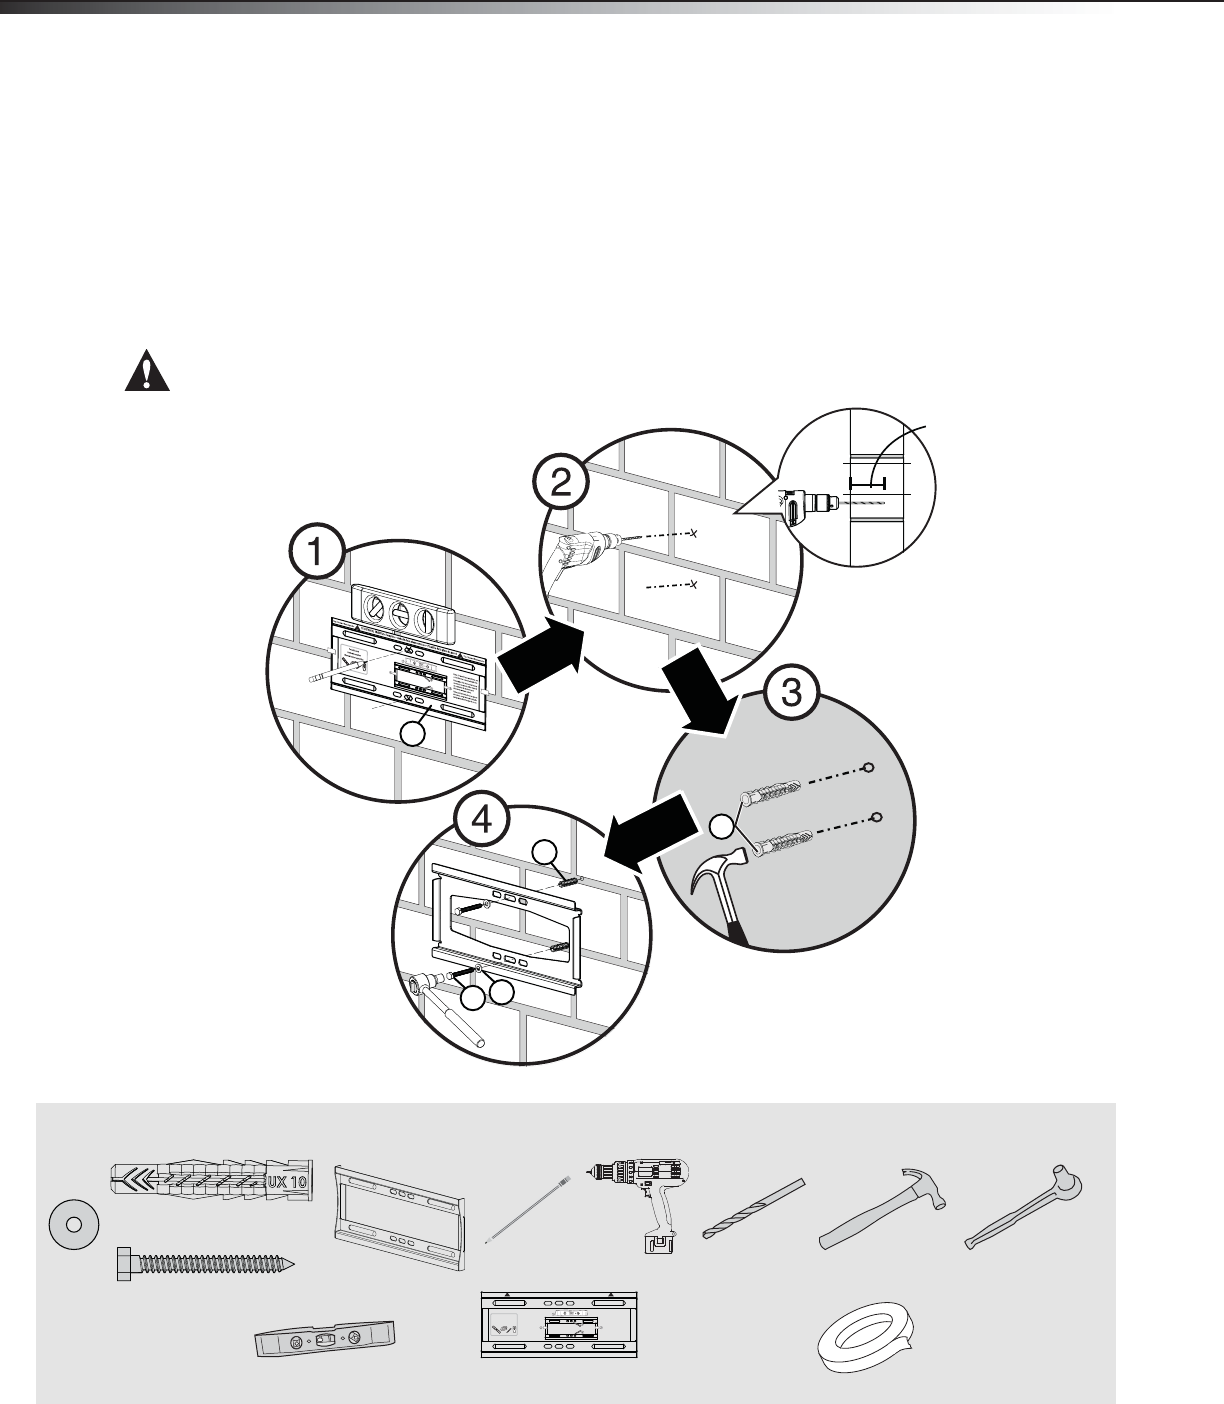
Yo u’ l l n e e d :
D
E
F
F
R
Never drill into
the mortar
between blocks.
3" (75 mm)
* Minimum solid concrete thickness: 8 in. (203mm).
* Minimum concrete block size: 8 x 8 x 16 in. (203 x
203 x 406 mm).
E (2)
D (2)
Pencil
Drill
Socket wrench with
1/2" (13 mm) socket
or adjustable wrench
3/8" (10 mm)
masonry drill
bit
Level
Hammer
F (2)
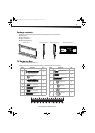
Top / Dessus / Vista superior Top / Dessus / Vista superior
DX-DRTVM102 Wall Plate Template • Gabarit de la plaque murale • Plantilla de la placa de pared
Note: For wood frame installations, use
a stud nder to locate wood studs rst.
Remarque : Pour des installations sur
des structures en bois, utiliser d'abord
un localisateur de montants pour
détecter un montant en bois.
Nota: para las instalaciones en marcos
de madera, use primero un localizador
de viga para ubicar las vigas de pared.
V1 13-0141
Tools Needed
Outils nécessaires
Herramientas requeridas
R Wall plate template
A Wall plate
Tape
DX-DRTVM102_12-1058_MAN_V3_ENG.fm Page 8 Wednesday, April 10, 2013 3:14 PM