


34
Computer Input
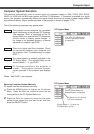
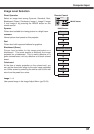
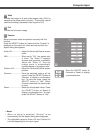
Store
Exit the Image Adjust Menu.
Quit
To store the adjusted data, select Store and press the
SELECT button. Select a level from Image 1 to 4 with the
Point
▲▼ buttons and press the SELECT button.
A confirmation box appears and then select [Yes].
Stored data can be called up by selecting "Image" in the
Image Level Selection on page 31.
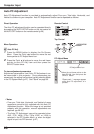
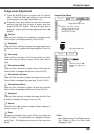
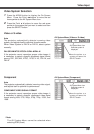
This projector has the picture screen resize function, which
enables you to customize the image size.
Press the MENU button to display the On-Screen
Menu. Press the Point
◄► buttons to move the red
frame pointer to the Screen Menu icon.
Press the Point ▲▼ buttons and move the red frame
pointer to the function that you want to select and then
press the SELECT button.
2
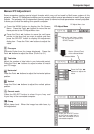
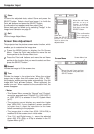
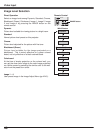
Screen Size Adjustment
Provide the image to fit the screen size.
Normal
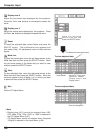
True
Provide the image in its original size. When the original
image size is larger than the screen size (1024 x 768 ),
this projector enters panning mode automatically. Pan the
image with Point
▲▼◄► buttons. When adjusted, the
arrows turn red. When reached to the correction limit, the
arrows disappear.
1
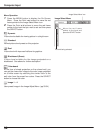
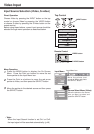
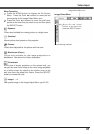
Move the red frame
pointer to any of
Image 1 to 4 where
y ou wa nt t o se t
and then press the
SELECT button.
The confirmation
bo x a ppea rs,
then select [Yes].
Store item
Press the SELECT
b ut to n a t t hi s
item to store the
adjusted data.
Move the red frame pointer
to the function and press the
SELECT button.
Screen Menu
Screen Menu icon
Notes:
• This Screen Menu, except for "Normal" and "Custom",
cannot be operated when 720p(HDTV), 1035i (HDTV),
or 1080i (HDTV) is selected in the PC System Menu
(p.27).
•
The projector cannot display any resolution higher
than 1600x1200. If your computer’s screen resolution
is higher than it, reset the resolution to the lower
before connecting to the projector.
•
The image data in other than XGA (1024x768) is
modified to fit the screen size in initial mode.
•
True, Full, and Digital zoom +/– cannot be selected
when 480i, 575i, 480p, or 575p is selected in the PC
System Menu (p.27).