8
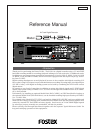
Model D2424 Reference Manual (Main features/Precautions)
Precautions
• Be sure to connect the recorder to the power supply
specified in the Specifications section of this
Reference Manual. Do not use an AC outlet of any
other voltage.
• Do not connect the recorder to the same AC outlet
to which devices that could generate noise (such
as a large motor or dimmer), or the devices that
consume a large amount of power (such as an air
conditioning system or large electric heater) are
connected.
• If you use the recorder in an area with a different
power voltage, first consult your dealer or the
nearest FOSTEX service station. You can use the
recorder with a power frequency of 50Hz or 60Hz.
• It is very dangerous to use a power cord that is
frayed or damage. In such a case, stop using the
recorder immediately and ask your dealer to repair
the cord.
• To avoid possible electric shock and damage to
the recorder, avoid contact with water or other
liquids, or do not handle the power plug while
your hands are wet.
• To prevent possible electric shock and damage to
the recorder, do not remove the main unit cover
or reach the inside the unit.
• Do not let water or other liquid, or metal objects
such aspins, accidentally enter the inside of the
recorder because this may lead to electric shock
or damage. Should water enter the inside of the
recorder, remove the power plug from the AC
outlet, and consult your dealer or the nearest
FOSTEX service station.
• To prevent damage to the recorder, be sure to
power on the connected devices first, then turn
on the power to the recorder.
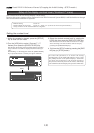
• Before turning the power off to the recorder, first
quit SETUP mode and make sure that the recorder
section is stopped.
Especially, never attempt to turn off the power to
the recorder while the hard disk is accessing data
(the HD ACCESS LED is lit or flashing). Otherwise,
not only will you lose recorded data, but you may
damage to the recorder.
FOSTEX is not responsible for the data lost during
operation of the recorder.
• Before you change the location of the recorder,
pack the recorder in the shipping carton or an
impactresistant case. Make sure that the recorder
is kept free from external vibration or impact since
the recorder is very sensitive to vibration.
• Do not install the recorder in locations subject to
the following:
* Extremely high or low temperature, or
significant changes in temperature.
* Excessive humidity or dust.
* Excessive changes in power supply voltage.
* Unstable or significantly vibrating or shaking
surfaces.
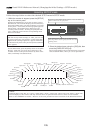
* Near a strong magnetic field (such as a TV or
speaker).
• If you move the recorder from a place with an
excessively low temperature to a warm place, or if
you use the recorder in a room in which the
temperature varies significantly during winter,
condensation may occur on the hard disk or other
parts. In such cases, leave the recorder for about
an hour in the new location before you turn on
the power.
Note on repair
• This recorder does not use any parts that users
can repair easily. Contact your dealer or the
nearest FOSTEX service station to ask about repairs.
• Use the packing carton designed for the recorder
when you transport the recorder to the dealer for
repair or return.
If you have discarded the packing box, try to pack
the recorder completely using shock absorbing
materials. Fostex is not responsible for malfunction
or damage due to incomplete packaging or caused
during transport.
About copyrights
• It is prohibited by law to use any part of a CD
recording or video images or audio data for which
copyright is possessed by a third party for
commercial purposes such as contents, broadcasts,
sales, or distribution- any purpose other than for
your personal pleasure.
About damage
• FOSTEX is not responsible for any “direct damage”
or “indirect damage” caused by using the recorder.