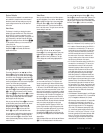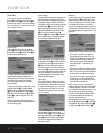
Audio Menu
In the Main menu, use the
K/L
Navigation
Buttons
9
to highlight the Audio menu; press the
N
Navigation Button
9
or Enter Button
9
to
access the Audio submenu. The left column shows the
items in the Audio menu. The right column shows the
current setting for each item.
Dynamic Range
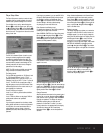
Select the Dynamic Range menu with the
K/L
Buttons
9
, if it is not already highlighted; press the
N
Navigation Button
9
or Enter Button
9
to
access the Dynamic Range submenu.
This setting enables Dolby Digital recordings to be
played back with full dialogue intelligibility while
reducing peak levels. This smooth level compression
prevents abrupt loud transitions from disturbing
others without reducing the impact of the digital
source perceptibly.
To change the Dynamic Range setting, use the
K/L
Navigation Buttons
9
to highlight DYNAMIC
RANGE and then press the
N
Navigation Button
9
. Press the
K/L
Navigation Buttons
9
to
select ON or OFF, and then press the
M
Navigation
Button
9
to enter the setting and return to the
Audio menu.
NOTE: If selected, Dynamic Range compression is
only active when a Dolby Digital signal is detected and
only for the analog outputs.
Audio Language
This step will define the default audio language (if the
disc contains different language tracks). The option
default will select the audio language originally encoded
as the default language on the disc; most times this
will be English. Choosing an audio language by pressing
the Audio Button
5
on the remote control (see
page 25) will change this setting only temporarily.
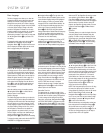
Select AUDIO LANGUAGE with the
K/L
Buttons
9
, if it is not already selected; press the
N
Navigation
9
or Enter Button
9
to access the
Audio Language submenu. The right column displays
the current setting (highlighted) and the options.
If you are playing a disc with a language other than
English, French, German, Italian or Spanish, press the
L
Navigation Button
9
until the word OTHER is
highlighted. Next, press the
N
Navigation Button
9
and note the word OTHER will be replaced by
four dashes. Using the chart on page 33, press the
Numeric Keys
S
to enter the number corresponding
to the desired language. When the entry is complete, the
menu screen will display the word OTHER, but the
appropriate language will be selected as long as it is
present on the disc being played.
Digital Output
If your system includes 5.1 digital audio surround
decoding (Dolby Digital and/or DTS), select ORIGINAL
as the digital output. In that case all audio signals will
be outputted with their original format. If your system
only includes stereo and/or Dolby Pro Logic, select
PCM. When PCM is selected you will not be able to
use DTS soundtracks.
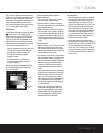
Select the Digital Output menu with the
K/L
Navigation Buttons
9
, if it is not already selected;
then press the
N
Navigation Button
9
or Enter
Button
9
to access the Digital Output submenu.
The right column displays the current setting (high-
lighted) and one option.
PCM Limit
Select the PCM Limit menu by pressing the
K/L
Navigation Buttons 9 until PCM LIMIT is high-
lighted. At this menu you will be able select the sam-
ple rate for the digital output of the DVD 25 so that it
is compatible with the circuitry in your receiver or
processor. Before making this setting you may want to
consult the Owner
’
s Manual for the receiver or proces-
sor to determine which type of digital signals it is com-
patible with.
With that information in hand, select one of these options:
• If your receiver or processor is not capable of
resolving digital inputs over 48kHz, or if you are
uncertain of the capabilities of your receiver, select
the 48kHz option. In this case, the DVD 25 will
down-sample any program material with higher
sample rates so that it is compatible with your
equipment.
• If your receiver or processor is capable of resolving
digital inputs up to 96kHz, select the 96kHz option.
Many, but not all, receivers manufactured within the
last two years are compatible with these signals.
• If your receiver or processor is capable of resolving
all digital inputs, up to 192kHz, select NONE. In
this case, all signals will be passed through at their
native rate without down-sampling.
NOTE: If you play a disc that is recorded with a
sample rate higher than 48kHz with either the NONE
or 96kHz setting when your receiver or processor is
not compatible with those types of signals you will not
hear any output even though the disc is playing
properly. In that case, change the setting to 48kHz
to complete compatability with all receivers and
processors, particularly older ones.
When all adjustments to the Audio menu are done,
press the
L
Navigation Button
9
until RETURN
is highlighted and then press the Enter Button 9
or simply press the
M
Navigation Button 9.
SYSTEM SETUP
18 SYSTEM SETUP


