


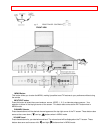


CONNECTING EXTERNAL VIDEO SOURCES - 19 -
NOTES:
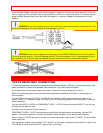
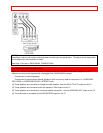
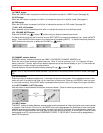
Completely insert the connection cord plugs when connecting to rear panel jacks. The picture that is played back will be
abnormal if the connection is loose.
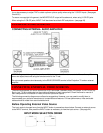
A single VCR can be used for VCR #1 and VCR #2, but note that a VCR cannot record its own video or line output. (INPUT
1 in example on page 13) Refer to your VCR operating guide for more information on line input-output connections.pg. 19
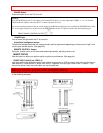
CONNECTING EXTERNAL VIDEO SOURCES (cont.)
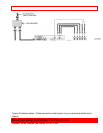
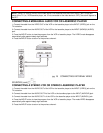
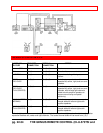
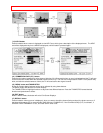
CONNECTING A LASERDISC PLAYER OR DVD PLAYER TO INPUT 2.
1. Connect the cable from the Y OUT of the Laserdisc or the DVD player to the INPUT 2 (Y) jack as shown on
the TV set below.
2. Connect the cable from the CB OUT or B-Y OUT of the Laserdisc or the DVD player to the INPUT 2 (CB) jack,
as shown on the TV set below.
3. Connect the cable from the CR or R-Y OUT or B-Y of the Laserdisc or the DVD player to the INPUT 2 (CR)
jack, as shown on the TV set below.
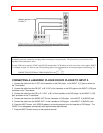
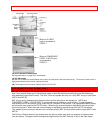
4. Connect the cable from the AUDIO OUT R of the Laserdisc or DVD player to the INPUT 2 (AUDIO/R) jack.
5. Connect the cable from the AUDIO OUT L of the Laserdisc or DVD player to the INPUT 2 (AUDIO/L) jack.
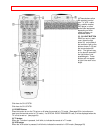
6. Press the INPUT button until VIDEO:2 appears, to view the program from the Laserdisc or DVD player. The
VIDEO:2 icon disappears automatically after approximately eight seconds.
7. Press the INPUT button to return to the previous channel.