40
NS-26L450A11/NS-32L450A11 26"/32" LCD, 1080p
www.insigniaproducts.com
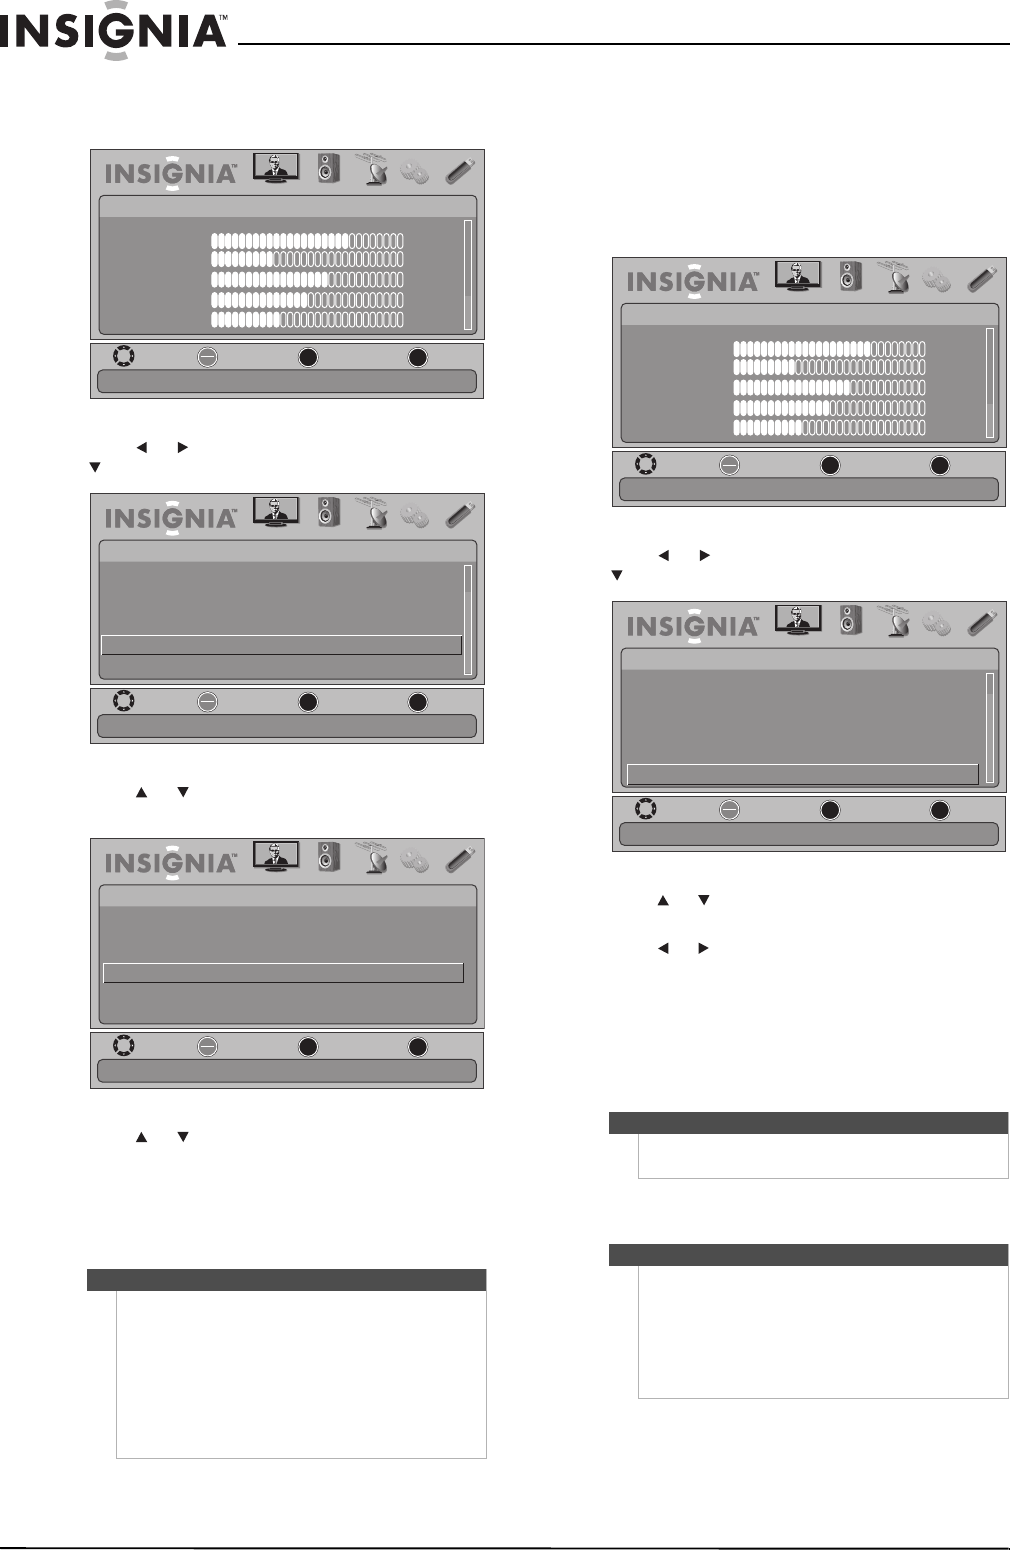
To display a list of INlink-compatible devices:
1 Press MENU. The on-screen menu opens.
2 Press or to highlight SETTINGS, then press
or OK/ENTER. The SETTINGS menu opens.
3 Press or to highlight INlink, then press
OK/ENTER. The SETTINGS-INlink menu opens.
4 Press or to highlight INlink Device Lists,
then press OK/ENTER. A list of the HDMI
CEC-compatible devices you have connected
appears.
5 Press MENU to return to the previous menu, or
press EXIT to close the menu.
Restoring settings to the defaults
When you restore default settings, all the settings
you have customized (except the password and
parental rating) are reset.
To restore settings to the defaults:
1 Press MENU. The on-screen menu opens.
2 Press or to highlight SETTINGS, then press
or OK/ENTER. The SETTINGS menu opens.
3 Press or to highlight Reset to Default, then
press OK/ENTER. A confirmation box opens.
4 Press or to select Ye s (to reset) or No (to not
reset), then press OK/ENTER.
5 Press MENU to return to the previous menu, or
press EXIT to close the menu.
Using USB
You can connect a USB device to your TV to view
compatible JPEG pictures.
Notes
HDMI cables must be used to connect HDMI
CEC-compatible devices to your TV.
The connected device’s HDMI CEC feature must be
turned on.
If you connect an HDMI device that is not HDMI
CEC-compatible, the INlink Control option does not
work.
Depending on the connected HDMI device, the
INlink Control option may not work.
MOVE
OK
ENTER
MENU
EXIT
EXIT
PREVIOUS
SELECT
PICTURE AUDIO CHANNELS SETTINGS USB
Mode
Brightness
Contrast
Color
Tint
Sharpness
PICTURE
Custom
70
40
60
0
40
Adjust settings to affect picture quality
MOVE
OK
ENTER
MENU
EXIT
EXIT
PREVIOUS
SELECT
PICTURE AUDIO
CHANNELS
SETTINGS USB
SETTINGS
Allow the TV to automatically control CEC devices connected to the TV via HDMI
Menu Settings
Input Labels
Computer Settings
Input Sensor On
INlink
Reset to Default
MOVE
OK
ENTER
MENU
EXIT
EXIT
PREVIOUS
SELECT
PICTURE AUDIO
CHANNELS
SETTINGS USB
SETTINGS•INlink
Go to device list to register new devices or remove devices from the list
INlink Control On
Device Auto Power Off On
TV Auto Power On On
INlink Device Lists
Note
Unless otherwise noted, all tasks in this section are
based on using the remote control.
Notes
• Never remove the USB device or turn off your TV
while viewing JPEG pictures.
• We recommend that you back up the data on
your USB device.
• The JPEG picture viewer only supports JPEG
format images (with “.jpg” file extensions) and
not all JPEG files are compatible with the TV.
MOVE
OK
ENTER
MENU
EXIT
EXIT
PREVIOUS
SELECT
PICTURE AUDIO CHANNELS SETTINGS USB
Mode
Brightness
Contrast
Color
Tint
Sharpness
PICTURE
Custom
70
40
60
0
40
Adjust settings to affect picture quality
MOVE
OK
ENTER
MENU
EXIT
EXIT
PREVIOUS
SELECT
PICTURE AUDIO
CHANNELS
SETTINGS USB
SETTINGS
Input Labels
Computer Settings
Input Sensor
INlink
Reset to Default
Menu Settings
On
Reset to Default
