


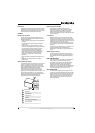
7
www.insigniaproducts.com
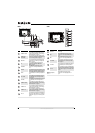
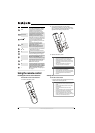
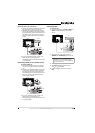
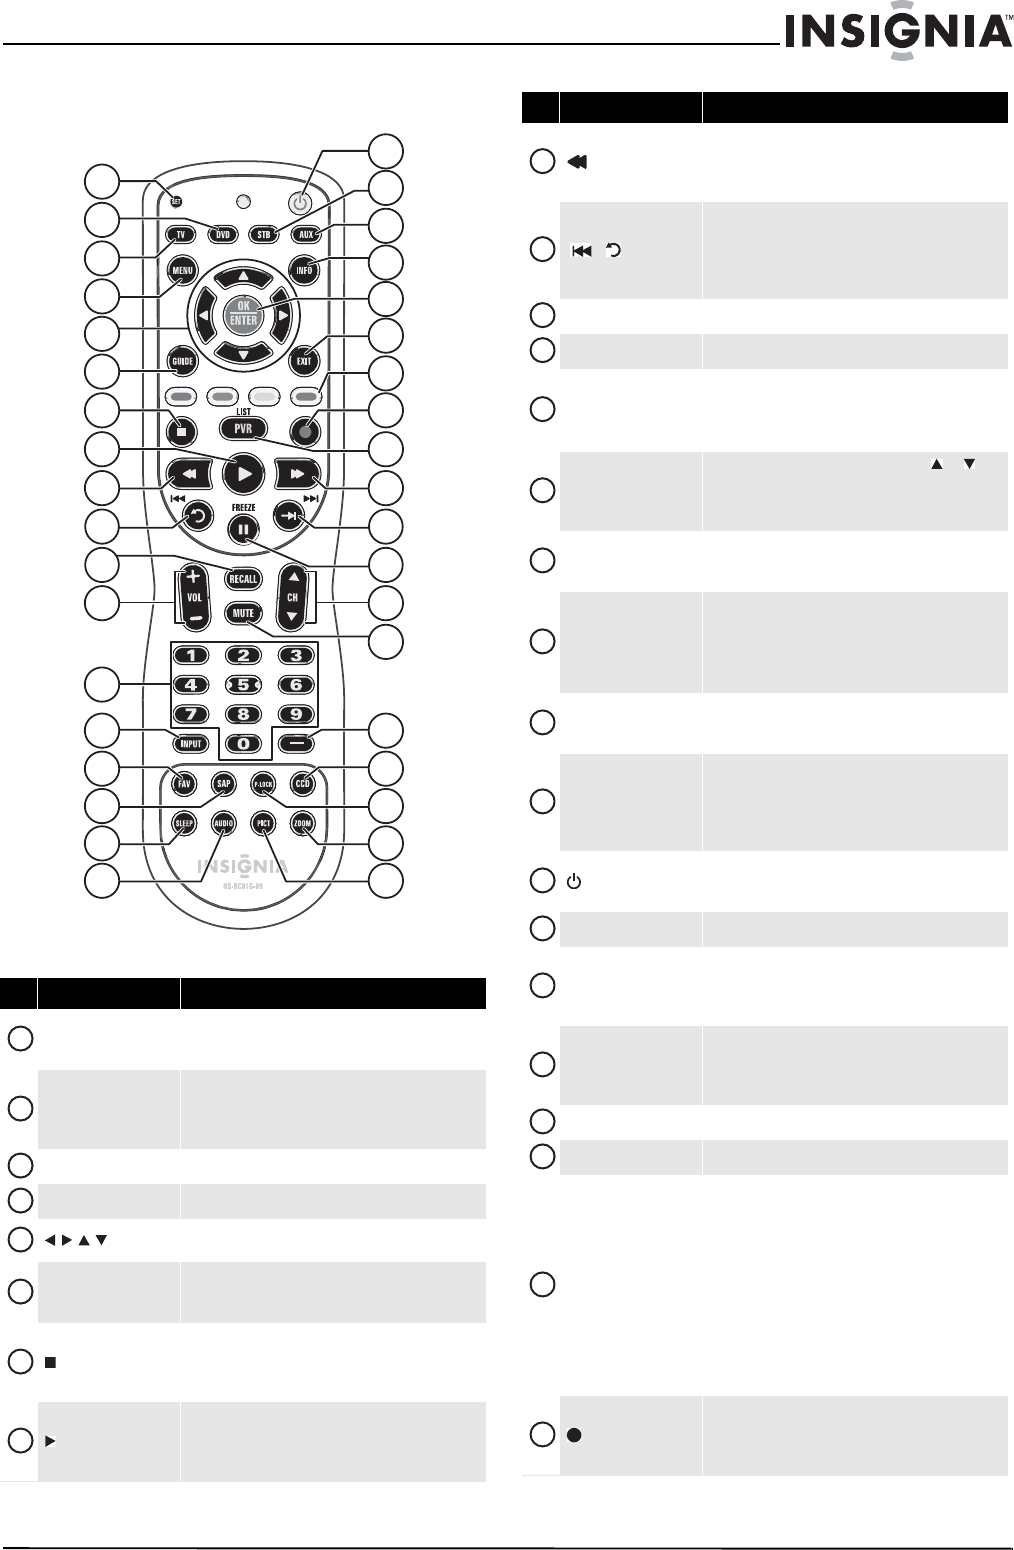
Remote control
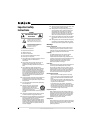
# Button Description
SET
Press to program the remote control to control
connected devices. For more information, see
“Programming your remote control” on page 31.
DVD
Press to control a connected DVD player. You must
program the remote control before this button works.
For more information, see “Programming your remote
control” on page 31.
TV
Press to control your TV.
MENU
Press to open the on-screen menu.
Press to move left, right, up, or down in on-screen
menus.
GUIDE
Press to display the program guide. For more
information, see “Displaying additional information”
on page 17.
(stop)
Press to stop playback on DVD, DVR, PVR, or CD
devices. You need to program the remote control to
control connected devices. For more information, see
“Programming your remote control” on page 31.
(play)
Press to start playback on DVD, DVR, PVR, or CD
devices. You need to program the remote control to
control connected devices. For more information, see
“Programming your remote control” on page 31.
TV VIDEO
COMP
HDMI
12
7
1
2
3
4
5
6
8
9
10
11
13
14
15
16
17
18
31
26
19
20
21
22
24
25
27
28
29
30
32
33
34
35
36
37
23
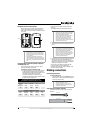
1
2
3
4
5
6
7
8
(fast reverse)
Press to fast reverse on DVD, DVR, PVR, or CD devices.
You need to program the remote control to control
connected devices. For more information, see
“Programming your remote control” on page 31.
/ (skip back)
In DVD, DVR, PVR, or CD mode, press to skip back to the
previous title or track. You need to program the
remote control to control connected devices. For more
information, see “Programming your remote control”
on page 31.
RECALL
In TV mode, press to return to the previous channel.
VOL+/VOL–
Press to increase or decrease the volume.
Numbers
Press to ener channel numbers and the parental
control password.
When programming the remote control, press to enter
device and programming codes.
INPUT
Press to open the Source List, then press or to
cycle through the available input sources. For more
information, see “Selecting the video input source” on
page 15.
FAV
Press to open the Favorite Channel list. For more
information, see “Setting up a favorite channel list” on
page 21.
SAP
In analog TV mode, press to select Stereo, Mono or
SAP. In digital TV mode, press to select the audio track
(language).
For more information, see “Adjusting the sound” on
page 18.
SLEEP
Press to set the sleep timer. You can select Off, 5, 10,
15, 30, 60, 90, 120, 180, or 240 minutes. For more
information, see “Setting the sleep timer” on page 29
AUDIO
When the Equalizer option is turned on, press to
toggle among different Equalizer modes. When the
Equalizer option is turned off, toggle to adjust the
treble, bass, or SRS TruSurround HD. For more
information, see “Adjusting the sound” on page 18.
(power)
Press to turn your TV on or off (standby mode). When
your TV is off, power still flows into it. To disconnect
power, unplug the power cord.
STB
Press to control a connected set-top box.
AUX
Press to control a connected device. You need to
program the remote control to control connected
devices. For more information, see “Programming your
remote control” on page 31.
INFO
Press to display TV status information, such as the
channel number, channel name (if available), or signal
source. For more information, see “Displaying
additional information” on page 17.
OK/ENTER
Press to confirm selections or changes
EXIT
Press to close the on-screen menu.
Video input buttons
TV—Press to select TV as the video source.
VIDEO— Press one or more time to select the device
connected the AV 1 VIDEO, AV 2 VIDEO, or S-VIDEO
jack.
COMP—Press one or more time to select the device
connected to the COMPONENT 1 or COMPONENT 2
video jack.
HDMI—Press one or more time to select the device
connected to HDMI 1, HDMI 2, HDMI 3, or HDMI 4.
For more information, see “Selecting the video input
source” on page 15.
(record)
In DVD, DVR, PVR, or CD mode, press to begin
recording. You need to program the remote control to
control connected devices. For more information, see
“Programming your remote control” on page 31.
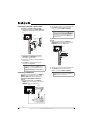
# Button Description
9
10
11
12
13
14
15
16
17
18
19
20
21
22
23
24
25
26