


34 EN
Master Page: Left
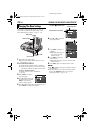
To use this player as a recorder
Dubbing from other devices in MPEG2 format is
possible if the connected device is another same
model of this unit. It is also possible to dub in
MPEG2 format from a D-VHS VCR, if the source
tape (D-VHS) has been originally dubbed from this
digital HD player in MPEG2 format.
● However, if signals on the D-VHS tape are
originally from an ATSC tuner etc., dubbing from a
D-VHS VCR in MPEG2 format is not possible.
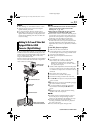
1 Perform step 1 to 4 of “To use this player as a
player” (੬ pg. 33).
2 Set “REC MODE” to “SP” or “LP”. (੬ pg. 26, 27)
3 Turn on the video unit’s power.
4 Insert the source cassette in the video unit.
5 Insert the recording cassette in this player.
6 Press and hold REC (7), then press 4/9 to
engage the Record Pause mode.
● The “” indication appears on the
screen.
7 Press 4/9 again to start recording.
● The indication rotates.
8 Press 4/9 again to engage the Record-Pause
mode.
● The indication stops rotating.
9 Repeat steps 7 – 8 for additional editing. Stop the
video unit and player.
NOTES:
DV to DV dubbing
● If a blank portion or disturbed image is played
back on the player during dubbing, unusual
images may be dubbed or the dubbing may stop.
MPEG2 to MPEG2 dubbing
● It is not possible to dub signals in MPEG2 format
from devices other than D-VHS VCRs or another
same model of this player.
● MPEG2 signals that are copy-guarded may not be
recorded with this player.
● When dubbing MPEG2 video to the player, image
may not appear on the LCD monitor. However, the
recording is performed properly.
Notes on dubbing to a D-VHS VCR
Dubbing cannot be conducted properly when
dubbing a tape which is recorded in both DV and
HD (or SD) mode. In this case, perform the
following procedure.
1) Disconnect the i.LINK cable.
2) Reset the i.LINK device number on the D-VHS
VCR.
● For the operation, refer to the instruction
manual of the D-VHS VCR.
3) Set “i.LINK OUT” to “SW” on this player.
(੬ pg. 26, 28)
4) Set the i.LINK Output Select Switch on this player
to “DV” to output scenes recorded in DV mode,
or “MPEG2” to output scenes recorded in HD or
SD mode.
5) Connect the i.LINK cable again.
6) Start playback on this player, and then start
recording on the D-VHS VCR.
Recording From The Middle Of A Tape
1) Play back a tape or use Blank Search (੬ pg. 17)
to find the spot at which you want to start
recording, then engage the Still Playback mode.
(੬ pg. 16)
NOTES:
● The time code cannot be reset.
● During fast-forwarding and rewinding, the time
code indication does not move smoothly.
● The time code is displayed only when “TIME
CODE” is set to “ON”. (੬ pg. 29)
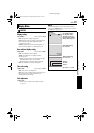
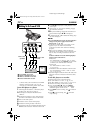
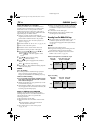
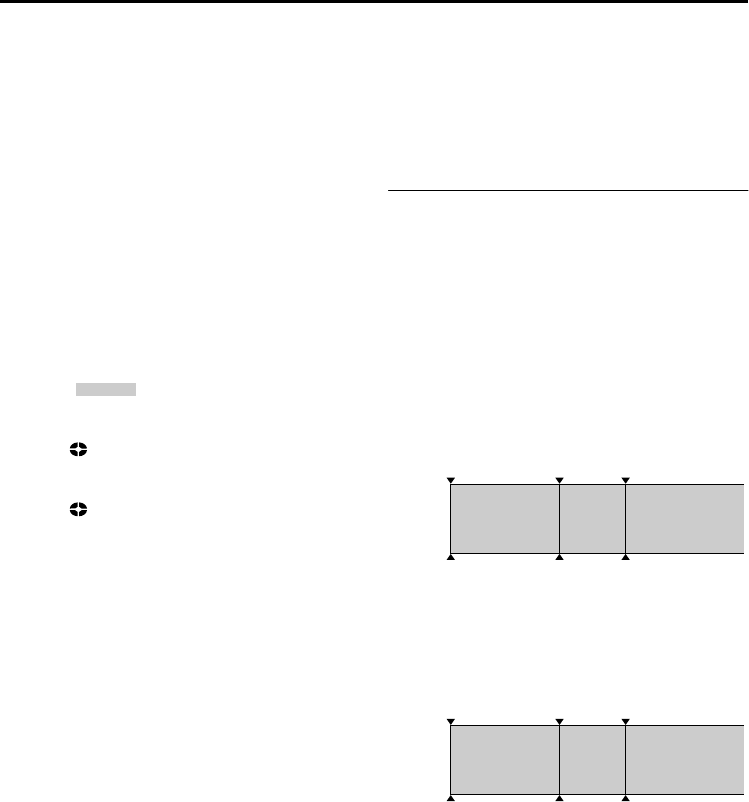
When a blank portion is recorded on a tape
Proper recording
i.LINK in
Time code
00:00:00
Tape
Already
recorded scene
Blank
Newly recorded
scene
Time code
05:43:21
Time code
00:00:00
Recording start
point
Recording stop
point
Recording start
point
Time code
00:00:00
Tape
Already
recorded scene
New
scene
Latest scene
Time code
05:43:21
Time code
05:44:00
Recording start
point
Recording start
point
Recording
start point
DUBBING (cont.)
CU-VH1E.book Page 34 Friday, March 26, 2004 1:55 PM