


32
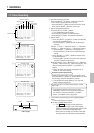
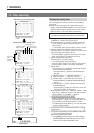
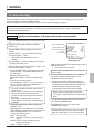
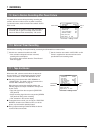
A LARM / SENSOR REC MODE
(ALARM REC) ON
(SENSOR REC) OFF
(REC MODE)
(DURATION) 180SEC
(BUZZER) OFF
(TAPE END MODE) STOP
PRESS (SHIFT, SET)
PRESS (MENU) TO END
6H
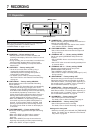
7-4 Alarm Recording
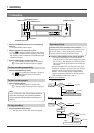
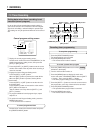
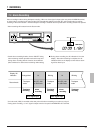
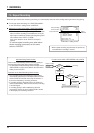
Connect an alarm sensor to the rear panel’s alarm input terminal.
Preparation
1 Press the [OPERATE] button to turn the operating mode
on.
Setting the function menu switches for the Alarm
Record mode
2 Press the [MENU] button to display the main menu
screen on the monitor.
3 Press the [SHIFT +/-] button to select <FUNCTION> and
press the [SET +/-] button.
[The function menu switch setting screen is
displayed.
4 Press the [SHIFT +/-] button to display the alarm/sensor
recording mode setting screen.
5 Select the item to be set with the [SHIFT +/-] button. Set
the value with the [SET +/-] button.
• Set <ALARM REC> to ON to activate the alarm
recording function. The AL REC indication in the
display lights.
• Select the alarm record mode.
Set the <REC MODE> to VHS Extended(6H),18H or
30H.
• Set the alarm recording duration.
Set duration to 5 sec., 15 sec., 30 sec., 60 sec.,
120 sec., 180 sec., TAPE END or MANUAL (for as
long as alarm signals are input).
* When the alarm recording time is set to MANUAL,
the alarm cue signal (index code) will not be
recorded correctly if alarm input lasts for less than
30 seconds.
* When alarm recording duration is set with an
external switcher, set the alarm recording duration
to MANUAL.
• To sound the buzzer during alarm recording, set
<BUZZER> to ON.
• Set the operation mode at tape end in the case when
alarm recording is executed even once with the menu
switch <TAPE END MODE> on the alarm/sensor
recording mode setting screen.
STOP : The tape stops.
REW : The tape is rewound to the beginning and
stops.
REPEAT : Recording continues from the beginning of
the tape.
EJECT : The tape is ejected.
6 After setting the function menu switches, press the
[MENU] button twice.
[The normal screen is restored.
Check the time and data shown on the monitor's on-
screen display.
Ⅲ If the time and date are not shown on the monitor or if
you want to change the display position, use the
<POSITION> function menu switch.
7 RECORDING
Alarm recording function
Alarm/sensor recording
mode setting screen
7 Select the timelapse recording mode with the [TIME
MODE] button on the front panel.
[ The selected recording mode is shown on the VCR's
display and the on-screen display.
8 Follow the procedures for "Basic recording operations"
on page 25.
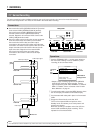
9 When an alarm signal is input to the rear panel's
ALARM IN terminal, alarm recording is executed as
specified.
0 To stop alarm recording and clear the alarm indication,
press the [AL/PL RESET] button.
• When the AL indication is lit on the display (during
alarm recording), press the [AL/PL RESET] button to
stop alarm recording. Timelapse recording is resumed
and the AL indication goes out. If the alarm buzzer is
on, it stops as well.
• When the AL indication is blinking on the display,
press the [AL/PL RESET] button. The AL indication
goes out.
! When the AL indication goes out, press the [AL/PL
RESET] button again to reset the alarm input/power loss
data.
* There may be some picture distortion at the start or
end of an alarm recording. This is not a malfunction.
Alarm recording duration
Buzzer
Tape end mode
Alarm recording mode