


34
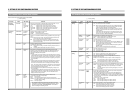
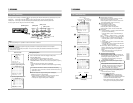
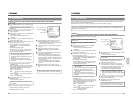
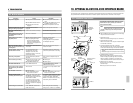
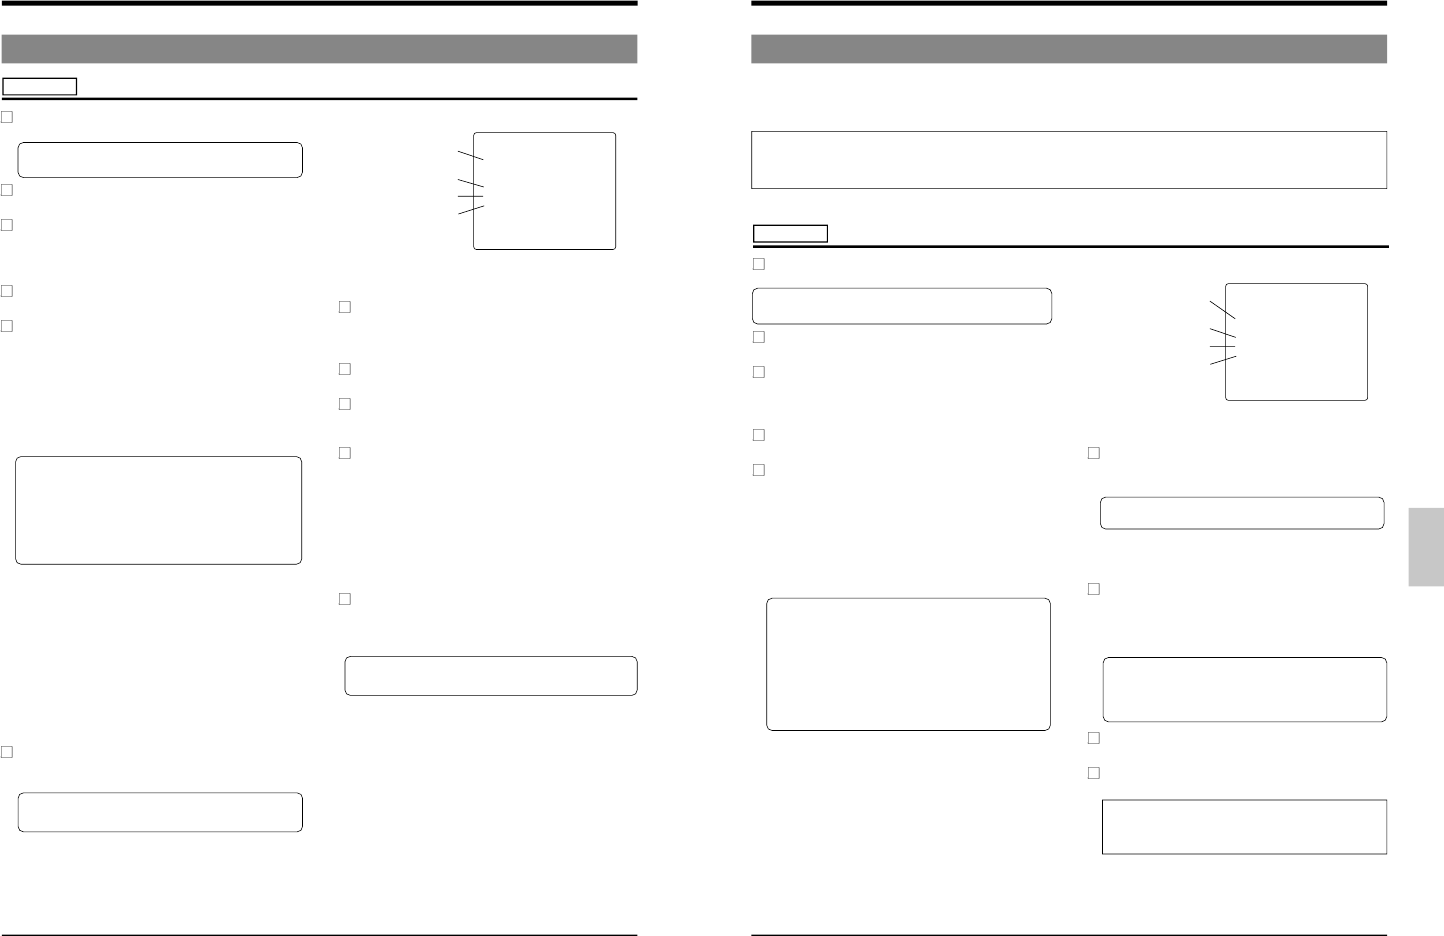
A LARM / SENSOR REC MODE
(ALARM REC) ON
(SENSOR REC) OFF
(TIMER ALARM) ON
(DURATION) 180SEC
(BUZZER) OFF
(TAPE END MODE) STOP
PRESS (SHIFT, SET)
PRESS (MENU) TO END
7-4 Alarm Recording
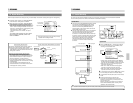
Connect an alarm sensor to the rear panel
’s alarm input terminal.
Preparation
Press the [OPERATE] button to turn the operating mode
on.
Setting the function menu switches for the Alarm
Record mode
Press the [MENU] button to display the main menu
screen on the monitor.
Press the [SHIFT +/-] button to select <FUNCTION> and
press the [SET +/-] button.
[
The function menu switch setting screen is
displayed.
Press the [SHIFT +/-] button to display the alarm/sensor
recording mode setting screen.
Select the item to be set with the [SHIFT +/-] button. Set
the value with the [SET +/-] button.
• Set <ALARM REC> to ON to activate the alarm
recording function. The AL REC indication in the
display lights.
• Set the alarm recording duration.
Set duration to 5 sec., 15 sec., 30 sec., 60 sec.,
120 sec., 180 sec., TAPE END or MANUAL (for as
long as alarm signals are input).
* When the alarm recording time is set to MANUAL,
the alarm cue signal (index code) will not be
recorded correctly if alarm input lasts for less than
30 seconds.
* When alarm recording duration is set with an
external switcher, set the alarm recording duration
to MANUAL.
• To sound the buzzer during alarm recording, set
<BUZZER> to ON.
• Set the operation mode at tape end in the case when
alarm recording is executed even once with the menu
switch <TAPE END MODE> on the alarm/sensor
recording mode setting screen.
STOP :The tape stops.
REW :The tape is rewound to the beginning and
stops.
REPEAT :Recording continues from the beginning of
the tape.
EJECT :The tape is ejected.
After setting the function menu switches, press the
[MENU] button twice.
[
The normal screen is restored.
Check the time and data shown on the monitor's on-
screen display.
Ⅲ If the time and date are not shown on the monitor or if
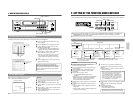
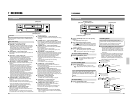
7 RECORDING
Alarm recording function
Alarm/sensor recording
mode setting screen
you want to change the display position, use the
<POSITION> function menu switch.
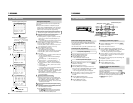
Alarm recording duration
Buzzer
Tape end mode
Select the timelapse recording mode (L12H or L24H)
with the [TIME MODE] button on the front panel.
[
The selected recording mode is shown on the VCR's
display and the on-screen display.
Follow the procedures for "Basic recording operations"
on page 27.
When an alarm signal is input to the rear panel's
ALARM IN terminal, alarm recording is executed as
specified.
To stop alarm recording and clear the alarm indication,
press the [AL/PL RESET] button.
• When the AL indication is lit on the display (during
alarm recording), press the [AL/PL RESET] button to
stop alarm recording. Timelapse recording is resumed
and the AL indication goes out. If the alarm buzzer is
on, it stops as well.
• When the AL indication is blinking on the display,
press the [AL/PL RESET] button. The AL indication
goes out.
When the AL indication goes out, press the [AL/PL
RESET] button again to reset the alarm input/power loss
data.
* There may be some picture distortion at the start or
end of an alarm recording. This is not a malfunction.
35
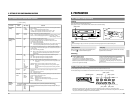
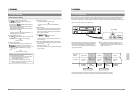
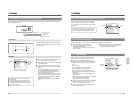
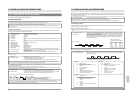
A LARM / SENSOR REC MODE
(ALARM REC) OFF
(SENSOR REC) ON
(TIMER ALARM) ON
(DURATION) 180SEC
(BUZZER) OFF
(TAPE END MODE) STOP
PRESS (SHIFT, SET)
PRESS (MENU) TO END
7 RECORDING
7-5 Sensor Recording
Sensor recording is executed only when the VCR is in the Stop mode (Stop or Timer Record Standby mode) and an alarm
signal is input to the rear panel
’s ALARM IN terminal.
Perform the settings for sensor recording in the same way as for "Alarm Recording" on page 33.
The mechanism of the SR-L910E/EK cannot be guaranteed if the sensor recording function is used frequently (100 times/
day or more). If alarm inputs are frequent, use the alarm recording function instead and carry out regular maintenance/
inspection and parts replacement.
Preparation
Alarm/sensor recording
mode setting screen
Sensor recording function
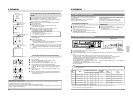
Connect an alarm sensor to the rear panel
’s alarm input terminal.
Press the [OPERATE] button to turn the operating mode
on.
Setting the function menu switches for the Sensor
Record mode
Press the [MENU] button to display the main menu
screen.
Press the [SHIFT +/-] button to select <FUNCTION>
and press the [SET +/-] button.
[
The function menu switch setting screen is
displayed.
Press the [SHIFT +/-] button to display the alarm/sensor
recording mode setting screen.
Select the item to be set with the [SHIFT +/-] button. Set
the value with the [SET +/-] button.
• Set the <SENSOR REC> to ON to activate the sensor
recording function. The SENSOR REC indication in
the display lights.
• Set the sensor recording duration.
Set <DURATION> to 5 sec., 15 sec., 30 sec., 60 sec.,
120 sec., 180 sec., TAPE END or MANUAL (for as
long as alarm signals are input).
* The sensor recording time will be shorter than the
specified value.
* When the sensor recording time is set to MANUAL,
the alarm cue signal (index code) will not be
recorded correctly if alarm input lasts for less than
30 seconds.
* When sensor recording duration is set with an
external switcher, set the sensor recording duration
to MANUAL.
• To sound the buzzer during sensor recording, set
<BUZZER> to ON.
• Set the operation mode at tape end in the case when
sensor recording is executed even once with the menu
switch <TAPE END MODE> on the alarm/sensor
recording mode setting screen.
STOP : The tape stops.
REW :The tape is rewound to the beginning and
stops.
REPEAT:Sensor recording continues from the
beginning of the tape.
EJECT :The tape is ejected.
After completing function menu switch setting, press the
[MENU] button twice.
[
The normal screen is restored.
Check the time and data shown on the monitor's on-
screen display.
Ⅲ If the time and date are not shown on the monitor or if
you need to change the display position, use the
<POSITION> function menu switch.
• When an alarm signal is input to the rear panel's
ALARM IN terminal, recording starts automatically in
the specified record mode and the AL indication is lit.
• After the specified recording duration expires,
recording stops and the Stop mode is engaged.
* Because sensor recording starts from the Stop
mode, it takes several seconds from the time an
alarm input is received to the time recording actually
starts.
To stop sensor recording and clear the AL indication,
press the [AL/PL RESET] button.
To disable sensor recording, set menu switch
<SENSOR REC> to OFF.
During playback, there may be some noise or picture
distortion at the point where one sensor recording
stops and another starts. This is not a malfunction.
Sensor recording duration
Tape end mode
Buzzer