


Entering User-defined Satellite Data
Once the link between the PC and the TracVision R5/R4 is
established as described in
Section 2.5, “Selecting the Active
Satellite,”
follow these steps to begin entering the data for your
user-defined satellite.
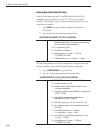
1. Type
HALT and press Enter to place the antenna in
Idle Mode.
2. Type following command and press Enter:
SATCONFIG,USERX,YYY,Z,D,L<ENTER>
Key: X = 1 or 2 (This represents the first or second user-
defined satellite.Your TracVision system allows
up to two user-defined satellites.
YYY = longitude (0-180)
Z = E (East) or W (West)
D = decoding type (0 = test, 1 = DSS-A,
2 = DSS-B, 3 = DVB)
L = LNB polarization (C = circular, L = linear)
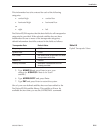
The main board has now been configured to recognize the user-
defined satellite. Next, the RF Board must be configur
ed.
3. Type
@DEBUGON and press Enter.
4.
Type the following command and press Enter.
@SATCONFIG,X,N,F,S,C,ID
,P,B,D<ENTER>
Key: @SATCONFIG = directs data to the RF Board
X = satellite location A or B
N = satellite table # (98 & 99 are slots for user-
configured satellites)
F = frequency in MHz (either 00000 or a range from
10700 - 12700)
S = the satellite transponder symbol rate in
Mbit/second (01000 - 29999)
C = the FEC code (e.g., 12, 23, 34, 56, 67, 78)
ID = the satellite network ID in hexidecimal format
(0x####)
P = the LNB polarization (v = ver
tical,
h = horizontal, r = right, l = left)
B = the LNB down conversion frequency (l = low,
h = high, u = USA)
D = decoding type (0 = test, 1 = DSS-A,
2 = DSS-B
, 3 = DVB)
2-20
A Guide to TracVision R5/R4