5-7
Maintenance
54-0157 Re
v
.
H
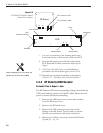
5. Remove the 4 standoffs – Fig. 5-1. Remove the RF
Detector PCB from the rotating plate.
6. Installation of the replacement RF Detector is the
reverse of this procedure. Be sure that the RF
cables are restored to their original positions. Be
sure that the center conductor pin is centered in
the connector before tightening the collar.
5.4.3 Antenna Gyro Assembly
(TracVision R5 only)
Estimated Time to Repair: 1 hour
The antenna gyro is mounted on the rear of the antenna reflector
bracket with four locking nuts and washers
– Fig. 5-3. Following
the removal and replacement of the antenna gyro assembly, it
will be necessary to calibrate the gyr
o and r
estart the system.
Directions for removal, replacement, and calibration follow:
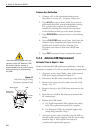
1. Using needle-nose pliers, remove the E-ring from
one end of the connecting rod
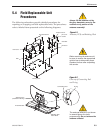
– Fig. 5-2.
2. Remove the connecting rod by sliding it off the
bracket.
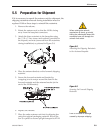
3. Fully retract the elevation axis motor shaft
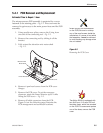
– Fig. 5-5.
4. Remove 6 pan head screws from the PCB cover
flanges.
5. Remove the PCB cover. To get the necessary
clearance, r
otate the linear actuator up 90º while
lifting the PCB cover
–
Fig. 5-5
.
6.
Remove the scr
ew and clamp holding the antenna
gyr
o cable to the r
otating plate. Be sure to save the
cable clamp and scr
ew
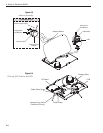
– Fig. 5-4.
7. Remove the Molex connector from J11 on the PCB
– Fig. 5-6.
8. Remove the 4 nuts and washers and take the gyro
off of the bracket.
9.
Remove the antenna gyr
o gasket.
10.
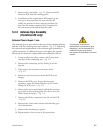
Replacement is the reverse of this procedure.
Following the removal and
replacement of the antenna gyro
assembly, it will be necessary to
calibrate the gyro and restart
the system as described in the next
section.


